How to create a dashboard with a YouTube Livestream, Timer, and Agenda

You want to create a dashboard with a timer and a YouTube live stream? Sounds like a difficult problem? It’s not! It’s super easy!
I’ll show you how to create the complete dashboard in HTML (with easy copy-paste, no experience required) and how to put it on the internet for free with one click.
This is the end result we want to accomplish:

A dashboard with a timer and live stream preview is useful for keeping track of time and seeing what is happening in the live stream at the same time. This is not only useful as feedback for a video producer but can also serve as digital signage for an event venue, especially with the agenda showing the current progress of the event.
Create a Timer and Agenda Page for Free
-
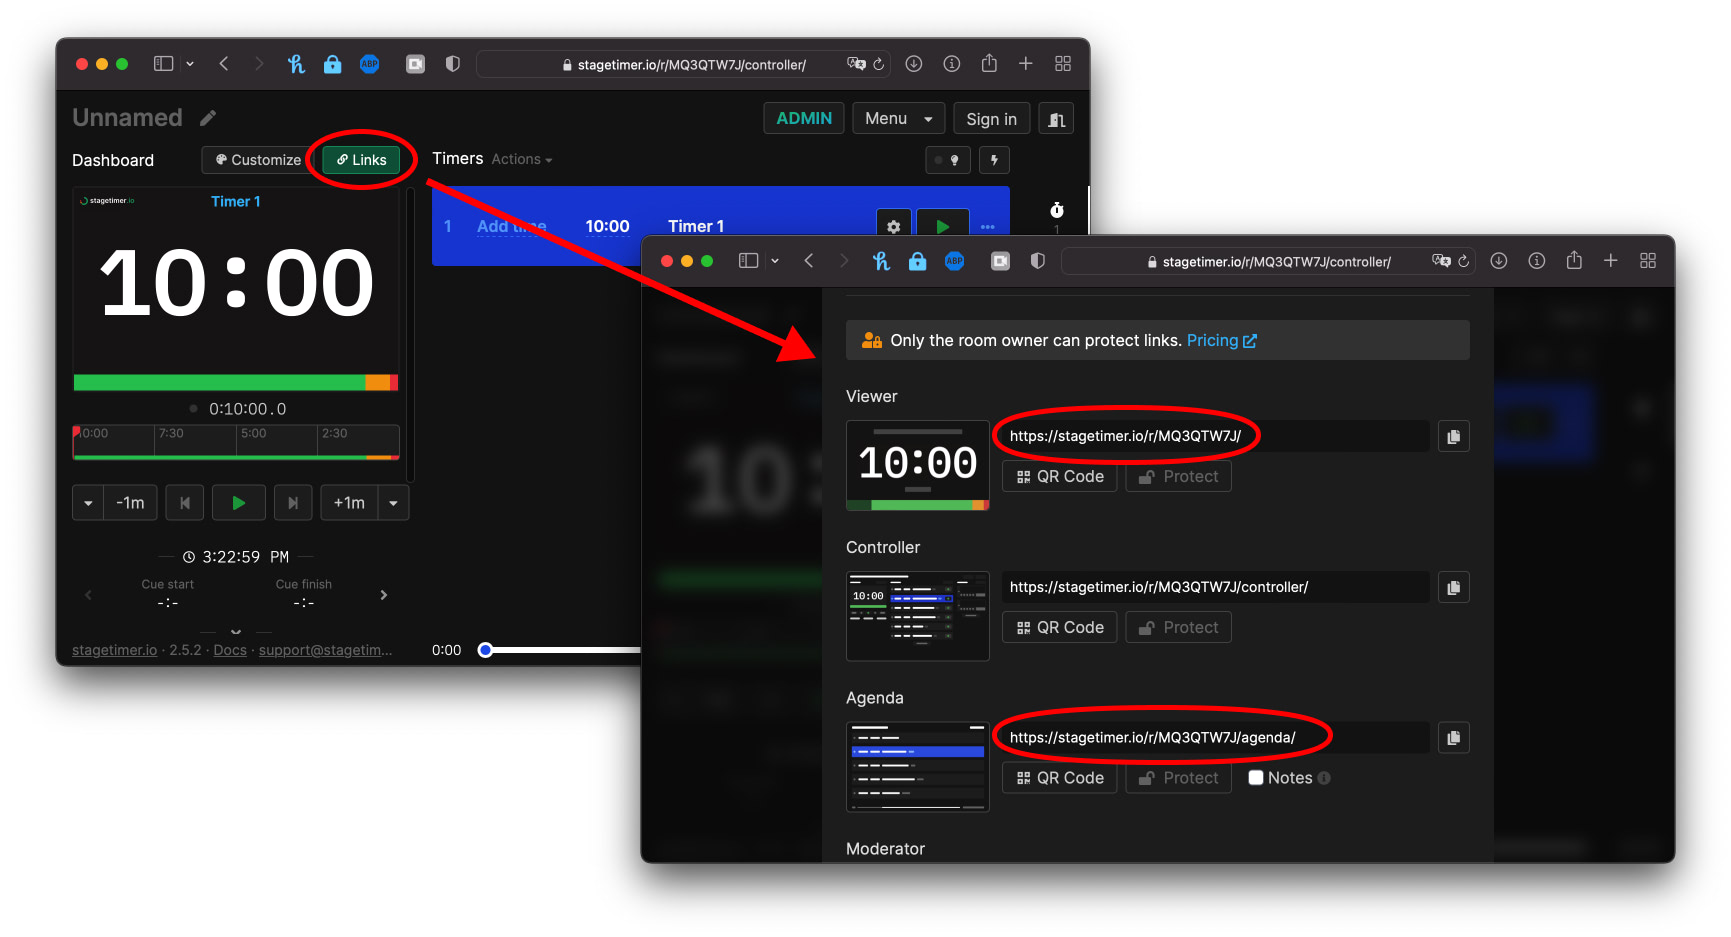
Create a timer for yourself with Stagetimer. It’s free and you don’t even need to create an account —> Create a new timer
-
Then copy the “Viewer” and “Agenda” links, we need them in the next step:
Create a “dashboard.html” File
(Easy Copy-Paste)
-
Use any text editor to create a new file and save it as “dashboard.html” in your project folder. (Tip: use Notepad (Win) or TextEdit (Mac), Microsoft Word won’t work)
-
Add the following code to the “dashboard.html” file:
<!DOCTYPE html>
<html lang="en" >
<head>
  <meta charset="UTF-8">
  <title>Timer Dashboard</title>
  <link rel='stylesheet' href='https://cdnjs.cloudflare.com/ajax/libs/tailwindcss/2.2.19/tailwind.min.css'>
</head>
<body translate="no">
  <main class="grid grid-cols-2 grid-rows-2 h-screen w-screen bg-black">
    <div class="border-2 border-black">
      <!-- Timer Frame -->
      <iframe
        src="https://stagetimer.io/r/6PAH8ZNA/"
        frameborder="0"
        class="w-full h-full"
      ></iframe>
    </div>
    <div class="row-span-2 border-2 border-black">
      <!-- Agenda Frame -->
      <iframe
        src="https://stagetimer.io/r/6PAH8ZNA/agenda/"
        frameborder="0"
        class="w-full h-full"
      ></iframe>
    </div>
    <div class="border-2 border-black">
      <!-- YouTube Frame -->
      <iframe
        width="560"
        height="315"
        class="w-full h-full"
        src="https://www.youtube.com/embed/jfKfPfyJRdk?controls=0&autoplay=1"
        title="YouTube video player"
        frameborder="0"
        allow="accelerometer; autoplay; clipboard-write; encrypted-media; gyroscope; picture-in-picture"
        allowfullscreen
      ></iframe>
    </div>
  </main>
</body>
</html>
(Or download the file here: https://stagetimer.io/astro-assets/articles/dashboard.html.zip)
-
Replace the URL for the timer with the “Viewer” URL you copied before:
src="https://stagetimer.io/r/6PAH8ZNA/" -
Replace the URL for the agenda with the “Agenda” URL you copied:
src="https://stagetimer.io/r/6PAH8ZNA/agenda/" -
Change the YouTube link with your own video ID
src="https://www.youtube.com/embed/<YOUR_VIDEO_ID>?controls=0&autoplay=1". (tip:autoplay=1starts the playback as soon as the page is loaded) -
Save the “dashboard.html” file and open it in your web browser.
(Here’s a working example: https://codepen.io/lhermann/pen/RwMYPdj)
Make it Live on the Internet
We’ll use a simple one-click hoster to get the dashboard on the internet.
-
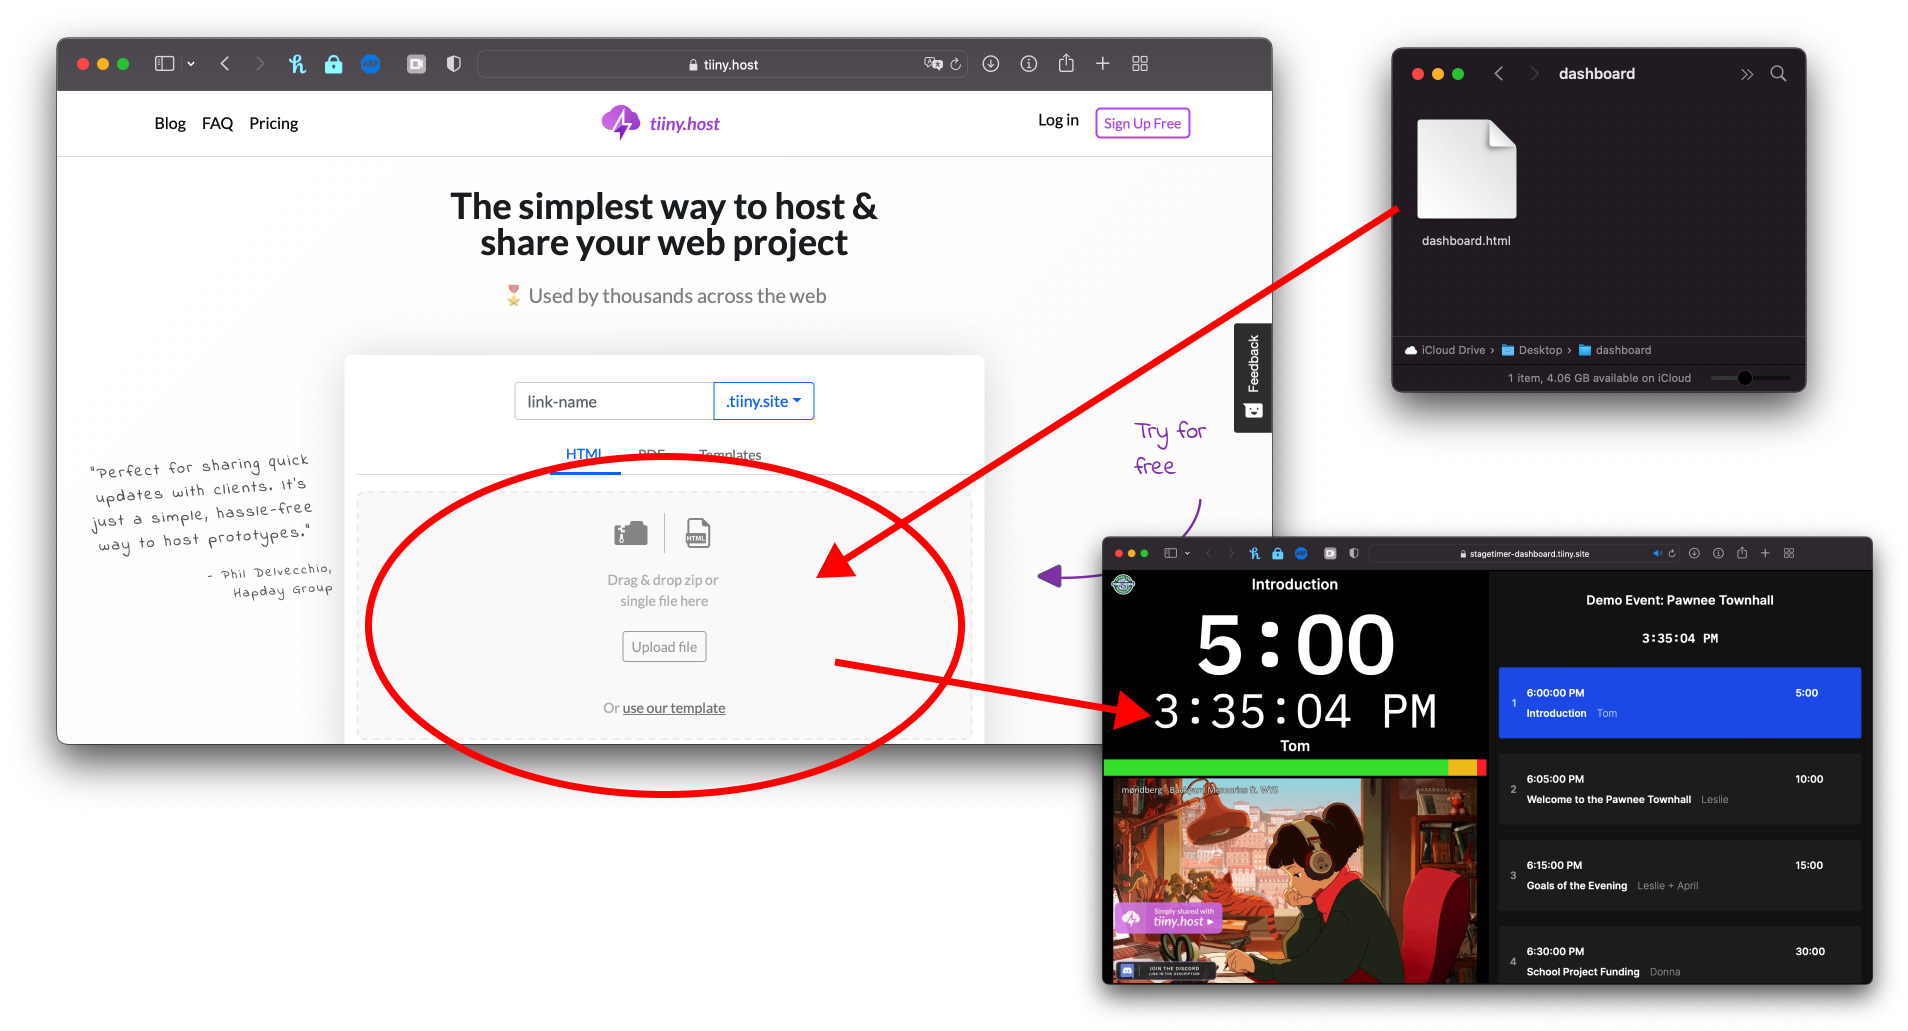
Go to https://tiiny.host
-
Drag & Drop the dashboard.html file into the website:
-
Verify your email address with tiiny.host to activate the website
-
Now you have a link to your dashboard you can share with others that looks something like this:
https://stagetimer-dashboard.tiiny.site/.
Awesome!
If you know a bit of HTML then it’s very easy to tweak the dashboard to your own requirements.
Enjoy 😃