How to Add a Countdown Timer in OBS Studio for Free

Having a countdown timer in your live stream is a great way to engage with your audience and it is a must if you want to host competitions, need to time a podcast recording or stay on schedule so your viewers know when to expect new content. Additionally, a countdown timer can help build suspense or excitement leading up to a big event.
Adding a countdown timer in OBS Studio is a simple task that can take your live stream quality up a notch. This guide shows step-by-step how to do it. Advanced knowledge of OBS Studio is not required, anyone can follow this guide.
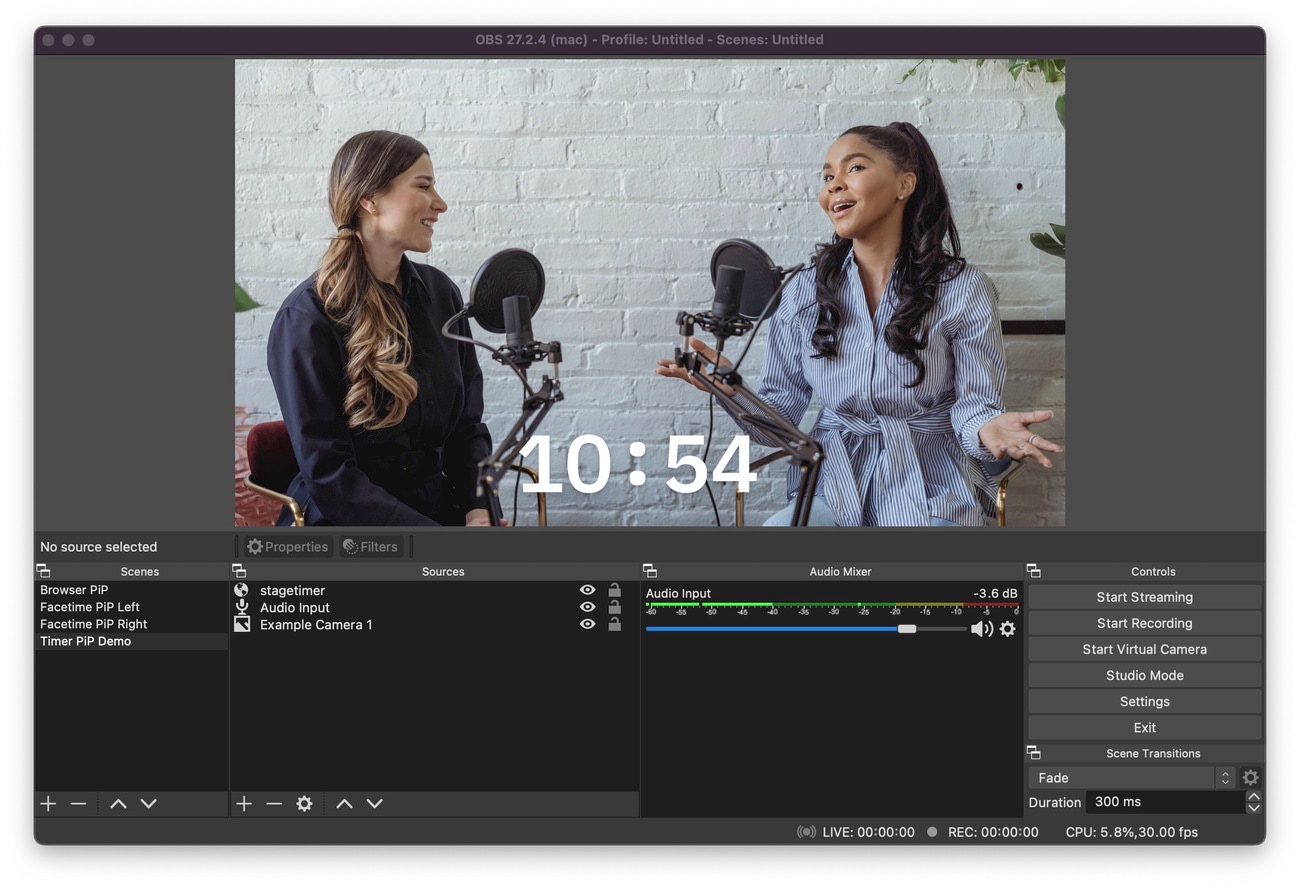
This is the result we want to accomplish:
Create an Embeddable Timer for Free
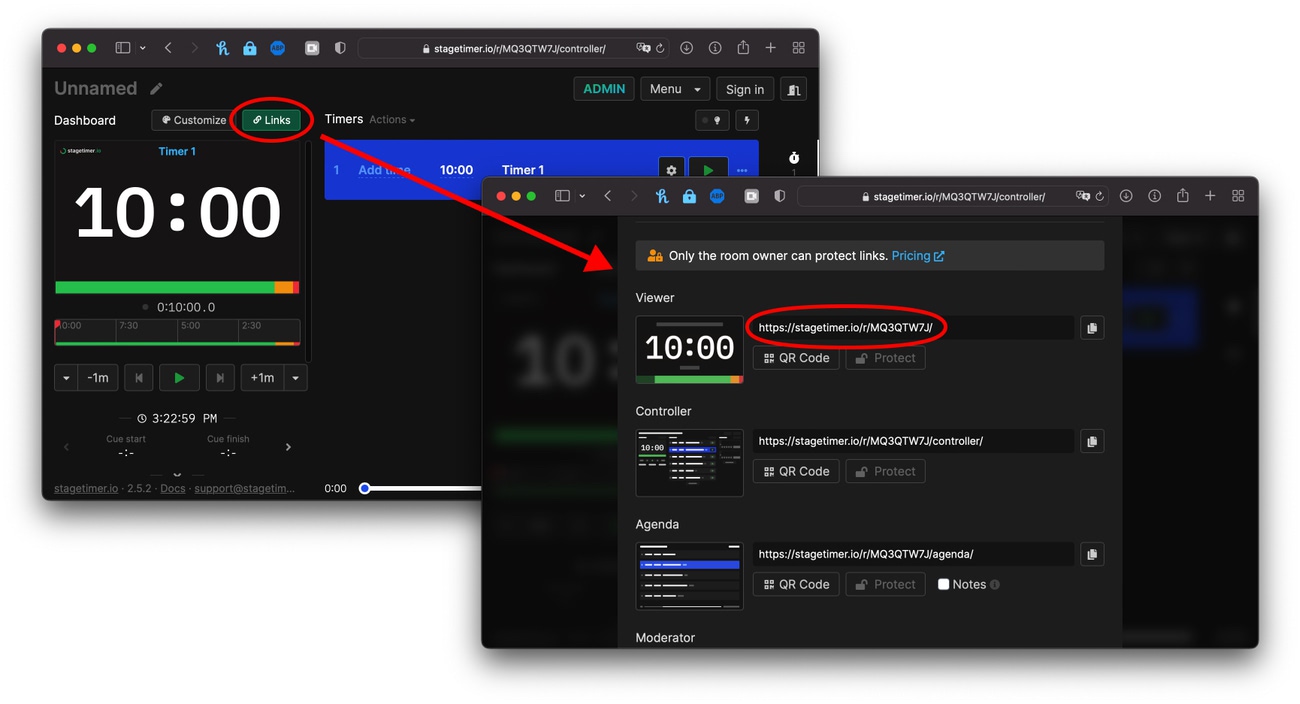
First, we use Stagetimer to create a free timer. This gives us a dashboard to control the timer and a link we’ll use to embed a timer with OBS.
-
Click this link to create a new timer —> https://stagetimer.io/r/generate/
-
Then copy the “Viewer” link, we need it in the next step:
Import the Timer to OBS Studio
There are many ways to add a countdown timer to your stream in OBS Studio, but for this tutorial, we’re going to use the “Browser” source feature.
-
Open OBS studio and create a new scene, or select an existing scene to edit
-
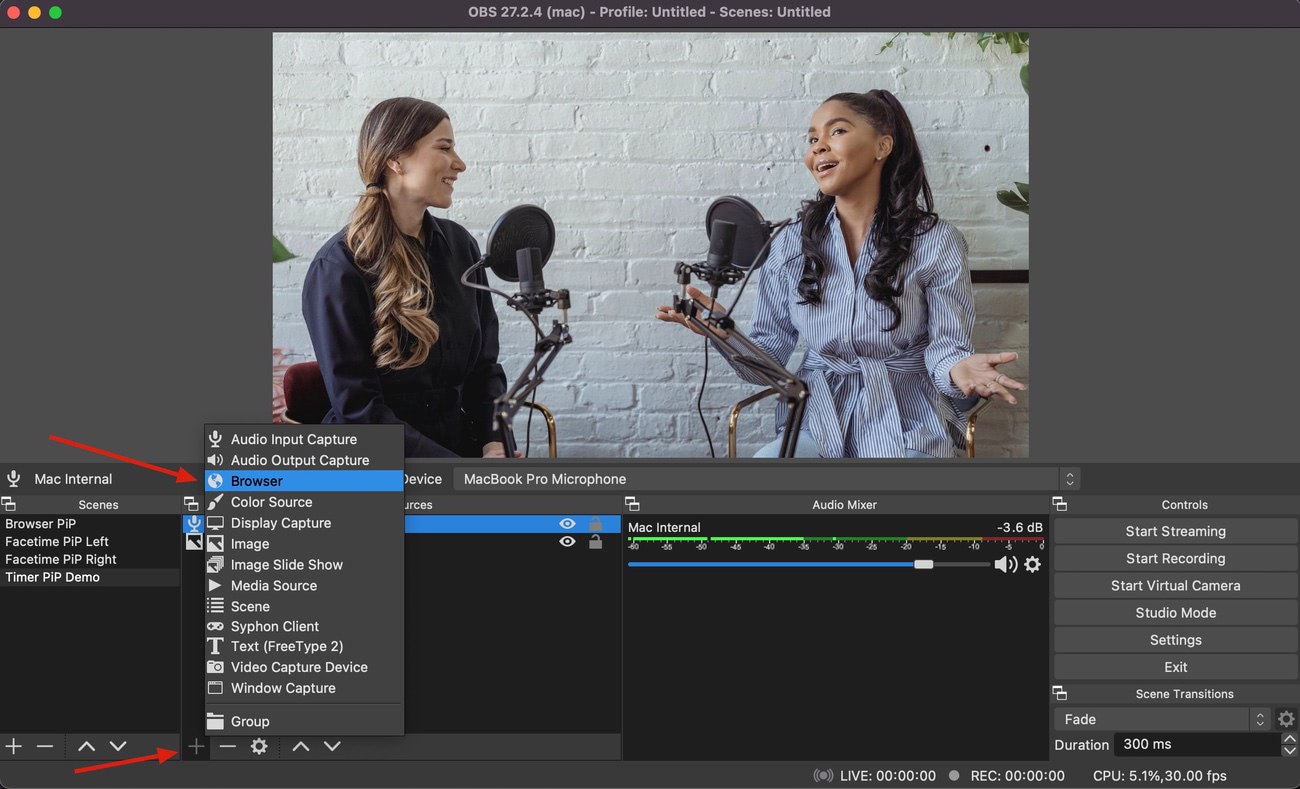
In the sources panel, click the ”+” button and select “Browser”
-
In the properties window that appears, paste the URL of the timer from the previous step. In our example, this is
https://stagetimer.io/r/JX151NX9/. -
Adjust the width to 1200 and the height to 400.

-
Click “OK” to close the properties window and the timer will now be imported into your scene.
-
Resize and position the timer where you want it.
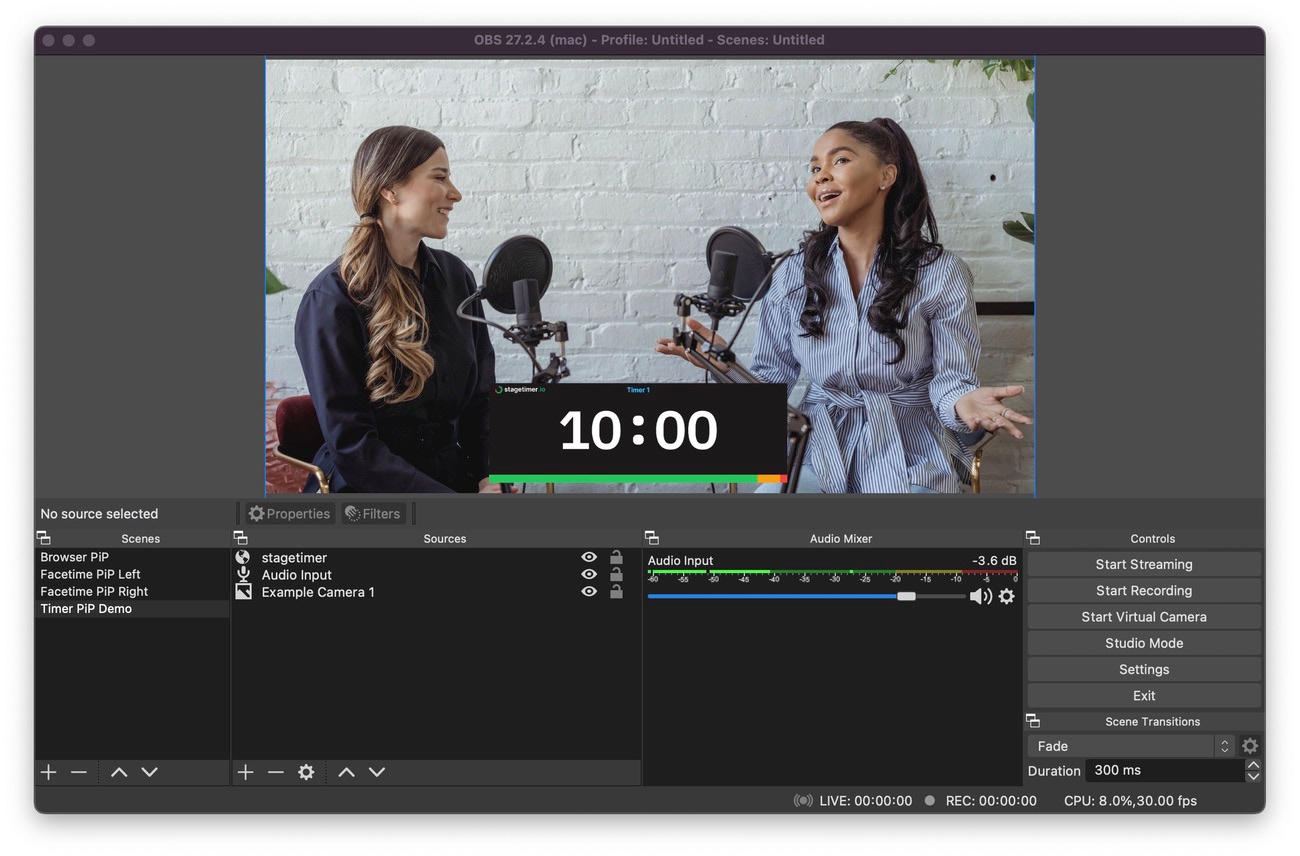
Your OBS Studio should now look like this. In the next step, we are going to isolate the timer element and remove the background.
Isolate the countdown timer
Stagetimer has a build-in way to isolate the timer element and get rid of the other elements like the logo, title, and progress bar.
-
Double-click on the browser source you just created to open the properties window again.
-
Add
?only=timerto the URL. In our example, the URL now looks like this:https://stagetimer.io/r/JX151NX9/?only=timer
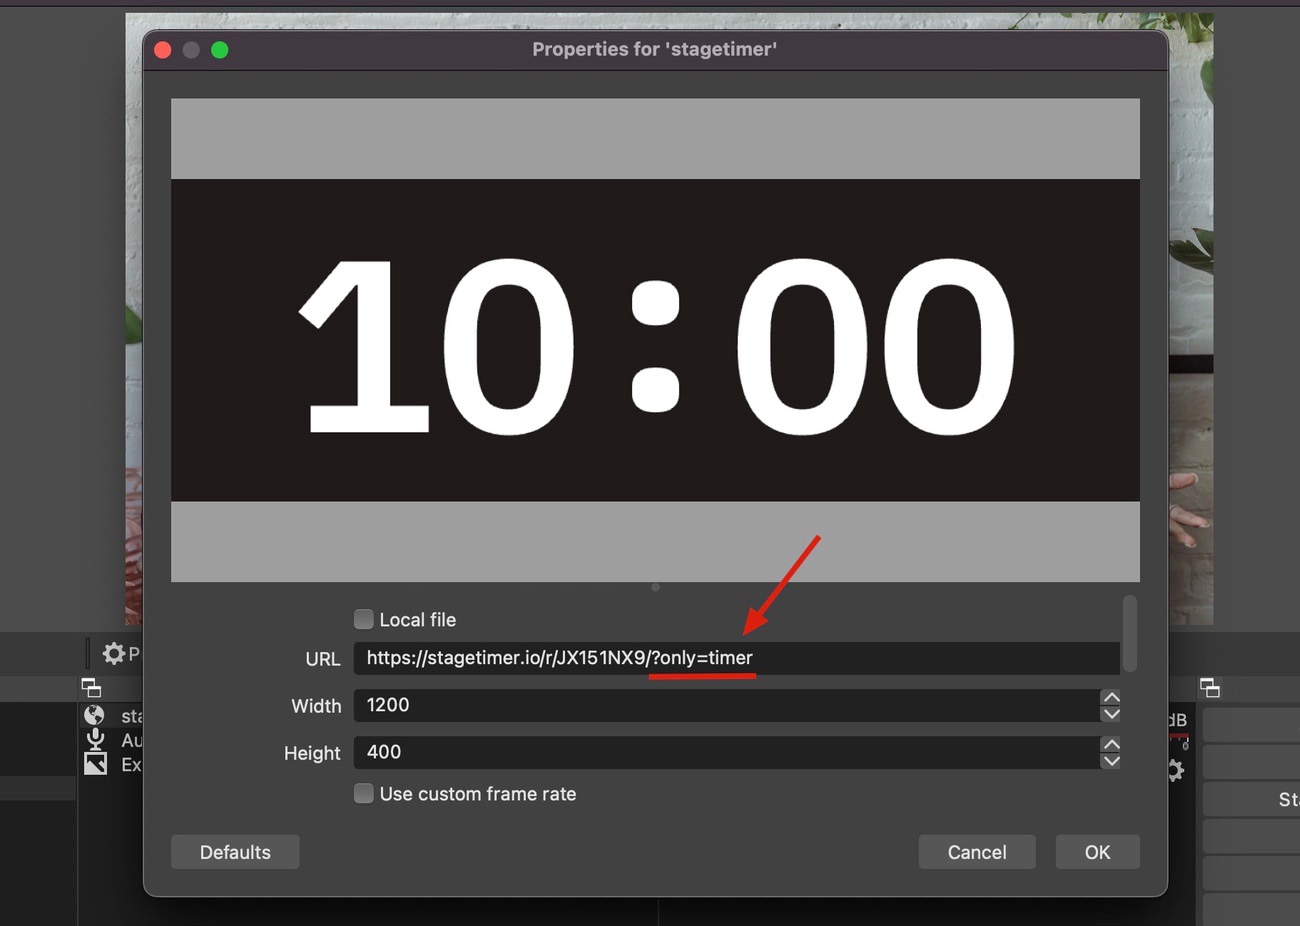
👉 Adding this ?only= parameter is called isolation mode, it’s documented here.
Make the Background Transparent
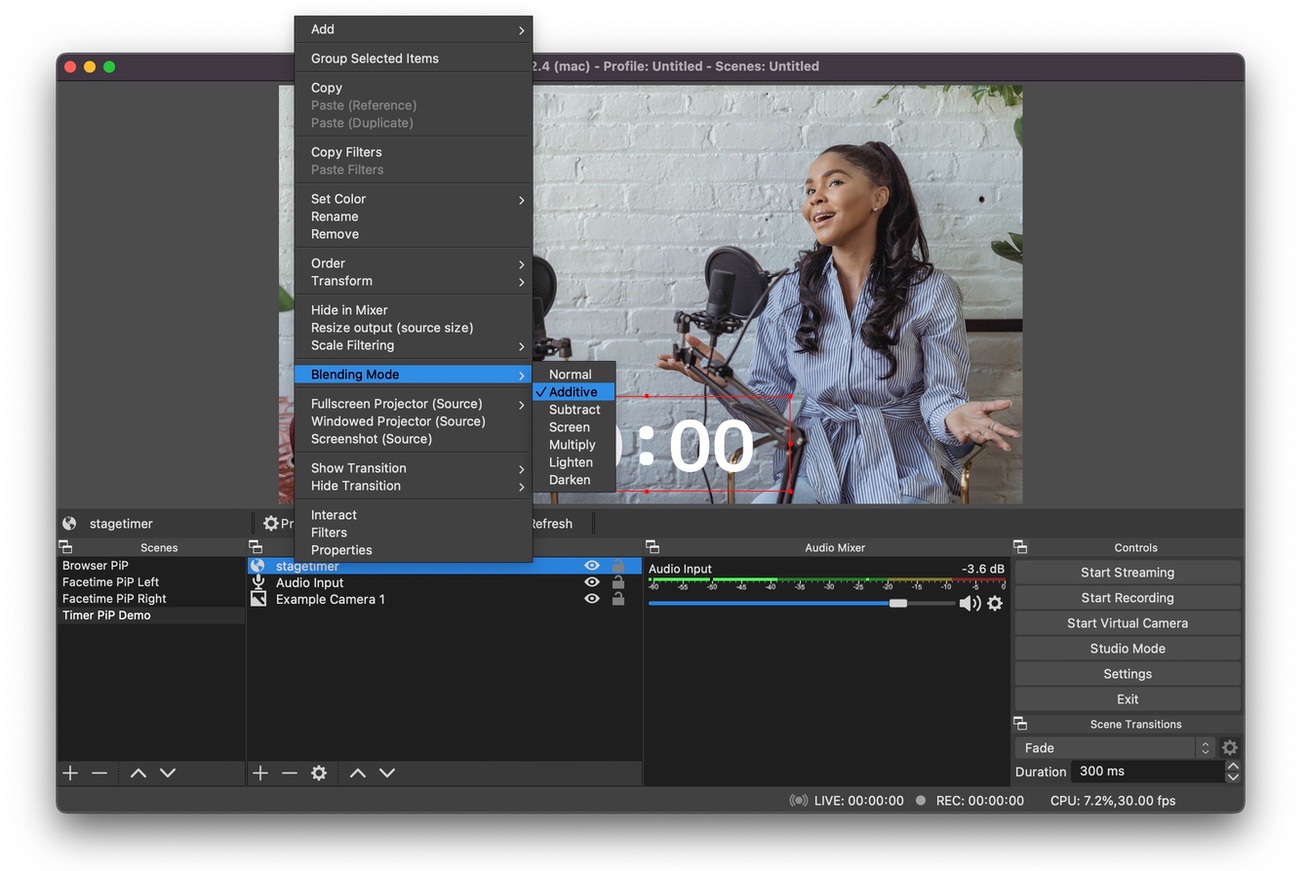
In OBS studio, there are a few ways to make the background of a source transparent. For this tutorial, we use the “Blending Mode” feature because it’s the easiest.
-
Right-click on your source in the Sources panel and select “Blending Mode” and then “Additive”. This will use the brightness values to determine the opacity of each pixel.
-
That’s it.
👉 If you have the premium license for Stagetimer you can also use the transparent background feature.
Add a Progress Bar in OBS
A progress bar can be a helpful visual aid to let viewers know how far along they are in the show, how much longer they have to talk, and whether or not the timer is currently paused.
Adding a progress bar is even easier than adding the timer:
-
In the sources panel, click the ”+” button to add another “Browser” source.
-
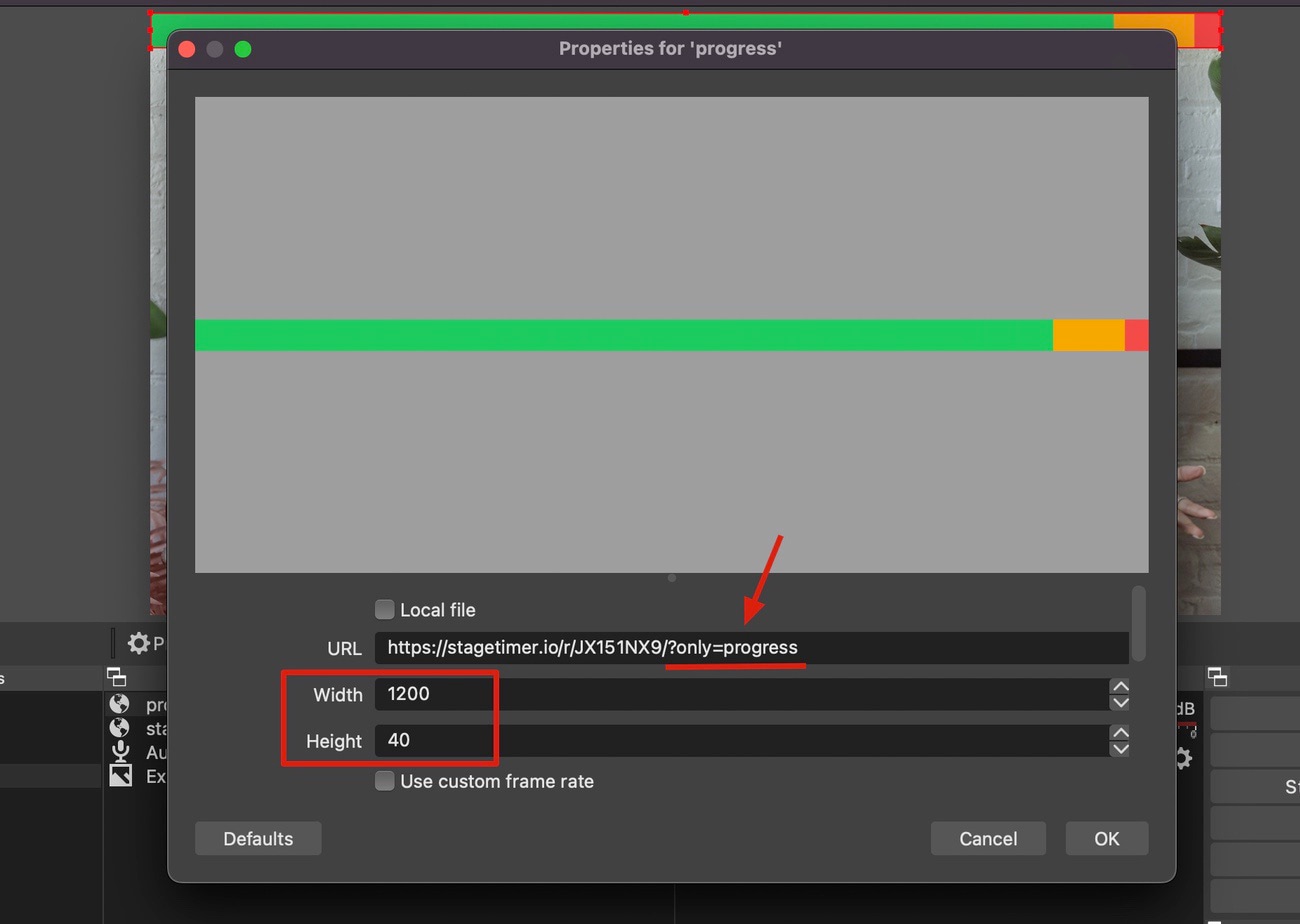
In the properties window, paste the URL of the timer, but this time we add
?only=progress. In our example, this ishttps://stagetimer.io/r/JX151NX9/?only=progress. -
The progress bar will fill the entire window. So let’s adjust the width to 1200 and the height to 40.
- Then position the progress bar in OBS, maybe along the top or bottom of the screen.
Bonus: Show Viewer Questions in OBS
Some people want to show the audience questions in a live stream because they want to engage with their audience and make the live stream more interactive. Additionally, showing audience questions can help the presenter gauge what topics are of interest to the viewers and ensure that the live stream is covering relevant information.
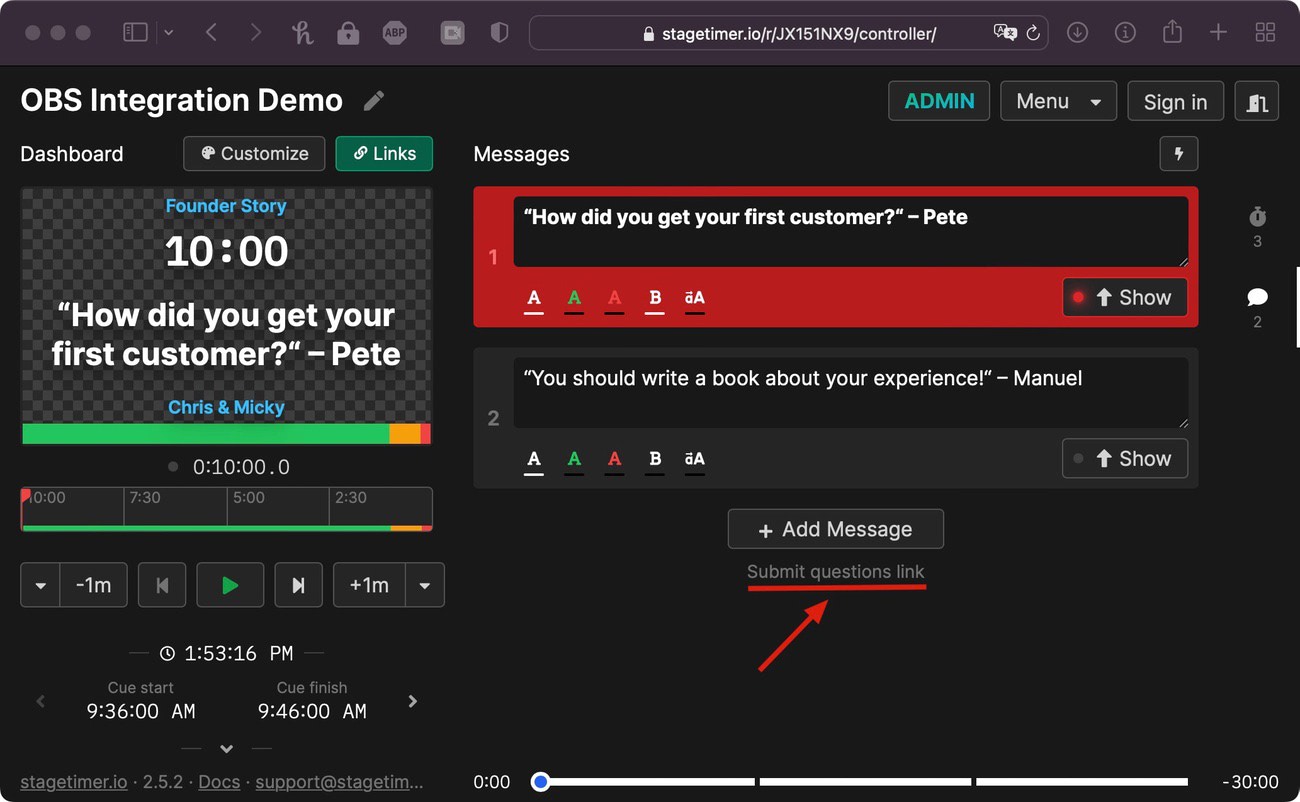
- On the Stagetimer controller page you can find a “Submit Questions” link. The page has simple “Question” and “Name” input fields. You can safely share this link with your audience. It uses a long alphanumeric ID and doesn’t reveal your actual Room ID.
-
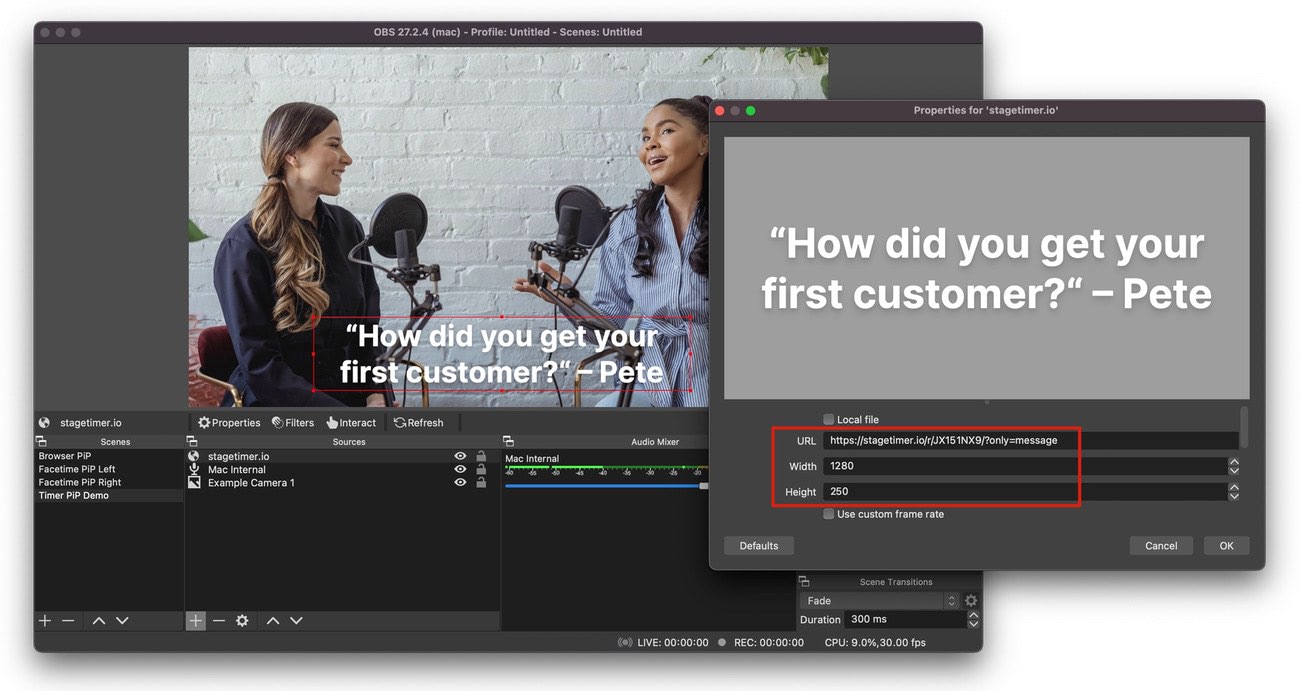
Then, in OBS add another “Browser” source and add
?only=messageto the URL. In our example, this ishttps://stagetimer.io/r/JX151NX9/?only=message. -
Just like with the timer and progress bar, the message will automatically fill the window. So set the width to 1200 and the height to 250.
-
Position the message on the screen in OBS.
- Once the first audience questions show up you can pick the one you want and show it on stream by clicking “Show” on the message.
👉 The submit question page is not protected against bots, so don’t paste it on a public website.