Viewer Output Documentation
What is the Viewer Output?
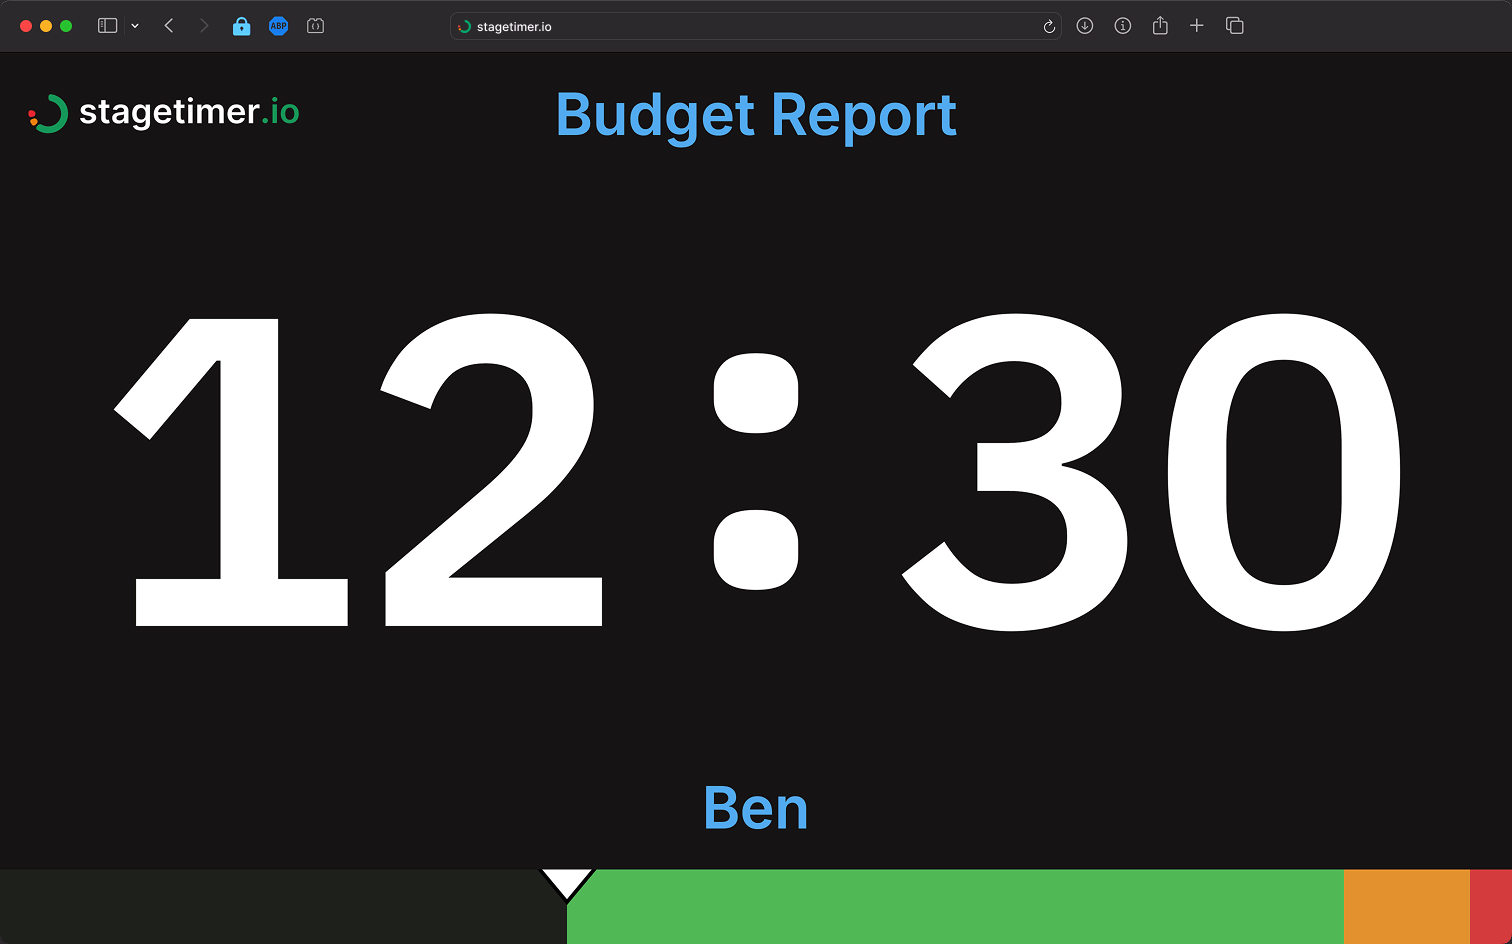
The Viewer output is a fullscreen timer display that presenters see on stage. You control the timers from the Controller on your laptop or tablet, while speakers see only their countdown on a separate screen - keeping everyone on schedule without complicated hardware.
Think of it as a confidence monitor or stage display: a dedicated screen facing the presenter that shows timing information, messages from the production team, and visual cues when time is running low.
Who is it for?
- Presenters and speakers who need to see their remaining time on stage
- Stage monitors and confidence displays facing talent
- Broadcast overlays in OBS, vMix, or streaming software
What can people with the Viewer link do?
- View the active timer (countdown, count-up, or clock)
- View messages sent from the Controller
- See progress and wrap-up color cues
- Toggle sound and fullscreen (via overlay controls)
Creating a Viewer Link
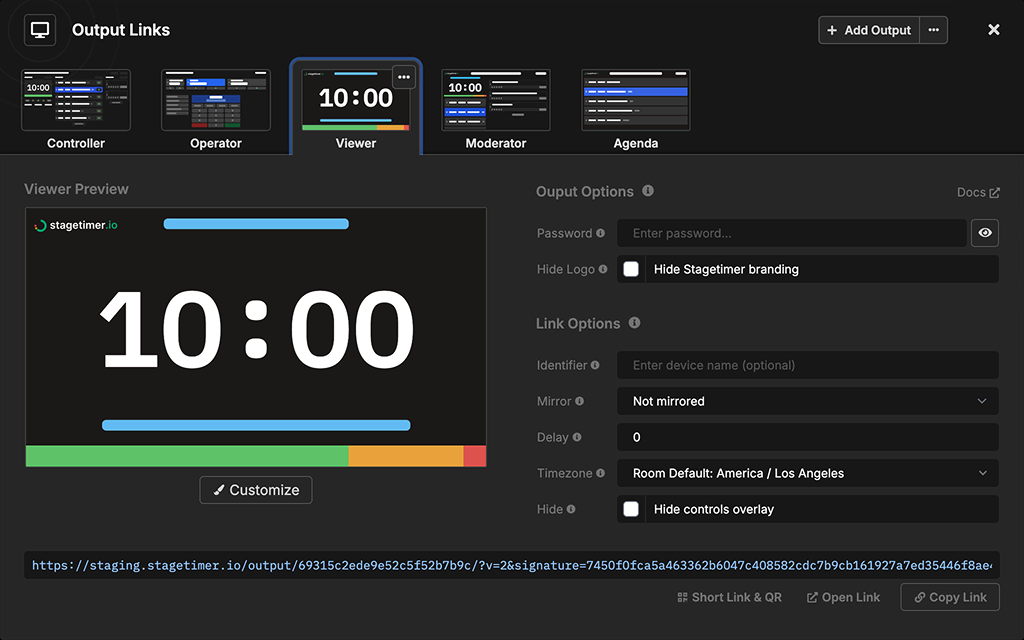
Access the Viewer output through the Output Links popup on your Controller page. From here you can:
- Configure link options (identifier, mirror, delay, timezone, hide controls)
- Copy the link or generate a QR code for easy sharing
- Set a password to protect access (paid plans)
- Hide the Stagetimer logo (paid plans)
Share the link with your presenter, open it on a stage monitor, or embed it in your streaming software. The Viewer syncs automatically with your Controller in real-time.
All output links are secure by default with tamper-proof signatures. For complete details on creating and managing output links, see Output Links.
What the Viewer Displays
The default Viewer output includes the timer, messages, title, speaker, and progress bar. Premium users can fully customize which elements appear and how they’re arranged.
Timer
The timer displays the currently active timer from your rundown. Each timer can be configured to show as a countdown, count-up, time of day (clock), or combinations like countdown with time of day. This is set per-timer on the Controller page - see Timer Appearances for all options.
The display format (how hours, minutes, and seconds are shown) can be configured in Room Settings. For element styling options, see the Timer Element.
Messages
Messages let you communicate with presenters during their talk - send cues, relay audience questions, or display announcements. Messages appear instantly on all connected Viewers when activated.
To display a message:
- Create messages in the Messages section on your Controller page
- Click “Show” on any message to display it
- The message appears on all Viewer outputs immediately
You can prepare messages in advance or create them on the fly. For complete message features including fullscreen display and Flash effects, see Messages and Message Element.
Title & Speaker
By default, the timer title appears above the countdown and the speaker name below it, helping presenters confirm they’re seeing the right segment. Premium users can customize the output layout to remove either text element or change what it displays - for example, replacing the speaker line with “Next: <Next timer title>” to show upcoming segments.
Progress Bar & Wrap-up Cues
A progress bar at the bottom shows how much time remains. As the timer counts down, the bar fills to indicate progress. The bar also changes color as wrap-up times approach:
- Green - Plenty of time remaining
- Yellow - Approaching wrap-up time (configurable)
- Red - Time is almost up or in overtime
Wrap-up times and chimes can be configured per-timer on the Controller. Click the settings gear icon on any timer to:
- Set wrap-up times when the display changes color
- Add chimes to alert speakers at specific times
- Configure flash effects to grab attention
For complete details, see Wrap-up Times & Actions. For styling options, see the Progress Bar Element.
Customizing the Viewer
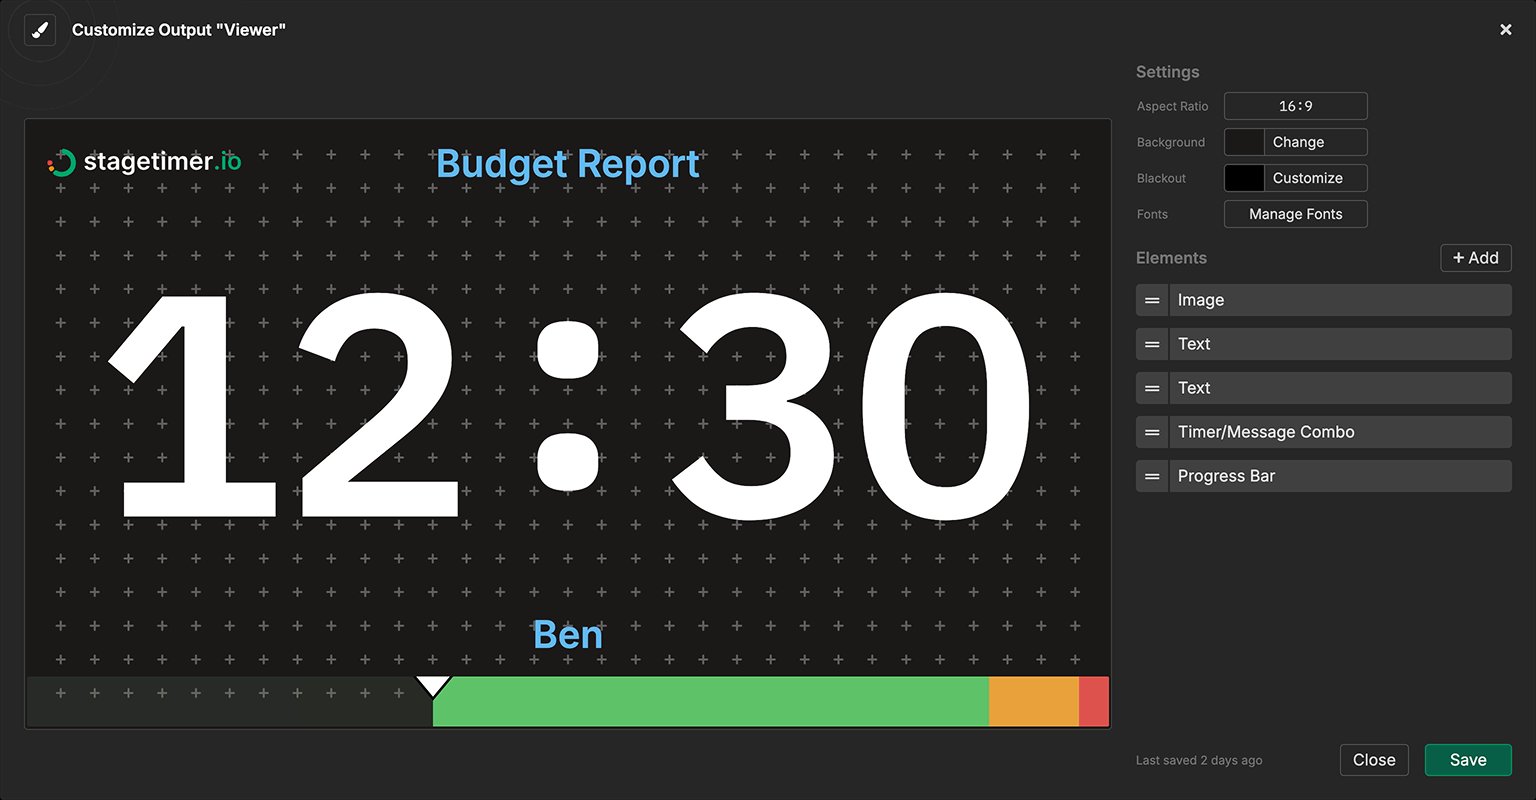
Premium users can fully customize the Viewer output using the drag-and-drop editor. Click Customize in the Output Links popup to:
- Rearrange and resize elements
- Add or remove elements (timer, messages, images, text, etc.)
- Configure fonts, colors, and styling per-element
- Set custom backgrounds or use transparency for broadcast overlays
- Configure blackout appearance (what shows when blackout is active)
Pro users can hide the Stagetimer logo via the output options. Premium users can also add custom logos using the Image Element. Free users can share the default Viewer output but cannot customize it. See the Pricing page for plan details.
For complete customization options, see:
- Custom Outputs - Editor interface and output settings
- Timer Element - Timer display settings
Using Multiple Viewers
You can open the same Viewer link on multiple devices - each one syncs independently with your Controller. Each connected device counts toward your plan’s live connection limit. Common setups include:
- Stage left and stage right monitors showing the same countdown
- Presenter monitor + confidence monitor for backup
- Multiple rooms in a conference, each with their own display
Use the Identifier field in Link Options to distinguish devices in your Live Connections list (e.g., “Stage Left”, “Backstage”, “Green Room”). This helps you track which displays are connected.
For advanced setups like showing multiple timers side-by-side on a single screen, see Embed on Website.
Broadcast & Streaming
The Viewer works seamlessly with broadcast software like OBS Studio, vMix, Wirecast, and others. Common use cases:
- Timer overlay on your stream or recording
- Lower third countdown for live broadcasts
- Fullscreen timer for virtual events
Premium users can set a transparent background in the output customizer, allowing the timer to overlay directly on your video feed. You can also use chroma key colors (green, magenta) if your software prefers that workflow.
Add the Viewer link as a Browser Source in OBS or equivalent in other software. The timer updates in real-time as you control it from the Controller.
Overlay Controls
When hovering over the Viewer output, overlay controls appear in the corner. These can be hidden via the Hide Controls Overlay option in Link Options.
Sound Toggle
Chimes and audio alerts can be toggled on or off using the sound button. This is particularly important for stage monitors where audio feedback to presenters is essential - you might want sound on the presenter’s monitor but off on the backstage display.
Each device remembers its sound preference, so you can have some monitors with sound enabled and others silent.
Mirror Display
The mirror button flips the display horizontally, useful for teleprompter setups or reflective glass displays. You can also set mirroring via Link Options when creating the output link.
Fullscreen on Mobile Devices
Click the fullscreen button to expand the Viewer to fill the entire screen, hiding browser controls and providing a clean display. On desktop browsers this works reliably, but mobile devices have some platform-specific quirks.
iPad
Safari supports fullscreen mode and will keep the screen awake while the Viewer is active.
Firefox, Chrome, and other browsers do not support fullscreen for web pages on iPadOS — only Safari does. If the fullscreen button doesn’t work, switch to Safari or use the Home Screen workaround below.
iPhone
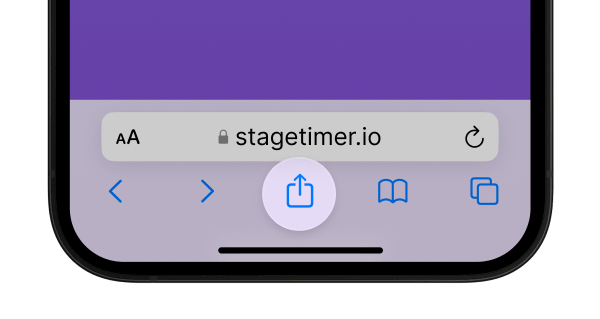
iPhones do not support browser-based fullscreen mode in any browser. Use the Home Screen workaround:
- Open the Viewer link in Safari
- Tap the “Share” icon at the bottom of the browser
- Select “Add to Home Screen” from the share options
- This creates a home screen icon for the link
- Opening the link from this icon displays it in fullscreen
Preventing Sleep (iOS/iPadOS)
Stagetimer requests a “wake lock” to keep the screen on, but iOS has stricter power management than other platforms:
- Set Auto-Lock to “Never” — Go to Settings → Display & Brightness → Auto-Lock and select “Never” to prevent the device from sleeping during your event.
- Low battery overrides wake lock — When the device is low on battery, iOS will ignore wake lock requests and may put the device to sleep regardless of your settings. Keep your device charged or plugged in for critical displays.
Connection & Sync
The Viewer connects to your Controller via WebSocket for real-time synchronization. Here’s how it handles various scenarios:
Normal operation: Timer updates, messages, and control actions sync instantly across all connected Viewers (typically under 150ms latency).
If connection drops: The current timer continues running locally - countdowns keep counting down accurately because start and end times are synchronized, not continuous timing signals. You won’t lose your countdown if WiFi hiccups.
Reconnection: The Viewer automatically attempts to reconnect. Once reconnected, any new actions from the Controller (starting a new timer, showing a message) will sync immediately. A subtle status indicator appears at the bottom of the screen during extended disconnections.
Bandwidth: Stagetimer uses extremely low bandwidth - typically no more than 2-3 MB for an entire show. You won’t be competing for bandwidth with other devices on the network.
Best practices:
- Use a stable network connection for critical events
- Test your setup before going live
- Keep a backup device ready for important shows