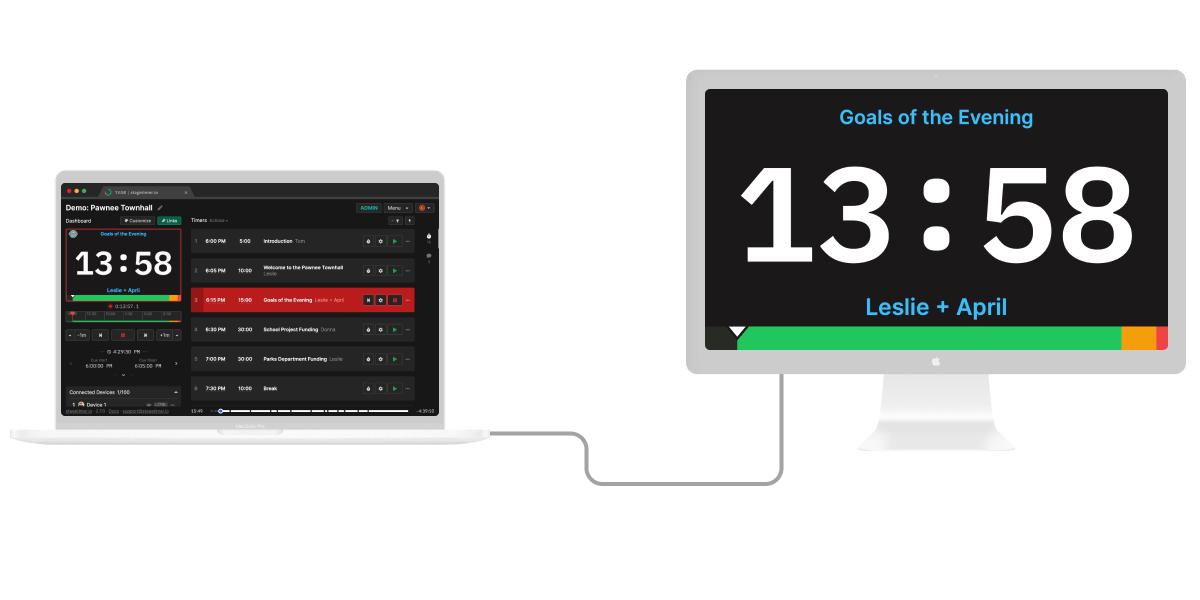
How to Display Stagetimer on a Screen
You control Stagetimer on your laptop or tablet. But the presenter needs to see the countdown on a separate screen — a confidence monitor on stage, a TV in the green room, or a display at the back of the venue. This guide covers every common way to get the timer onto that screen.
How It Works
Stagetimer runs in two modes. Each display method in this guide is tagged so you can see which mode it supports:
Web You use stagetimer.io in a browser. Requires internet on every device that displays the timer. Best for most setups.
Desktop App You run the Stagetimer desktop app on your computer. It creates a local server that other devices on the same network connect to — no internet required. Best for venues with unreliable or restricted internet.
Both modes work the same way: you open a Viewer link on the display device, and it syncs with your controller in real-time. The difference is just where that link points — to stagetimer.io (web) or to a local IP address like 192.168.1.100:3000 (desktop app).
To get the Viewer link, open Output Links on the controller page, select the Viewer output, and copy the link. See Output Links for details.
Video Cable from Your Computer
Web Desktop App
The most reliable method. Connect a screen directly to your computer with a cable. No extra devices, no wireless issues, no browser compatibility concerns.
Opening the Viewer on a Second Screen
Once your screen is connected and your computer recognizes it as a second display:
- Copy your Viewer link — In your Stagetimer room, click Output Links, select the Viewer output, and copy the link.
- Open a new browser window — Press
Ctrl+N(Windows/Linux) orCmd+N(Mac) to open a fresh window. Paste the Viewer link and press Enter. - Move the window to the second screen — Drag the browser window onto your connected display. On Windows, you can also use
Win+Shift+Arrowto move it quickly. - Go fullscreen — Press
F11(Windows/Linux/Chrome) orCtrl+Cmd+F(Mac/Chrome) to hide the browser toolbar. The timer now fills the entire screen.
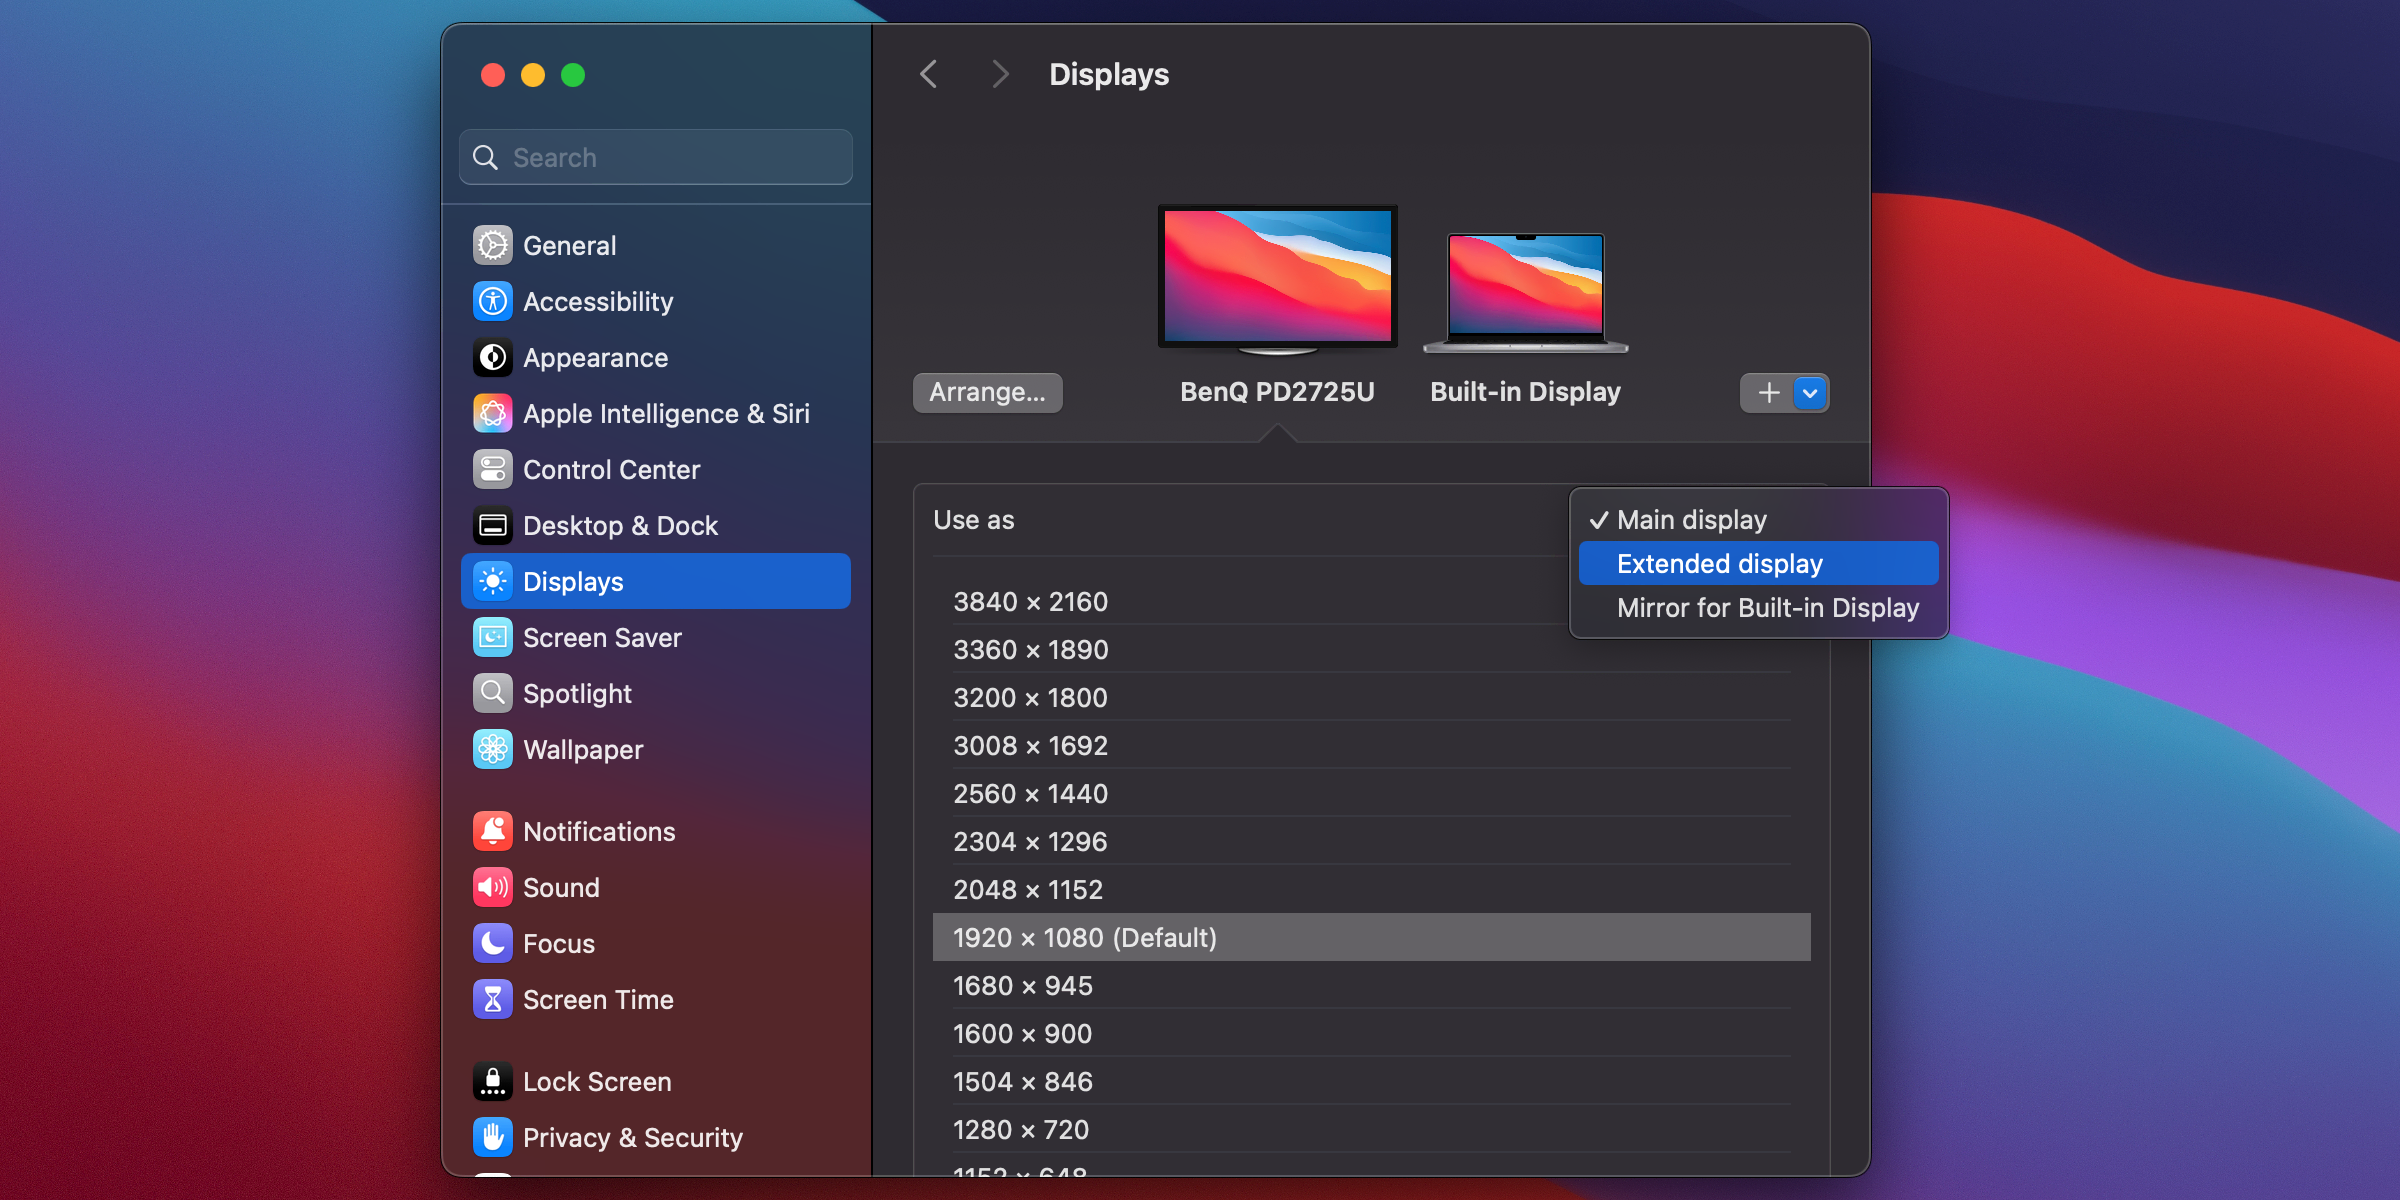
Tip: Make sure your operating system is set to “Extend” displays, not Mirror. On Windows, press Win+P and select “Extend”. On Mac, go to System Settings > Displays and make sure “Mirror Displays” is unchecked.
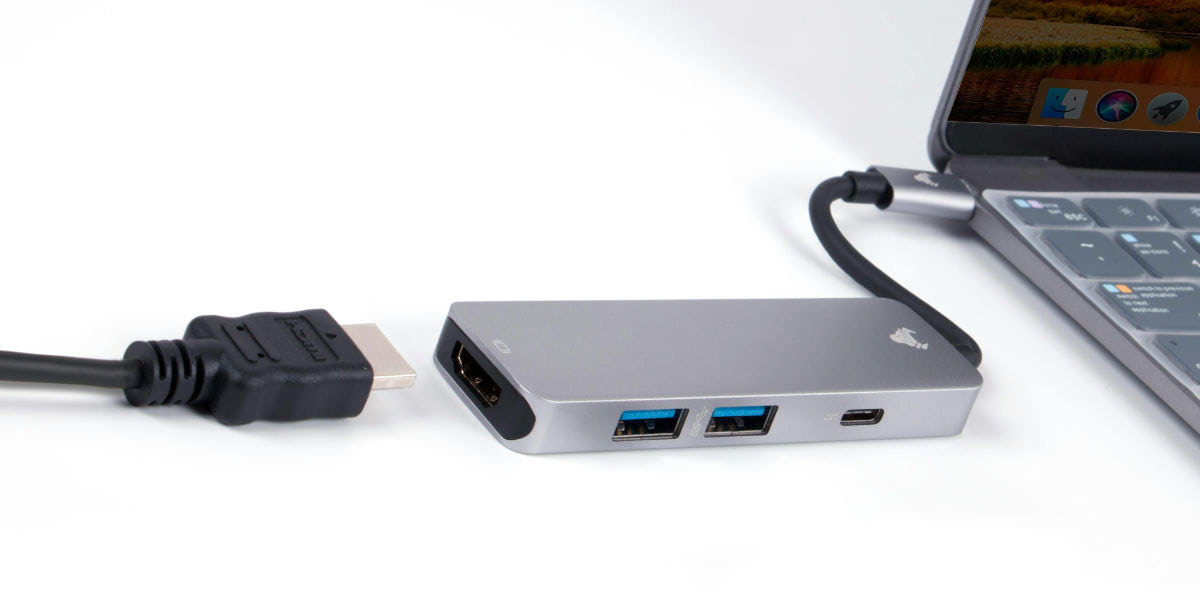
HDMI
The most common video cable. Nearly every TV, monitor, and projector has an HDMI port.
- Maximum cable length: About 15 meters (50 feet) for a standard passive cable. Active HDMI cables or fiber-optic HDMI cables can reach 30m or more.
- Adapters: Many laptops only have USB-C or Thunderbolt ports. A USB-C to HDMI adapter or dock solves this. Make sure it supports your desired resolution.
HDMI works great for small to medium venues where the screen is close to the operator. For longer distances, read on.
SDI
For longer cable runs, SDI (Serial Digital Interface) is the event-industry standard. SDI cables can carry a signal over 100 meters (300+ feet) without signal loss, using standard BNC coaxial cables.
Most computers don’t have SDI outputs and most TVs don’t have SDI inputs. You use converters at each end:
Computer (HDMI out) → HDMI-to-SDI converter → SDI cable → SDI-to-HDMI converter → Screen (HDMI in)
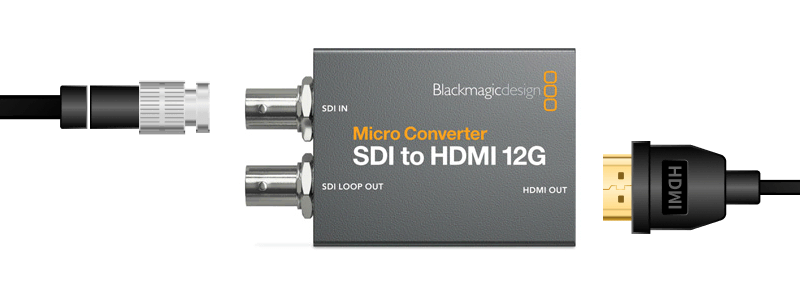
Compact HDMI-to-SDI converters (like the Blackmagic Micro Converter SDI to HDMI 12G) cost around $50-100 each. You need one at each end. SDI is a go-to in live event production because BNC cables are rugged, lockable, and cheap for long runs.
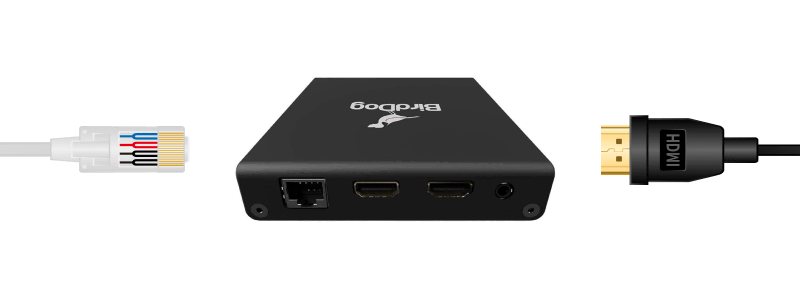
NDI
NDI (Network Device Interface) sends video over a standard ethernet or WiFi network — no dedicated video cable needed. It’s widely used in live event production and broadcast environments.
Like SDI, you can use HDMI-to-NDI converters (like the BirdDog Mini) at the source and NDI-to-HDMI converters at the screen. The advantage over SDI is that you use existing network infrastructure instead of running a dedicated cable, and you can easily send the same signal to multiple screens.
NDI is also common in larger production setups where Stagetimer feeds into an ATEM switcher, vMix, or OBS.
Tip: If you’re using the desktop app, you can skip the HDMI-to-NDI converter entirely. The desktop app sends timer displays as NDI® sources directly — any NDI receiver on your network can pick them up.
Tablet or Phone
Web Desktop App
An iPad, Android tablet, or even a phone can work as a confidence monitor — especially for smaller events, rehearsals, or as a backup display. Just open the Viewer link in the browser and go fullscreen.
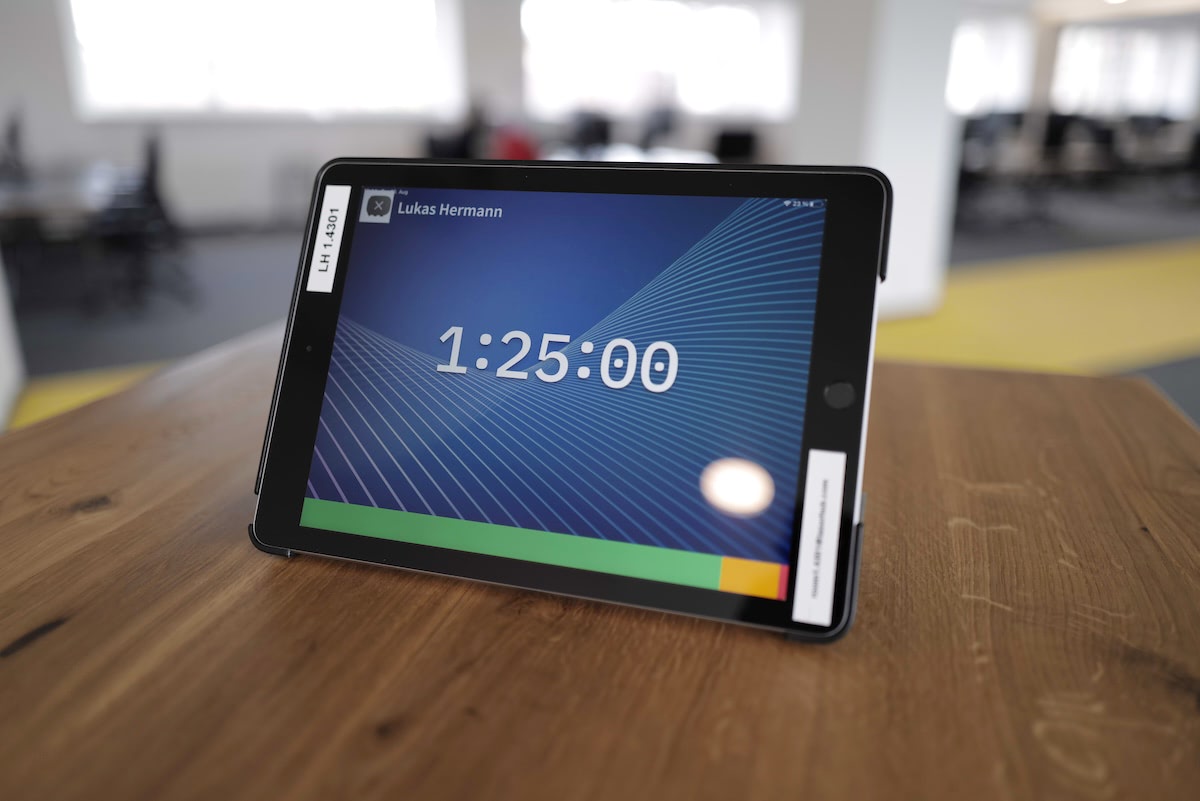
iPad (Safari): Open the Viewer link, tap the fullscreen button in the overlay controls. Safari on iPad supports fullscreen and keeps the screen awake while the Viewer is active.
iPad (Chrome/Firefox): These browsers don’t support fullscreen on iPadOS. Use Safari, or add the Viewer to your Home Screen: tap Share > “Add to Home Screen”. Opening from the Home Screen icon runs it in fullscreen.
iPhone: No browser supports fullscreen. Use the Home Screen workaround described above.
Android: Open the Viewer link in Chrome and tap the fullscreen button. Most Android devices support this without issues.
Prevent screen sleep: Go to Settings > Display & Brightness > Auto-Lock and set it to Never. Keep the device plugged in — low battery can override the wake lock. See the Viewer docs on mobile fullscreen for more details.
Smart TV with Built-in Browser
Web
Many modern Smart TVs include a web browser. If yours does, you can open the Stagetimer Viewer directly on the TV without any extra hardware.
- Open the browser on your Smart TV (check your TV’s app menu)
- Navigate to your Viewer link — use a short link like
stagetimer.io/o/ABC1234to make typing easier with a remote - Enable fullscreen if the browser supports it
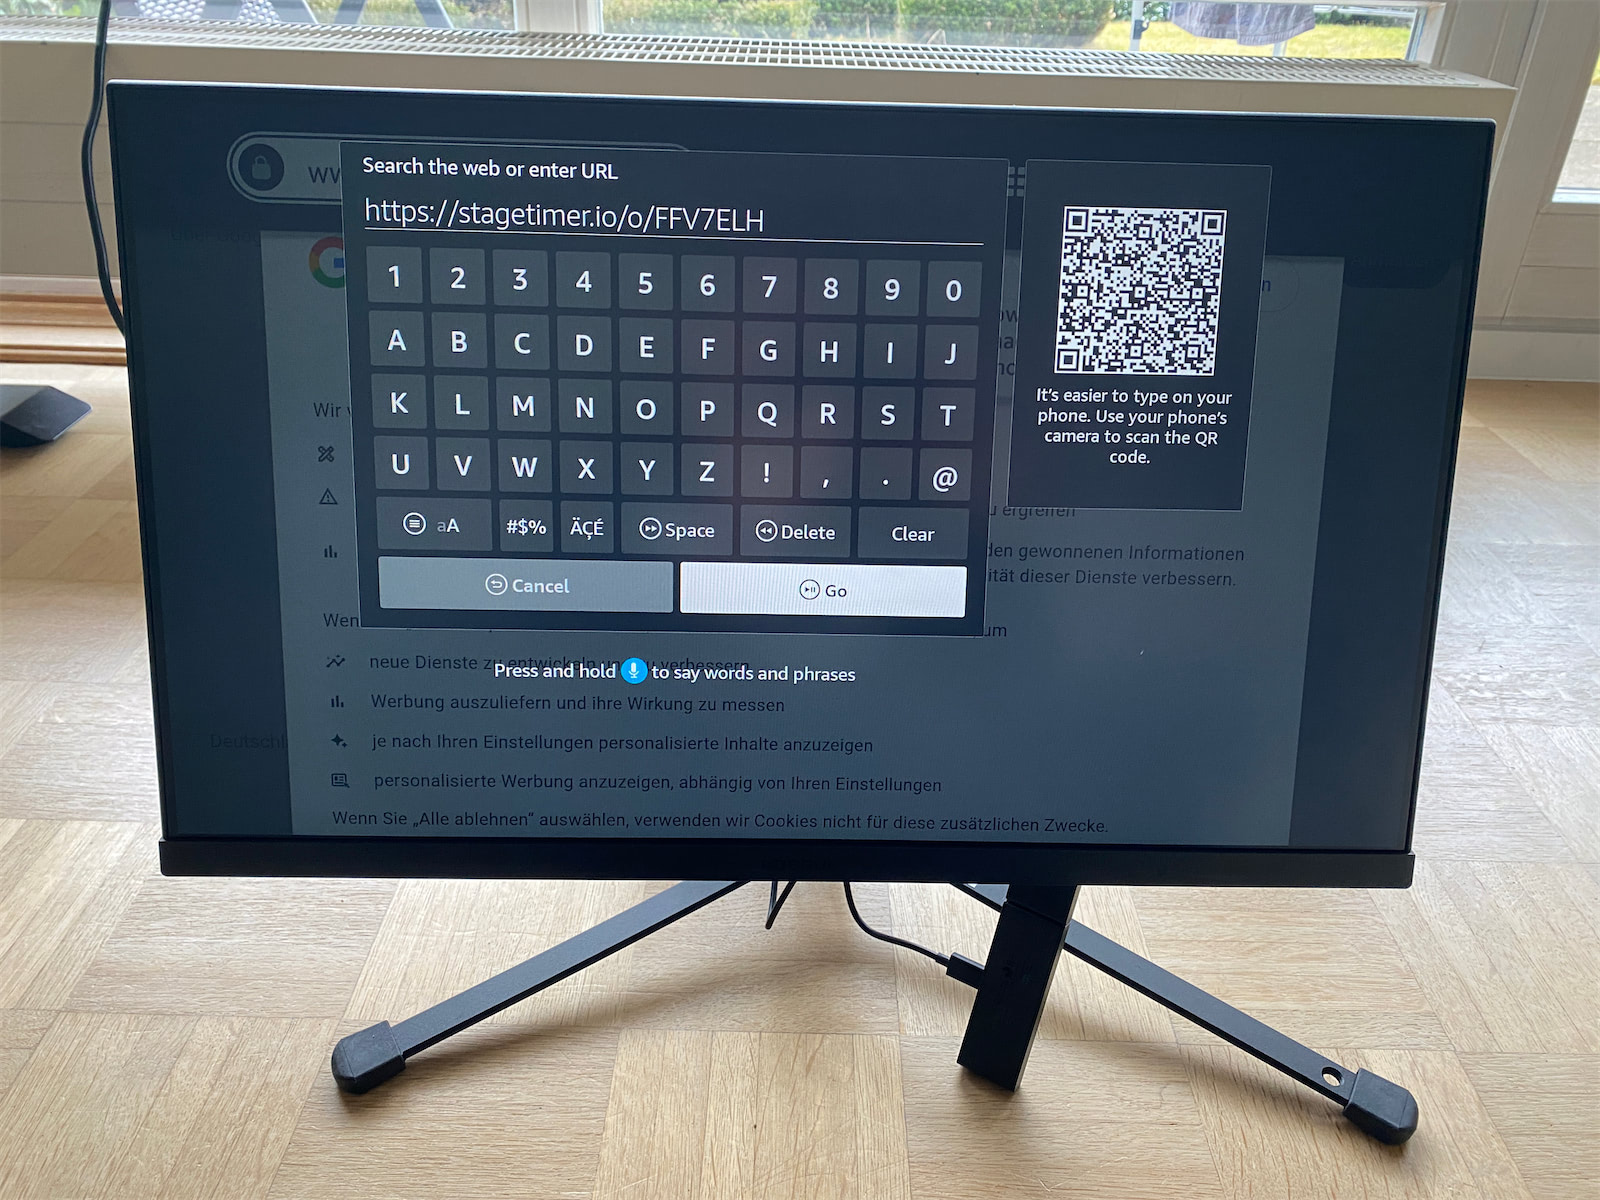
Limitations: Smart TV browsers vary wildly in quality. Some work perfectly, others are slow or don’t support fullscreen. Samsung (Tizen) and LG (webOS) TVs tend to work well. Test yours before your event. If the browser doesn’t cut it, consider a Fire TV Stick for a more reliable experience.
Apple TV / AirPlay
Web Desktop App
If you have an Apple TV connected to your screen and a Mac as your control computer, AirPlay lets you use the TV as a wireless second display.
- On your Mac, go to System Settings > Displays
- Click ”+” and select your Apple TV under “Mirror or extend to”
- Choose “Use as Extended Display” (not Mirror)
- Open the Viewer in a new browser window and move it to the Apple TV display
- Go fullscreen with Ctrl+Cmd+F
This works the same as a cable connection — your Mac treats the Apple TV as a second monitor. The Viewer runs in a browser on your Mac and the screen content is streamed to the TV.
Note: AirPlay adds a small amount of latency (typically under 100ms), which is imperceptible for timer displays. Make sure both devices are on the same WiFi network.
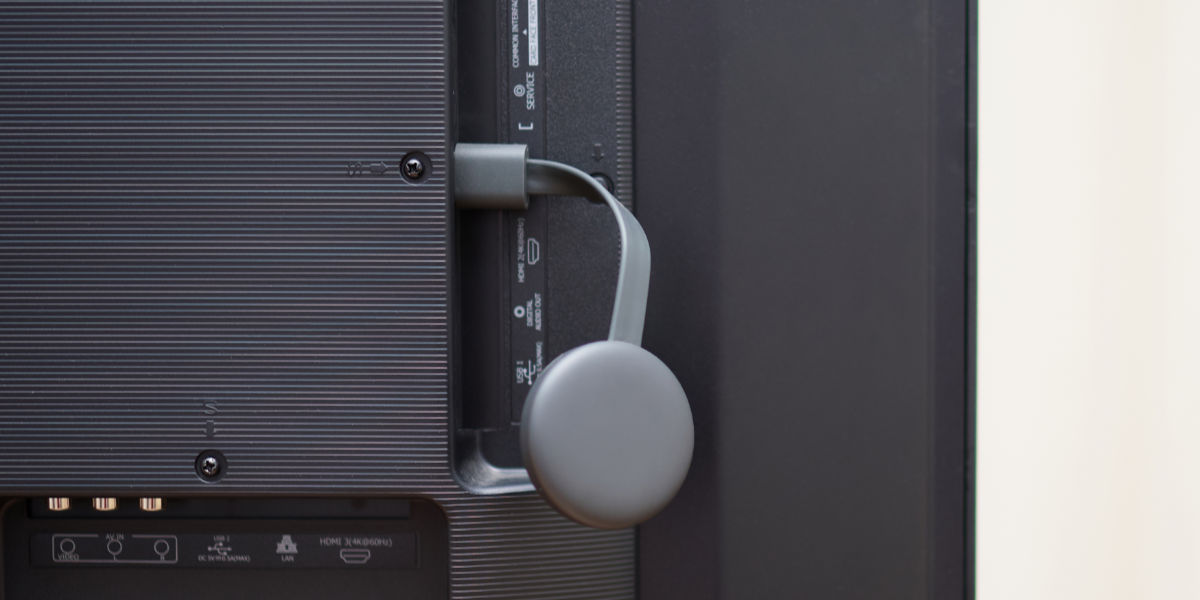
Chromecast / Google Cast
Web
Chromecast lets you cast a Chrome browser tab to a TV. The Viewer runs in Chrome on your computer and the tab content is streamed to the Chromecast.
- Open the Viewer link in a Chrome browser tab on your computer
- Click the three-dot menu (⋮) in Chrome and select “Cast…”
- Select your Chromecast device
- Choose “Cast tab” (not “Cast screen”)
Tip: Keep the tab open on your computer while casting — closing it stops the cast. You can switch to other tabs; the cast continues from the Viewer tab.
Note: Chromecast adds noticeable latency (up to 0.5-1 second) compared to a direct connection. For a countdown timer this is usually fine, but be aware of it.
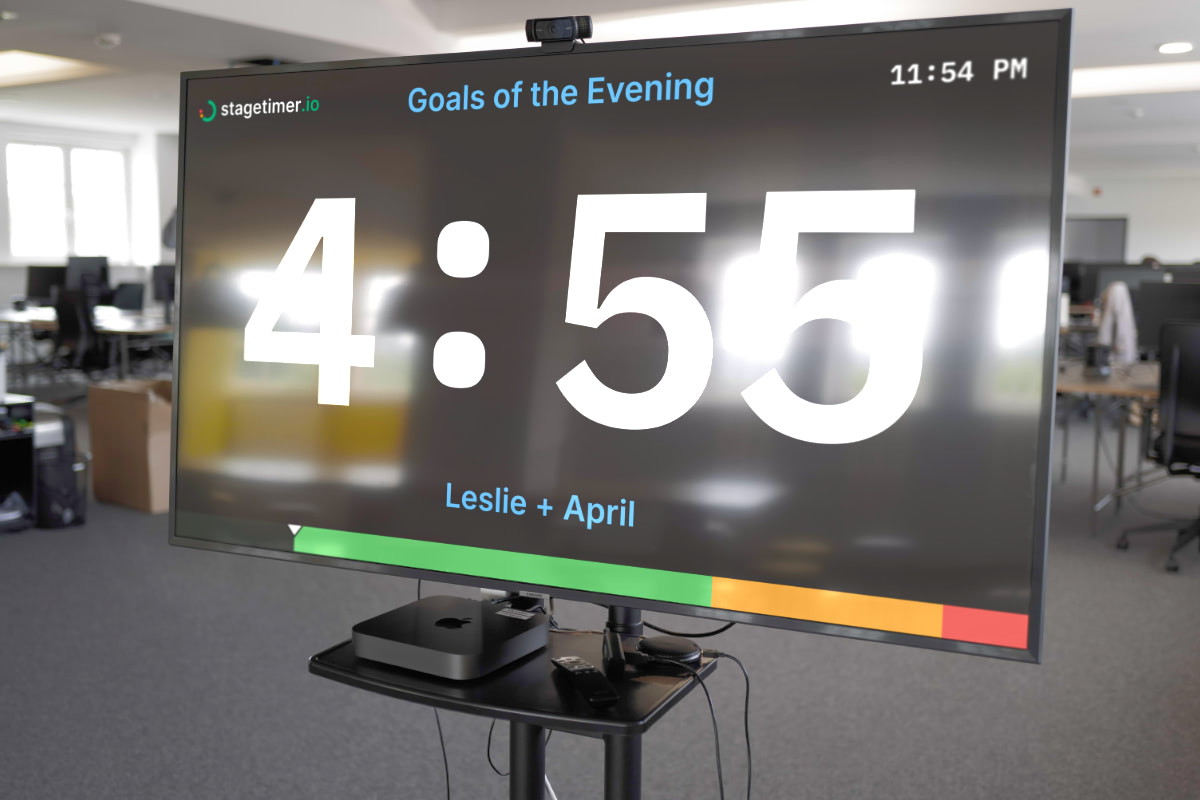
Amazon Fire TV Stick
Web
The Fire TV Stick (around $30-60) turns any TV with an HDMI port into a dedicated Stagetimer display. It runs its own browser, so your computer doesn’t need to stay connected.
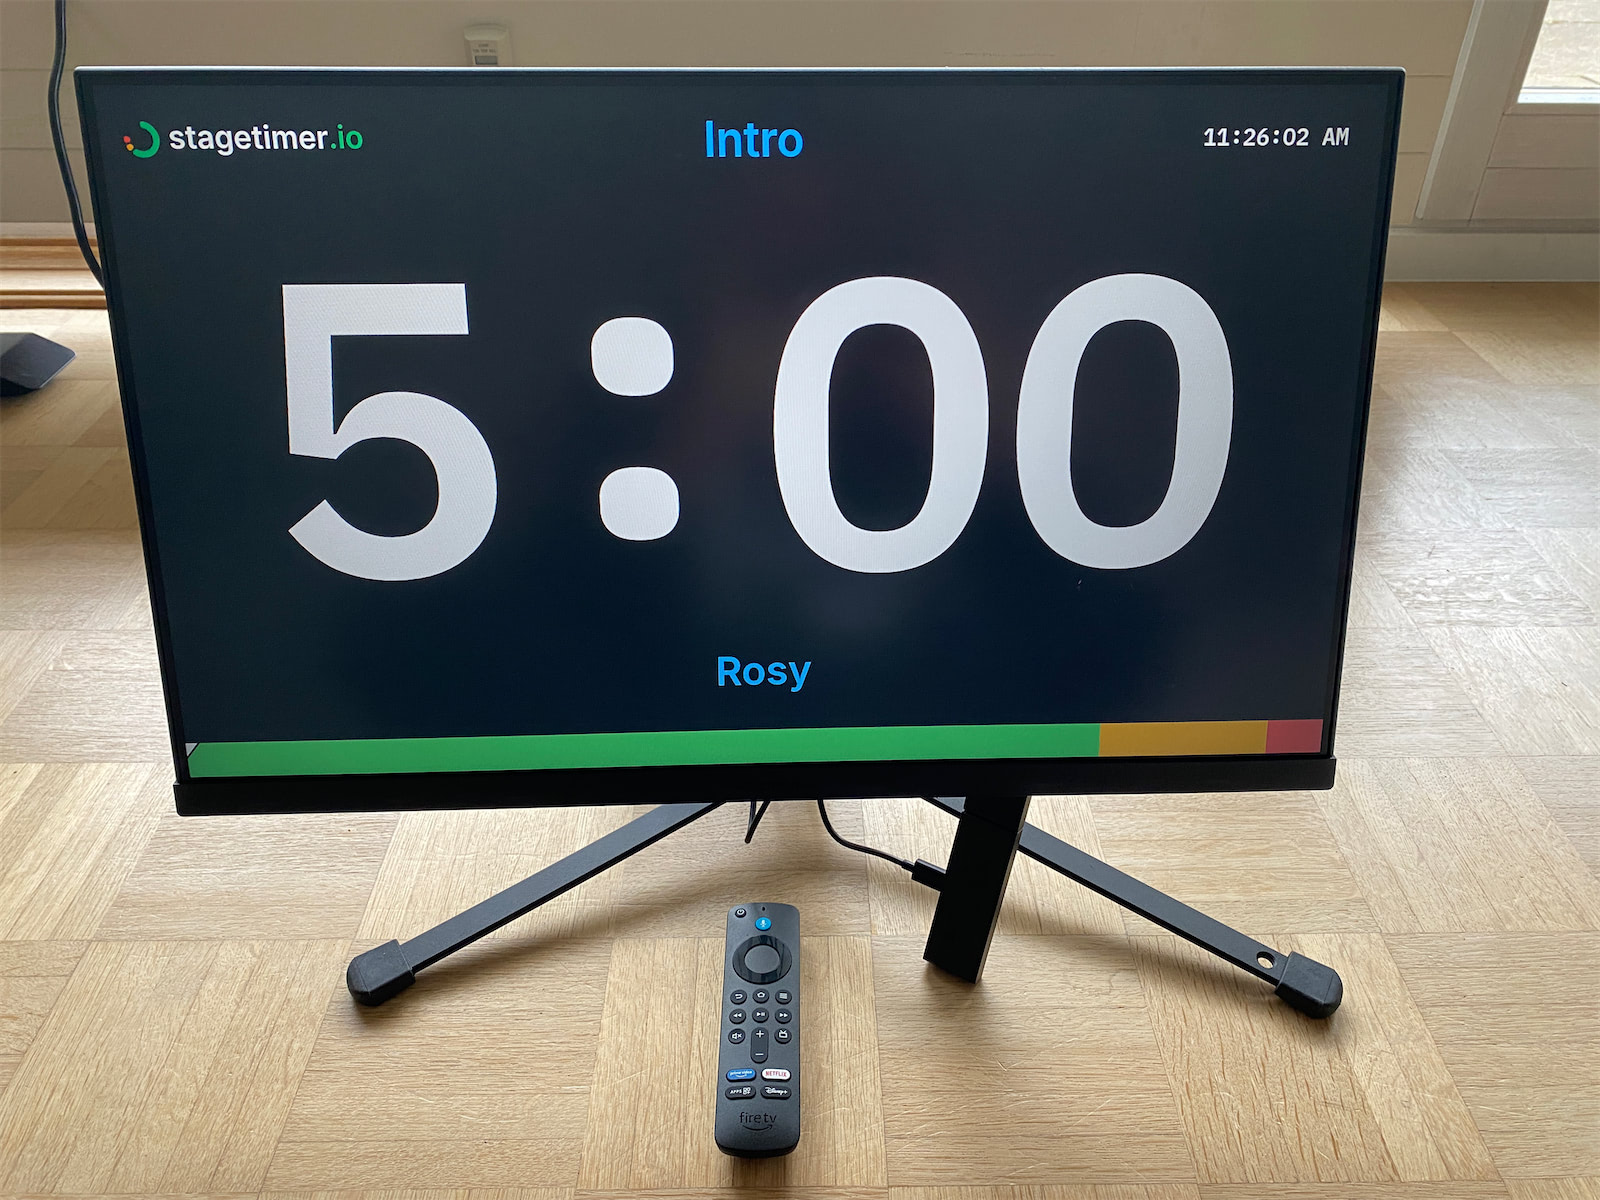
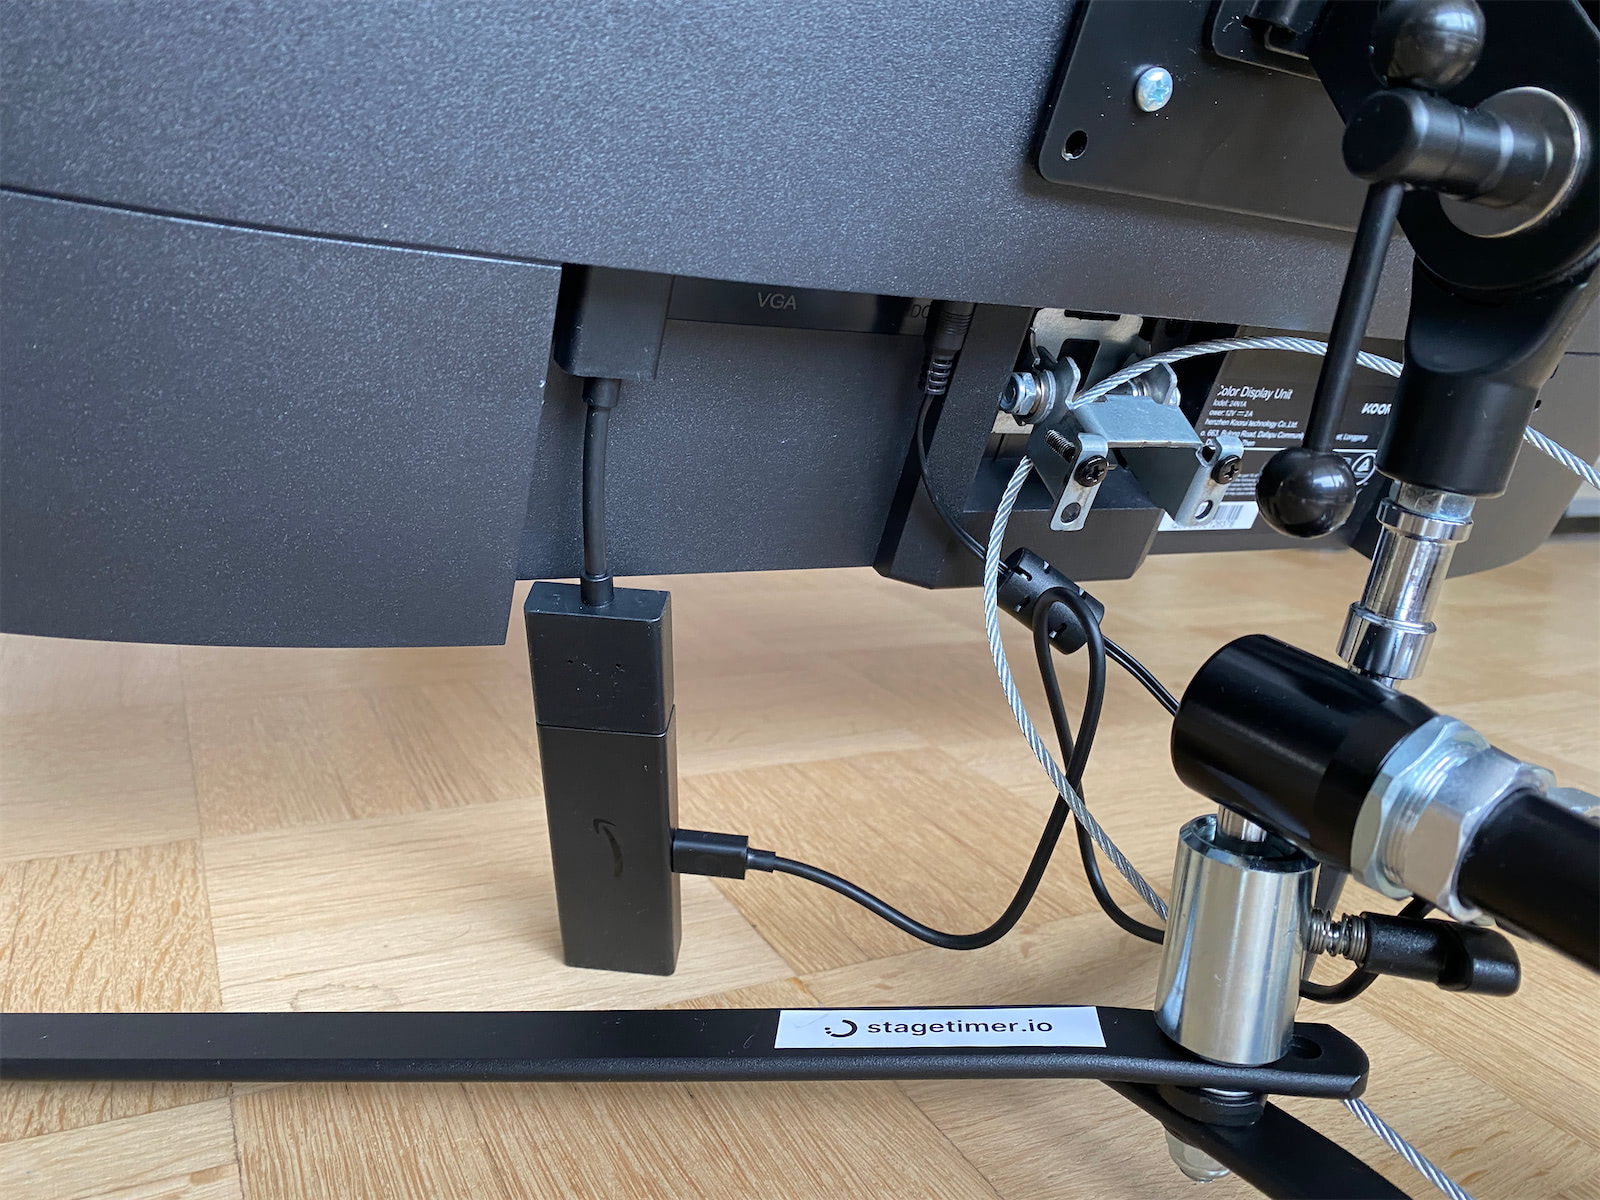
Open the Silk browser on the Fire TV Stick, navigate to your Viewer link, and enable fullscreen. The timer runs independently on the Fire TV Stick — you control it from any other device.
Best for: A cheap, portable, dedicated display that doesn’t tie up your computer. Great for festivals, churches, and recurring events.
Full step-by-step guide: Fire TV Stick setup →
Raspberry Pi
Web Desktop App
A Raspberry Pi is a small, affordable computer (starting at ~$35) that can run Stagetimer either in a browser (web version) or as a standalone server (desktop app). Connect it to any screen via HDMI.
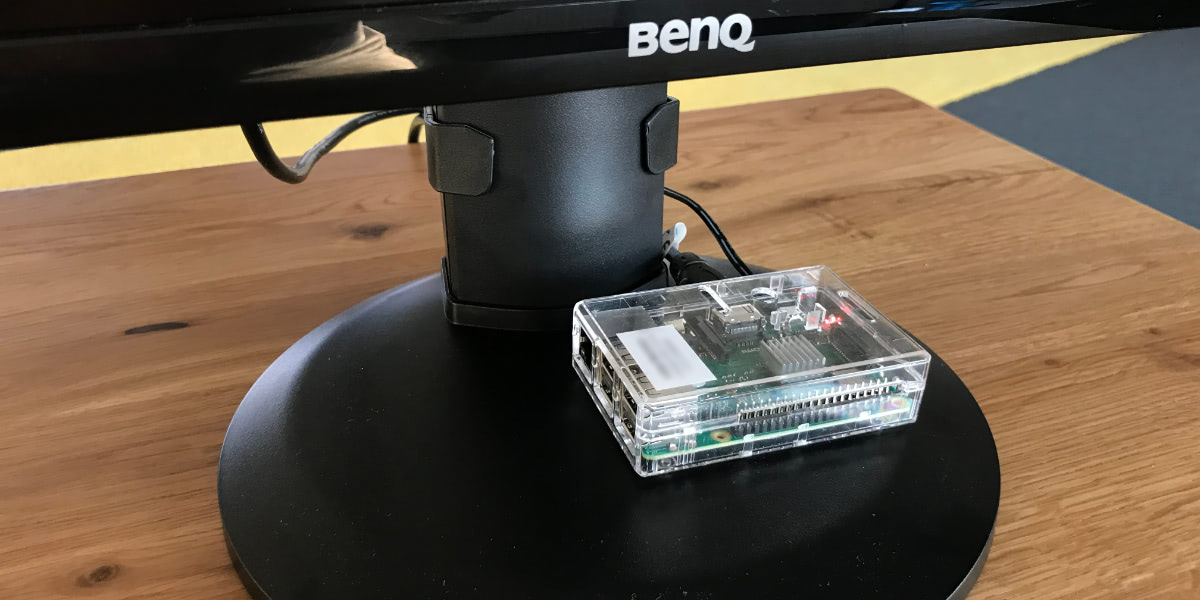
With kiosk mode, the Pi boots directly into a fullscreen Viewer — no manual interaction needed. It’s ideal for permanent installations or “set it and forget it” setups.
Best for: Permanent timer displays, venues without internet (using the desktop app), and production kits where you want a dedicated, reliable device.
Full step-by-step guide: Raspberry Pi setup →
Which Method Should You Use?
| Scenario | Recommended method | Mode |
|---|---|---|
| Simplest setup | HDMI cable from your computer | Web Desktop |
| Quick and portable | Tablet (iPad, Android) on a stand | Web Desktop |
| Screen is far away (30m+) | SDI or NDI converters | Web Desktop |
| No extra hardware | Smart TV browser or HDMI cable | Web |
| No internet at venue | HDMI cable + desktop app, or Raspberry Pi + desktop app | Desktop |
| Dedicated portable display | Fire TV Stick (cheapest) or Raspberry Pi (most flexible) | Web |
| Permanent installation | Raspberry Pi with kiosk mode | Web Desktop |
| Multiple screens, same timer | Open the Viewer link on each device | Web Desktop |
When in doubt, start with an HDMI cable. It’s the simplest, most reliable option with zero latency and no dependencies. Add complexity only when the venue demands it.
General Tips
Use short links for manual URL entry. Typing a full output URL on a TV remote is painful. Generate a short link like stagetimer.io/o/ABC1234 instead — much easier to type or scan as a QR code.
Test before your event. Whatever method you choose, test the full setup before show day. Check that the screen displays correctly, fullscreen works, and the connection is stable.
Prevent screen sleep. Most devices will turn off the screen after a period of inactivity. Disable sleep or screen timeout in your device settings. Stagetimer requests a “wake lock” to keep the screen on, but not all devices respect this.
One controller, many screens. You can open the same Viewer link on as many devices as you want. A backstage monitor, a stage-left screen, and a green room TV can all show the same timer simultaneously. Each counts toward your plan’s live connection limit.
Related documentation: Viewer · Output Links · Desktop App · Fire TV Stick Guide · Raspberry Pi Guide · System Requirements