
Using Timers Correctly
What are Timers?
A timer is one segment of your show. You run it from the controller on your laptop or tablet, and presenters see it as a fullscreen countdown on their screen.
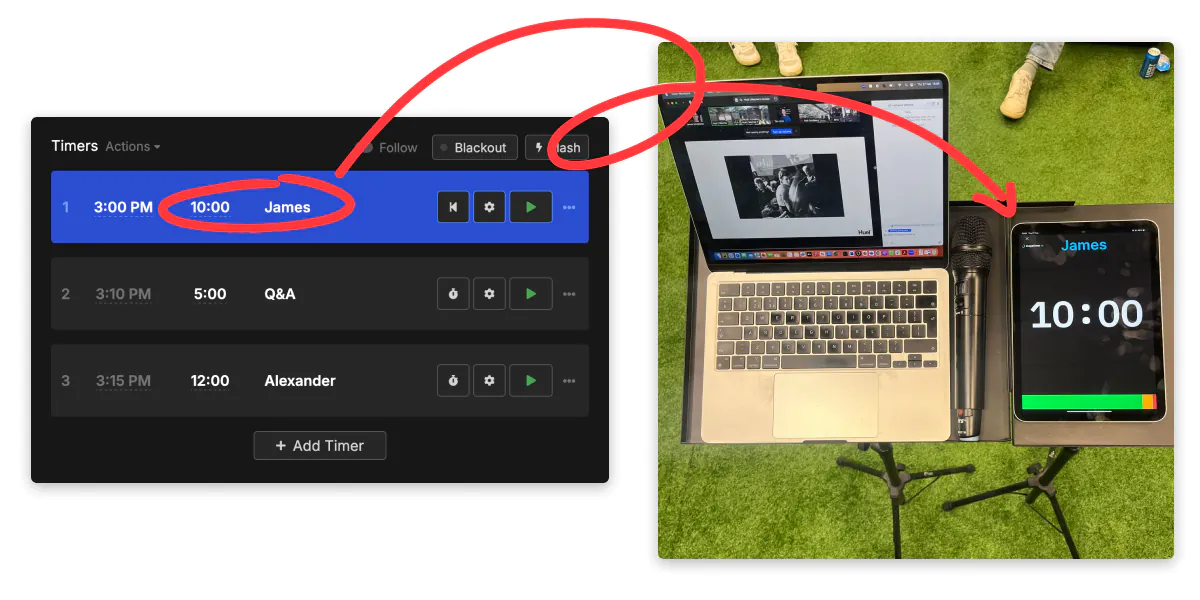
Each timer has a title, speaker, duration and start time. Timers run manually or linked one after another.
To bring in a rundown from a spreadsheet, see Import and Export.
To set the event date and the start times, see Running Your Show on Time.
To share the countdown with presenters, crew and audience, see Output Links.
Per-Timer Options
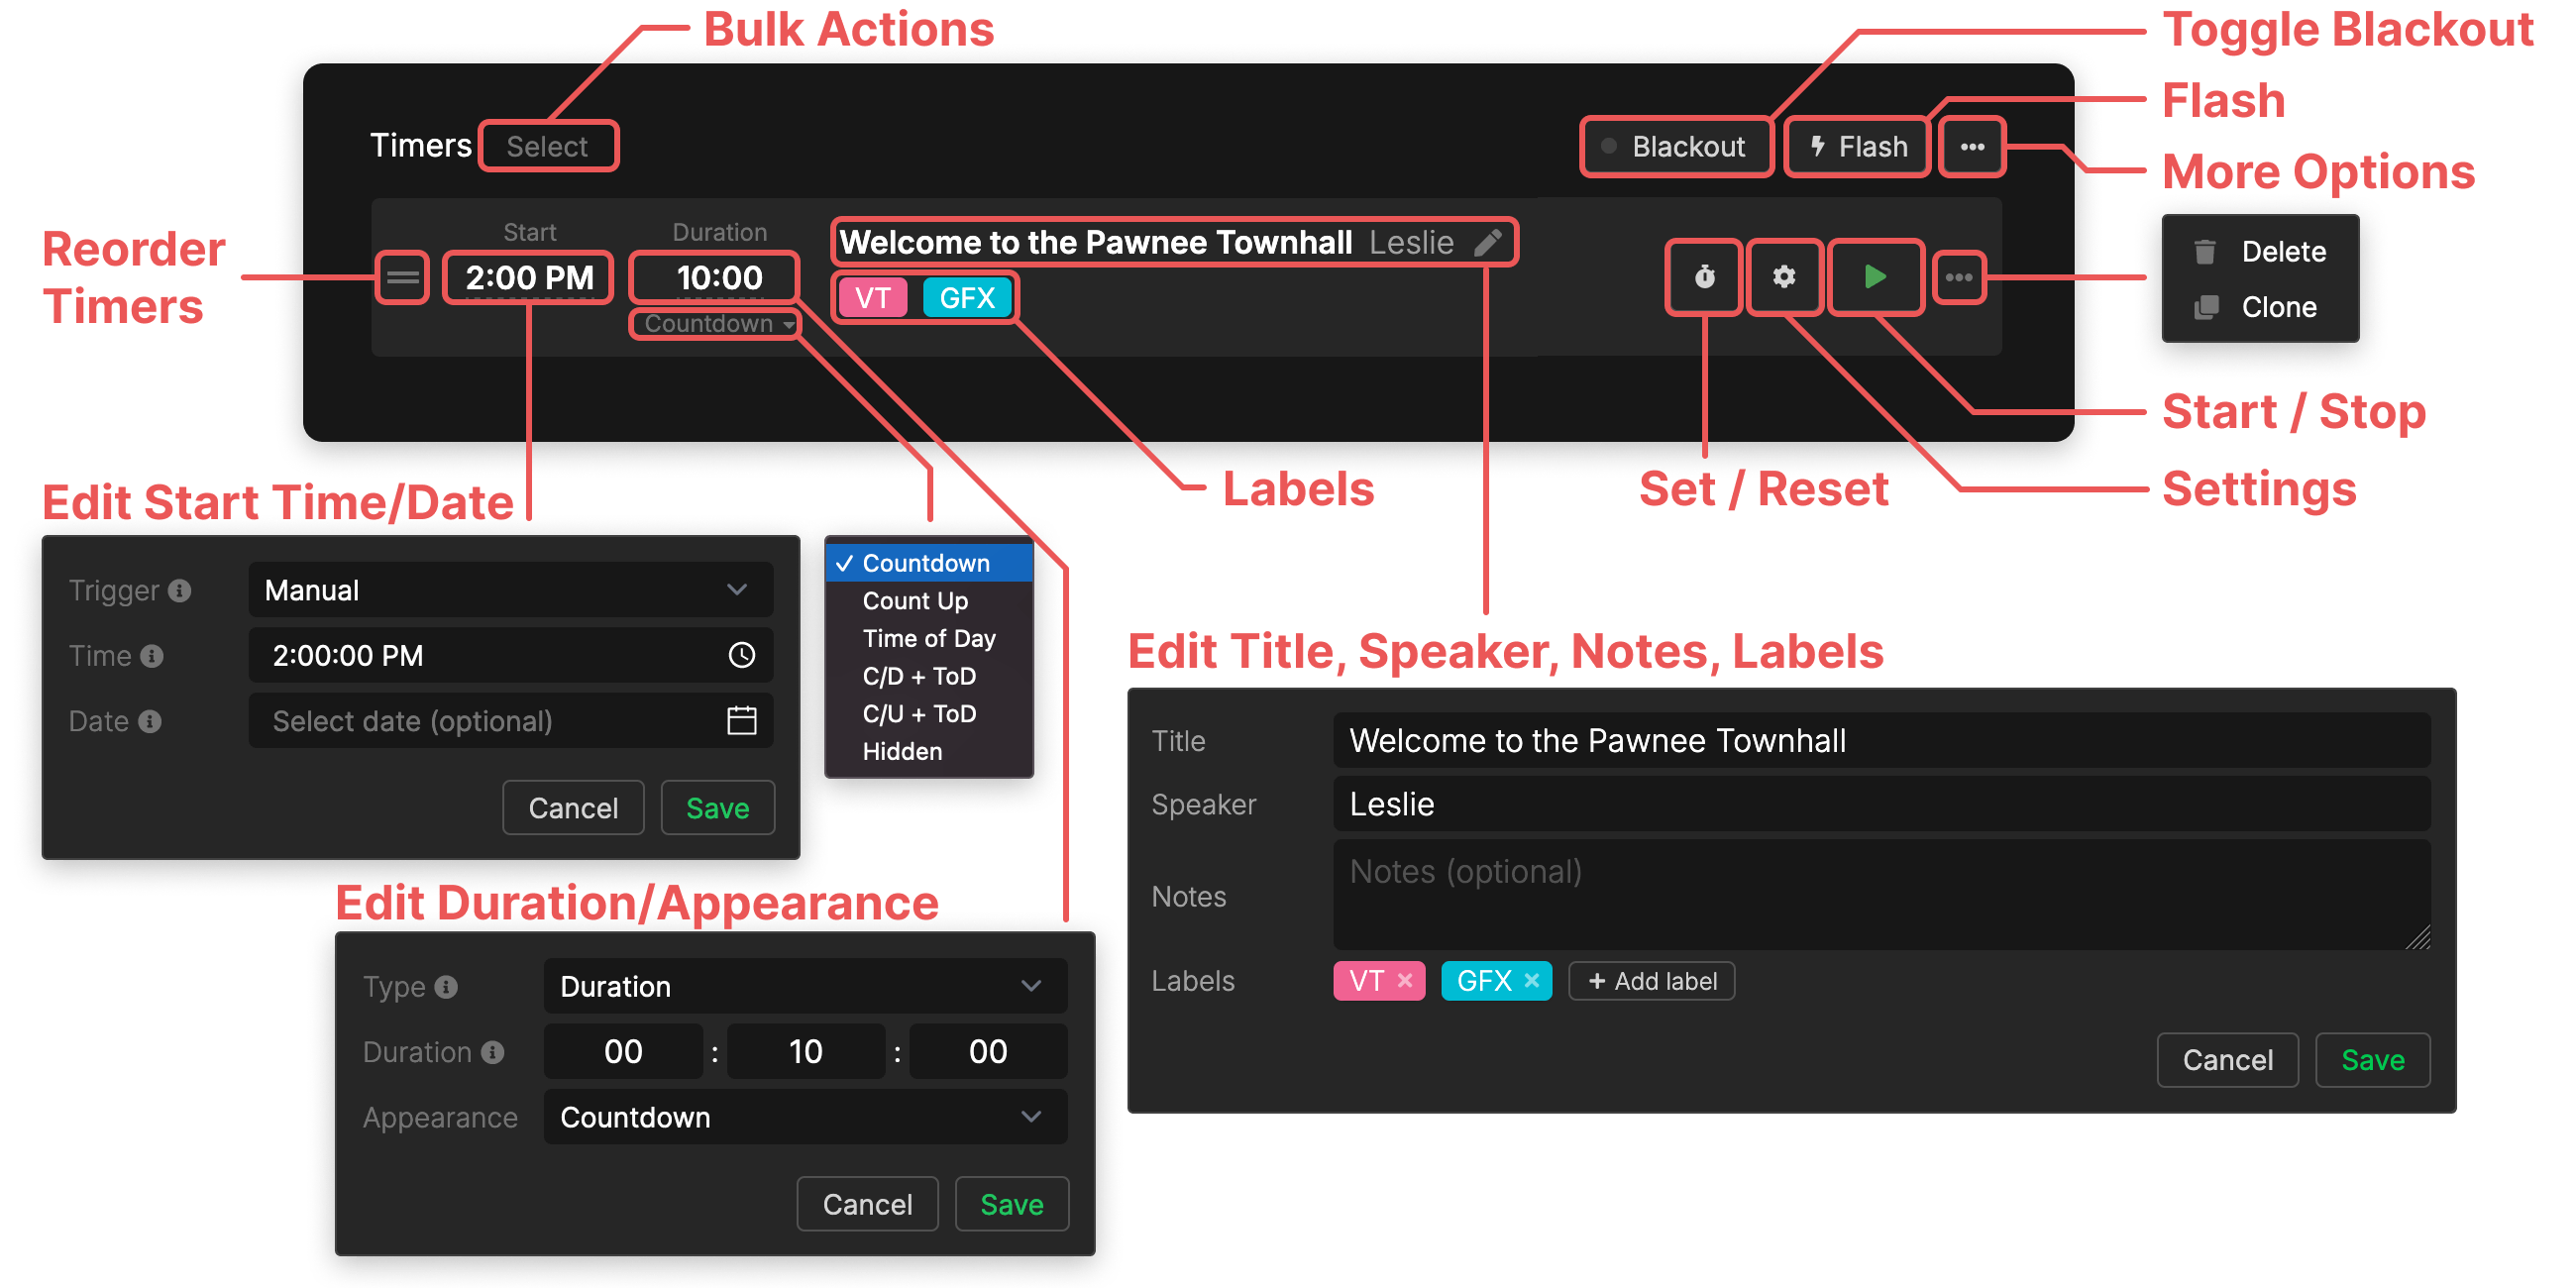
Timer Trigger
To define how your timer starts, you can choose from the following options:
Manual: The timer has to be started manually via the “Play” button either on the cue itself or the transport controls.Linked: The timer is linked to the previous timer such that it starts automatically when the previous timer reaches zero.Scheduled: The timer starts automatically at the given time. This scheduling happens server-side and will start the timer even if the controller page is closed in the browser.
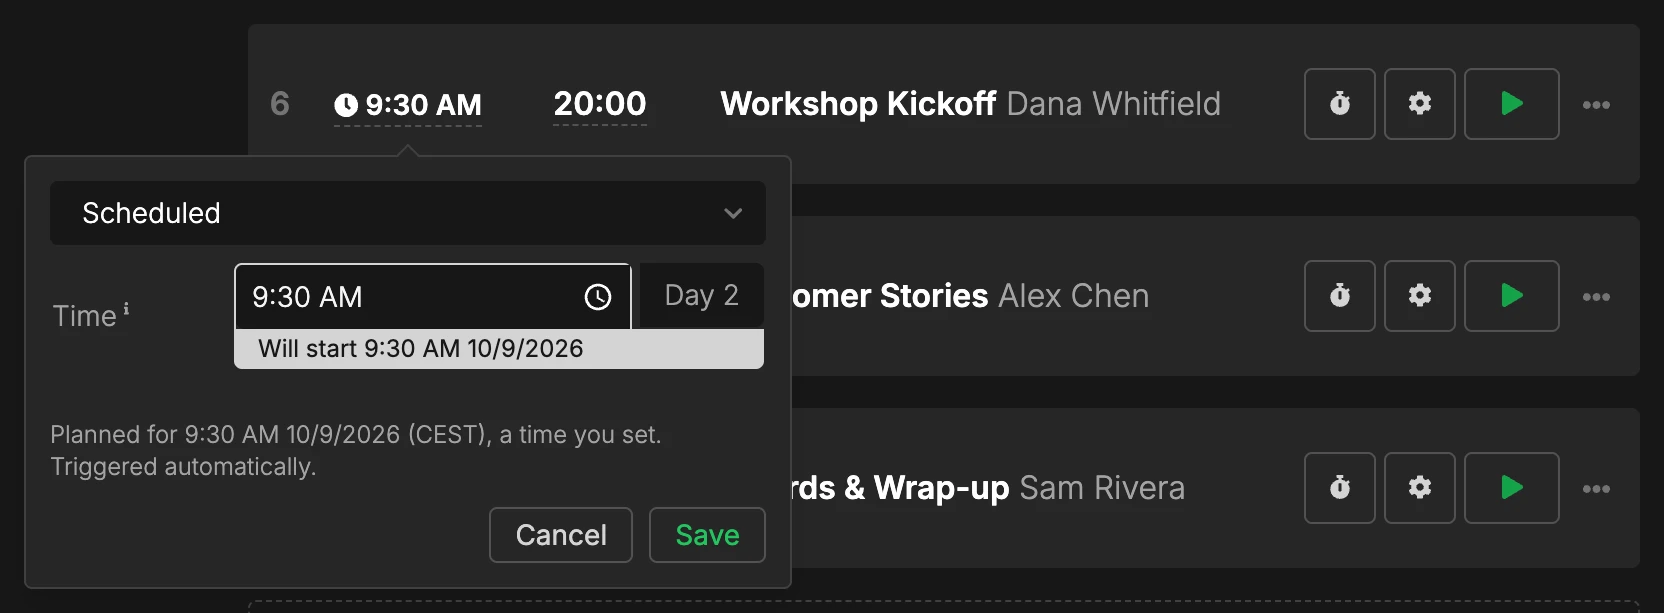
A scheduled timer fires on the day the rundown gives it: the event date, plus one day for every end of day row above the timer. Move the event date and every scheduled timer moves with it. The server drops the old schedule and arms a new one on the new day. A timer whose new start is already in the past is not armed again; its status line reads Will not start, 9:30 AM has passed. The same happens when you edit a scheduled timer’s start time or drag it across an end of day row.
Timer Duration Type
The following options let you define how the runtime length of your timer is calculated:
Duration: A fixed length, like 10 minutes. The timer counts down or up from it.Until Finish Time: A time of day the timer ends at, like 2:30 PM. The duration is calculated when the timer starts.Time Warp (Modified Speed): Two lengths: Duration is how long the timer really runs, Presenter Sees is what the display counts. Set 8 minutes and 10 minutes and the display runs 1.25× faster than real time.
Timer Appearances
Here’s how you can choose to display your timer:
Countdown: The default, the timer counts down from the duration total to zero.Count Up: The timer counts up from zero to the duration total.Time of Day: Showing only the current time of day, or clock, and hiding the progress bar.C/D + ToD: Countdown together with Time of Day.C/U + ToD: Count Up together with Time of Day.- “Hidden”: The timer and progress bar are hidden, but all other elements like the logo and the title are still visible. This is different from the “blackout” option where all elements of the timer are hidden.
End of Show
The end of show row sits below the last timer, marked with a checkered flag. The over/under counts to it.
Leave the time empty and the end is calculated: wherever your timers end, in gray. Type a time and it is fixed, in white. During a run the row shows where you’re heading: +4m beside the time, → 2:04 PM below it.
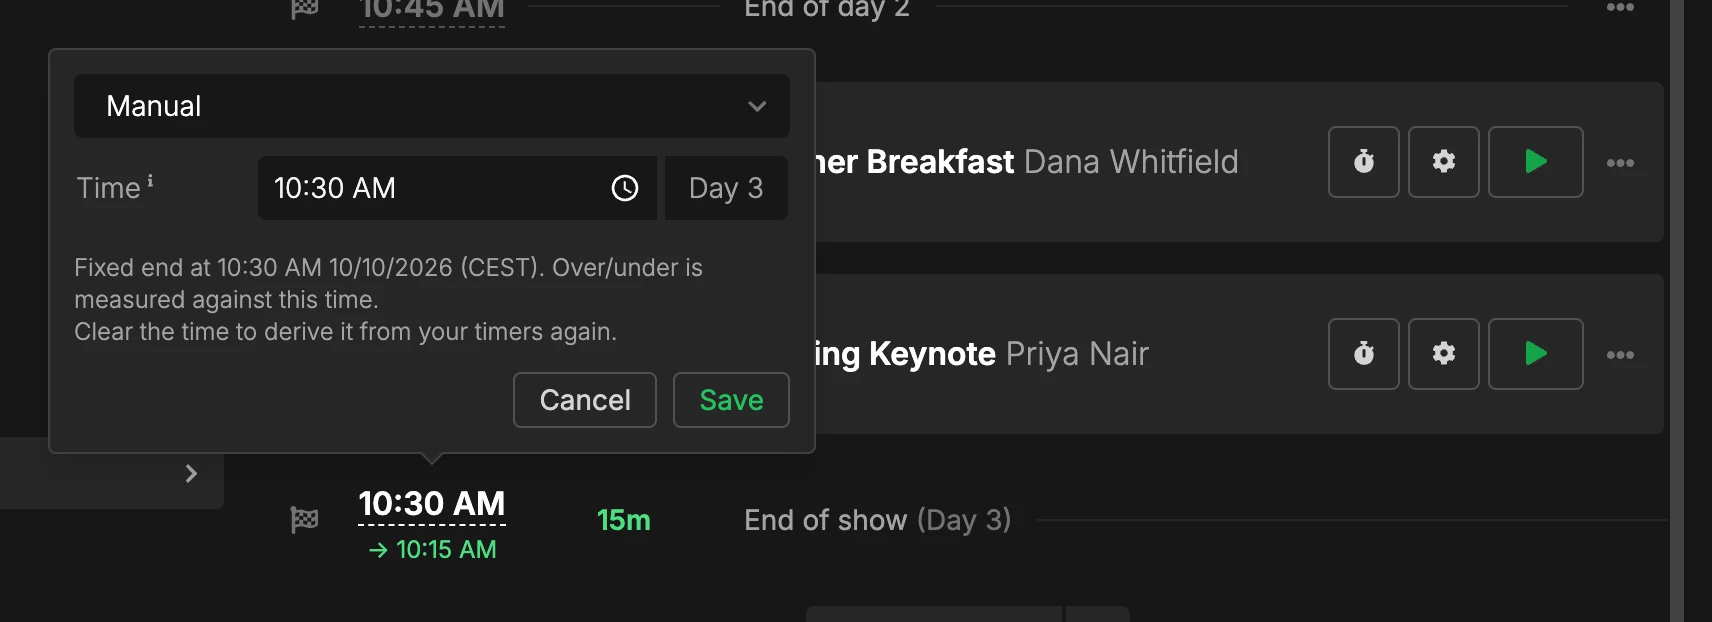
The row also holds the trigger for the last timer:
Manual: the last timer runs over at 0:00 until you stop it.Linked: the last timer stops at 0:00 exactly.Loop: the rundown restarts from the top at 0:00, for repeating content like a trade show demo reel. Set how many times the show plays in total, from 2× to 10×. The row shows your progress asLoop 2/4, and only Start fresh re-arms the counter.
Room Settings
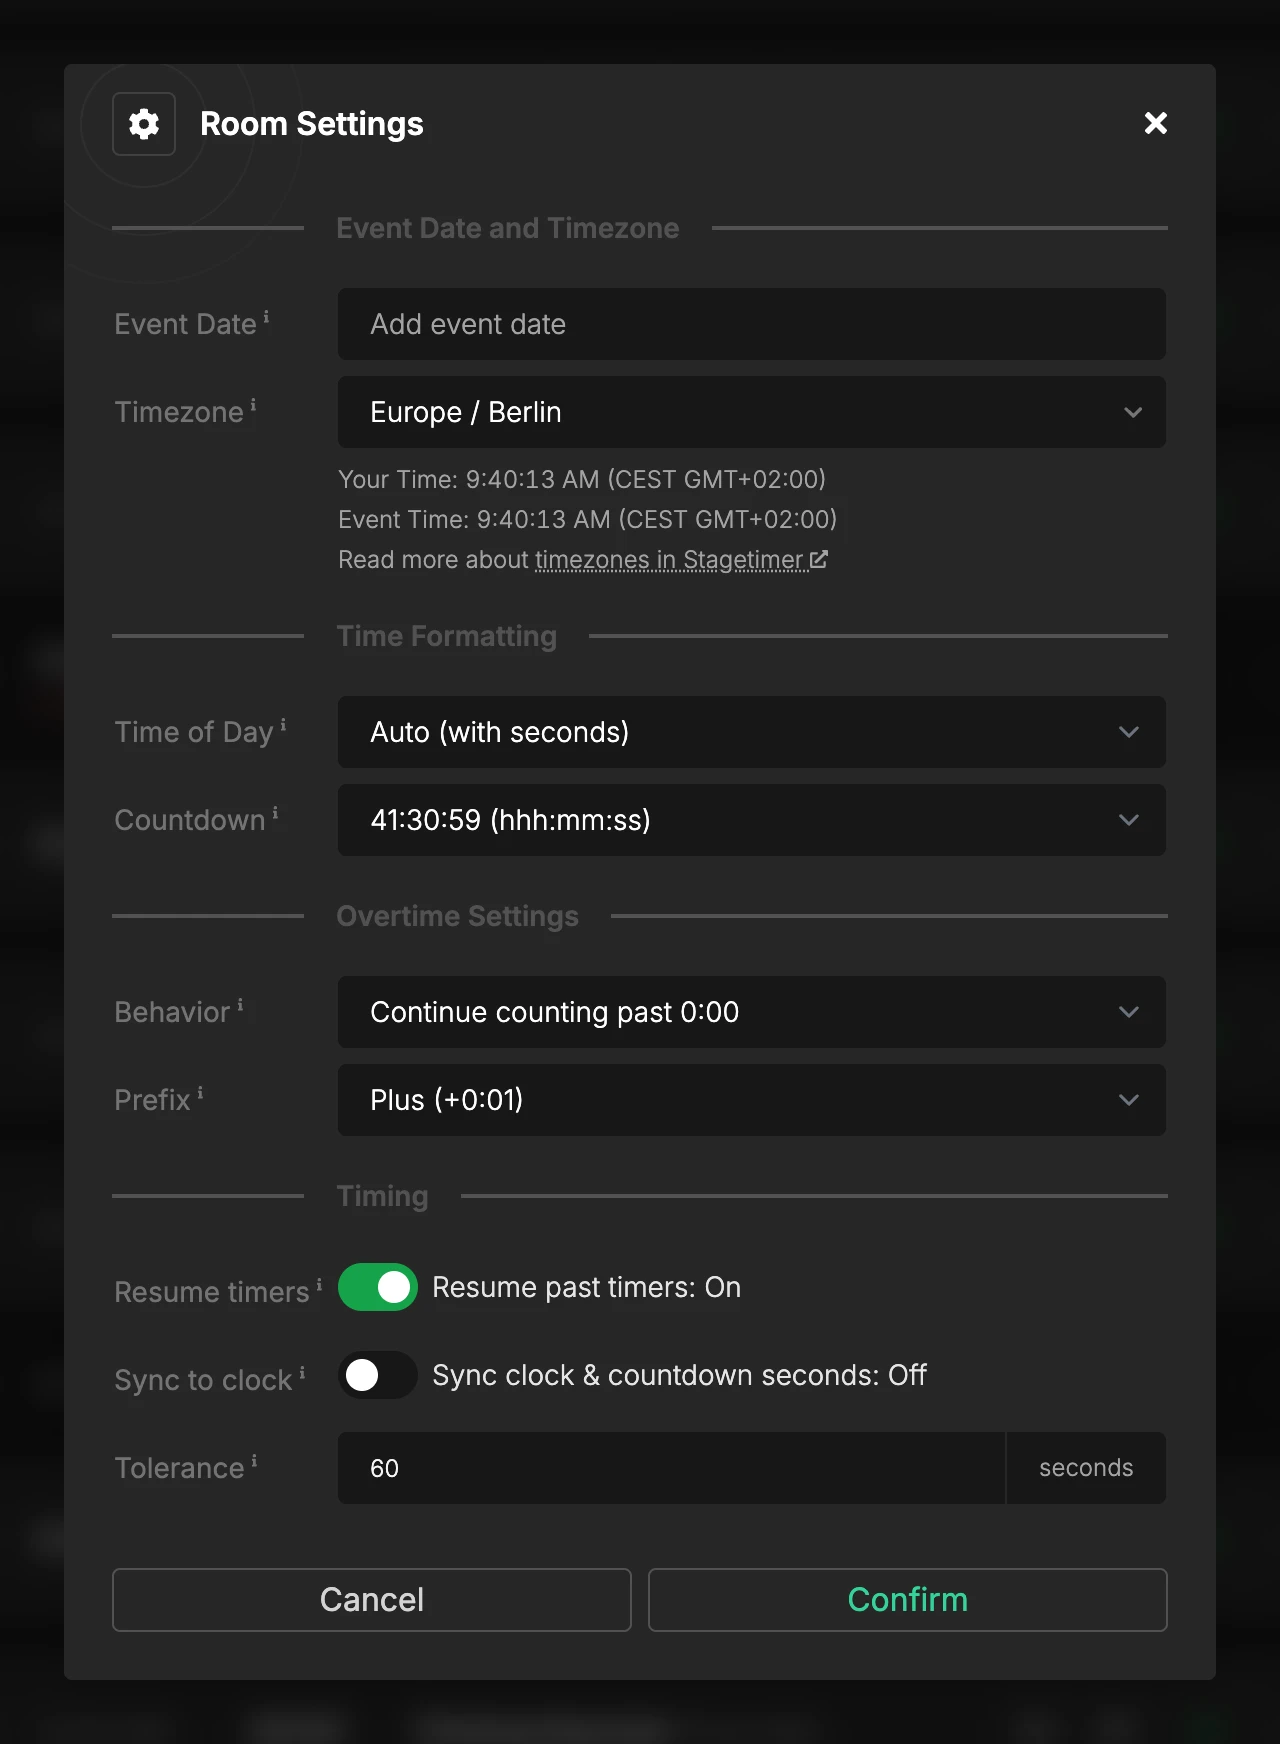
You can access these room-wide settings by going to the “Room” menu and selecting “Settings”. These settings affect how all timers in your room display time and handle overtime, and serve as the default for all outputs.
The same dialog also holds three timing settings. Tolerance decides how far off schedule your show can run before Stagetimer calls it late.
Resume timers makes a timer that already ran pick up where it stopped instead of restarting from the top. It’s off by default and unavailable in classic view. The third is Sync to clock.
Settings hierarchy: Room Settings are the base layer. For outputs (Viewer, Agenda, Moderator, Custom), these can be overridden via Link Options when generating a link, and further overridden per-element in Custom Outputs. Element settings take highest precedence, followed by link options, then room settings.
Countdown Formats
Choose how your countdown timers display time:
1:17:30:59 (d:hh:mm:ss)1:17:30:59.5 (d:hh:mm:ss.S)41:30:59 (hhh:mm:ss)41:30:59.5 (hhh:mm:ss.S)42 (hours only)230:59 (mmm:ss)230:59.5 (mmm:ss:S)231 (minutes only)92 (seconds only)92.5 (sss:S)2d1d 18h1d 17h 30m1d 17h 30m 59s41h 30m 59s42h230m 59s231m92s
The single-unit formats (hours only, minutes only, seconds only) round the
remainder up, so the number shown is the time remaining at most: with 4:59
left, a minutes-only display shows 5 and switches to 4 at exactly 4:00.
Time of Day Formats
For the time of day (clock), you can choose one of these formats. This is the room default; individual output elements can override this in their settings.
Use browser setting6:59:36 (24h)6:59 (24h)06:59:36 (24h, leading zero)06:59 (24h, leading zero)6:59:36 PM6:59 PM6:59:36 (12h w/o AM/PM)6:59 (12h w/o AM/PM)
The leading-zero variants pad hours below 10, so 06:59:36 lines up with
15:59:36.
Overtime Settings
When timers go past 0:00, you can control how the overtime is displayed:
Behavior: Choose what happens when your timer reaches zero:
Continue counting past 0:00Stop counting at 0:00
Prefix: If you’ve set the behavior to continue counting, choose how overtime appears:
Plus (+0:01)- Shows overtime as positive time with a plus signMinus (-0:01)- Shows overtime as negative time with a minus sign
Changes take effect when you click “Confirm” and apply to all live connections immediately.
Sync to Clock
Turn it on and a timer you start or resume waits a fraction of a second, so its countdown lands on a whole second and ticks in step with the time of day.
Without it the countdown ticks from the moment you started it, up to a second off the clock. With it the timer starts up to one second after you press the button.
Timezones
Every room has a timezone. A new room takes the timezone of your device.
Everyone sees the room’s timezone, no matter where they are. The timezone popup calls it Event Time and shows Your Time beside it for comparison only.
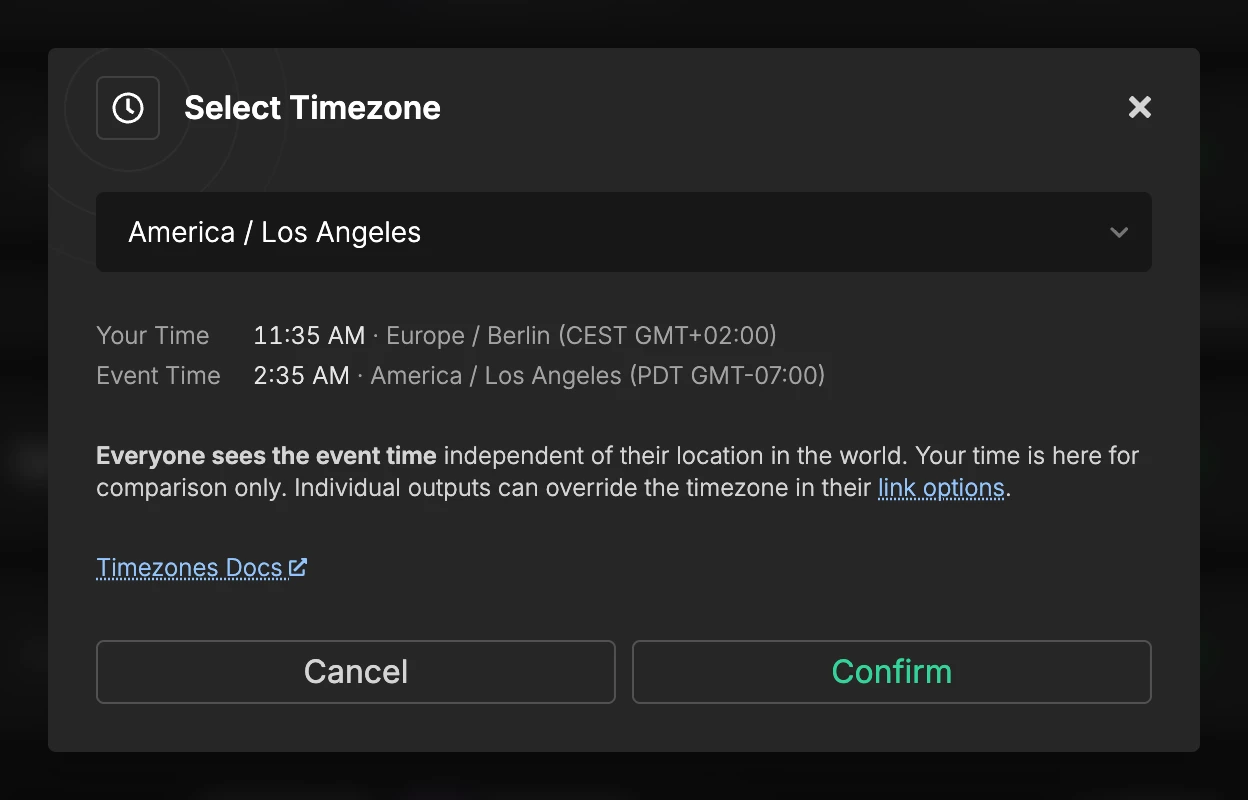
Set a room to Europe / Berlin and a viewer in Los Angeles sees Berlin time. Stagetimer never falls back to the timezone of the device opening the link.
Change it in Room Settings or by clicking the timezone under the transport controls, shown like “America / Los Angeles (PST)”. Timezones are named by continent and city, not “Pacific Time”; the chooser shows the colloquial name, abbreviation and GMT offset beside each. Daylight saving changes shift all times by one hour.
Link Options override the timezone per output, and Custom Outputs per element.
Wrap-up Times & Actions
Wrap-up times are the yellow and red parts at the end of the progress bar. You set them per timer in the timer settings (the cog icon on a timer row). Yellow is the warning, red is the last stretch, and 0:00 is the end.
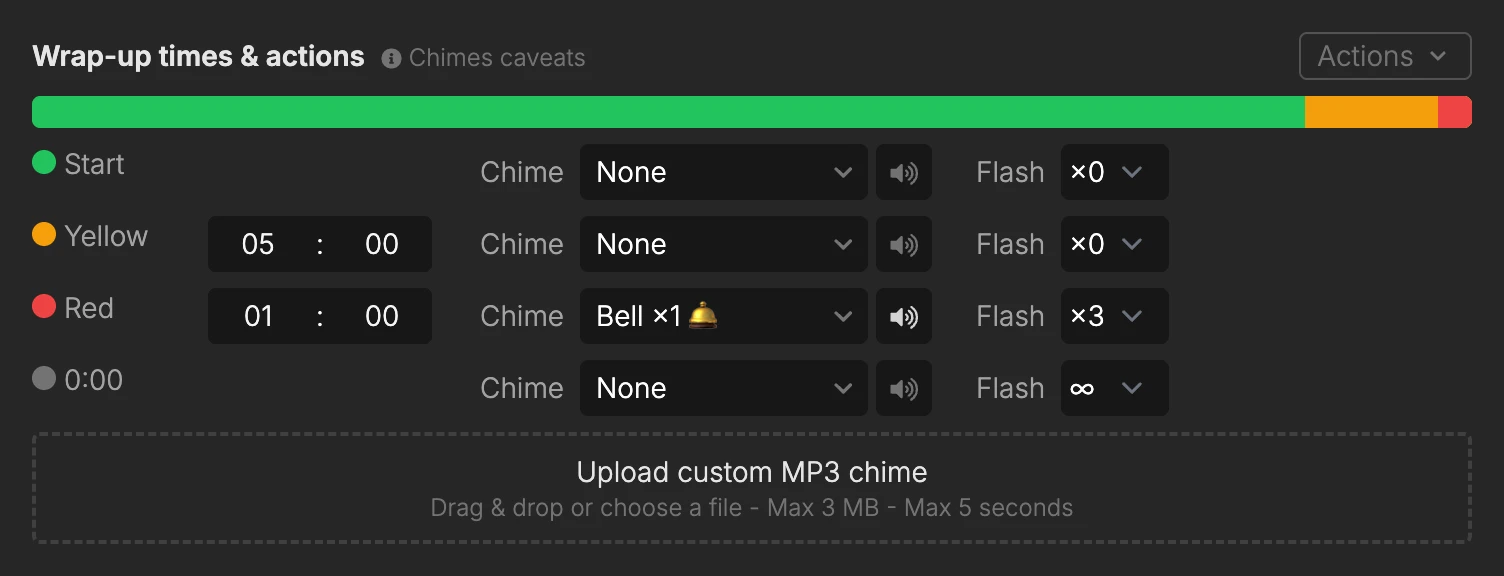
Each phase can trigger an action:
- Chime: Play a sound when the timer starts, turns yellow, turns red or reaches 0:00. Pick from the built-in list (bells, dings, beeps, a gong, a ship horn, plain 440Hz and 880Hz tones and more). The speaker button next to the list plays a preview.
- Flash: Flash the timer 1, 2 or 3 times, or keep flashing (∞) until the timer stops. A common setup is 3 flashes at red and endless flashing past 0:00.
Chimes and flashes require a paid plan. The times themselves are available on every plan.
Custom Chimes
Upload your own MP3 to the box below the wrap-up rows, or drag a file onto it. Give it a name and it appears under “Custom chimes” at the top of every chime list in the room. A file can be up to 3 MB and 5 seconds long, and a room holds up to 50 custom chimes.
Custom chimes belong to the room. They travel with it when you duplicate the room or export it as JSON and import it again. Deleting the room deletes its chimes.
Actions Menu
The “Actions” button in the top right of the wrap-up section applies one timer’s setup to the whole rundown:
Set wrap-up times to 0:00: Clears yellow and red for this timer.Apply wrap-up times to all timers: Copies this timer’s yellow and red times to every timer in the room.Apply chime settings to all timers: Copies this timer’s four chime choices to every timer.Apply flash settings to all timers: Copies this timer’s four flash settings to every timer.
Where Chimes Play
Chimes play on the Controller and on every output that shows the timer, so the same bell sounds in the control room and on the confidence monitor. A mute button appears in the header of the Controller, Viewer and Agenda as soon as any timer in the room has a chime. Mute is per browser: muting the Controller does not silence the stage.
Browsers block audio until the page has been clicked once. If a chime stays silent on an output, click anywhere on that page once. If you route an output through a video mixer, see Audio chimes with OBS Studio and the ATEM guide: the sound comes from the computer, not from the HDMI signal.
Timer Text & Labels
Title, Speaker & Notes
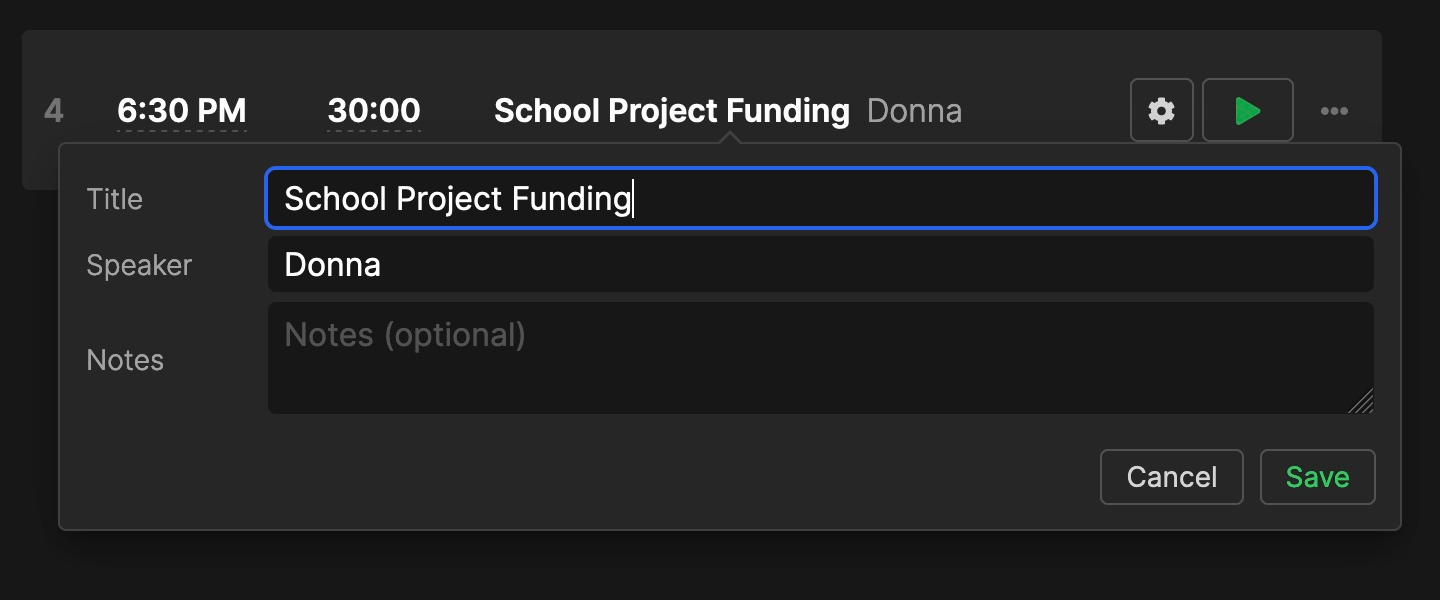
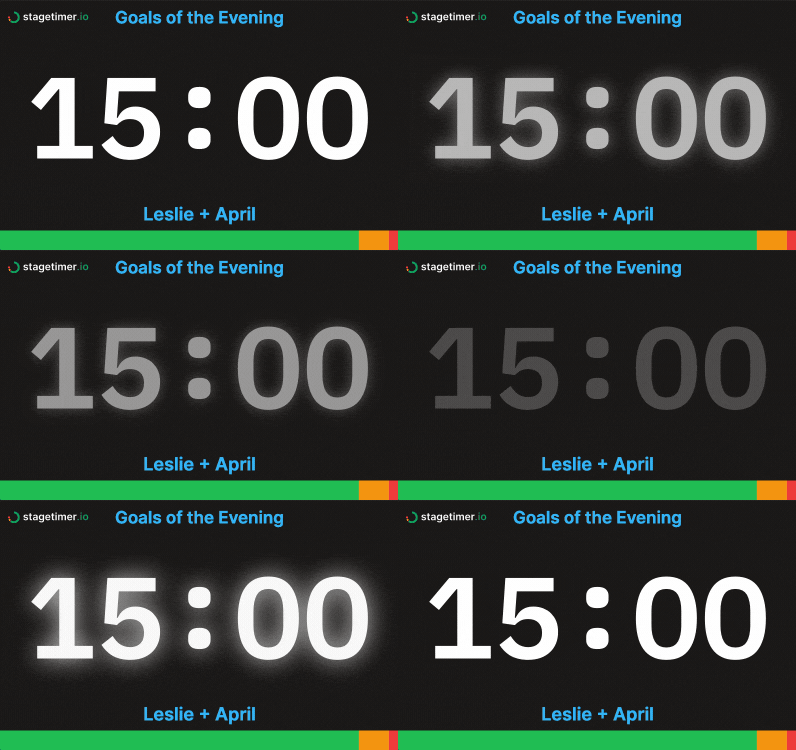
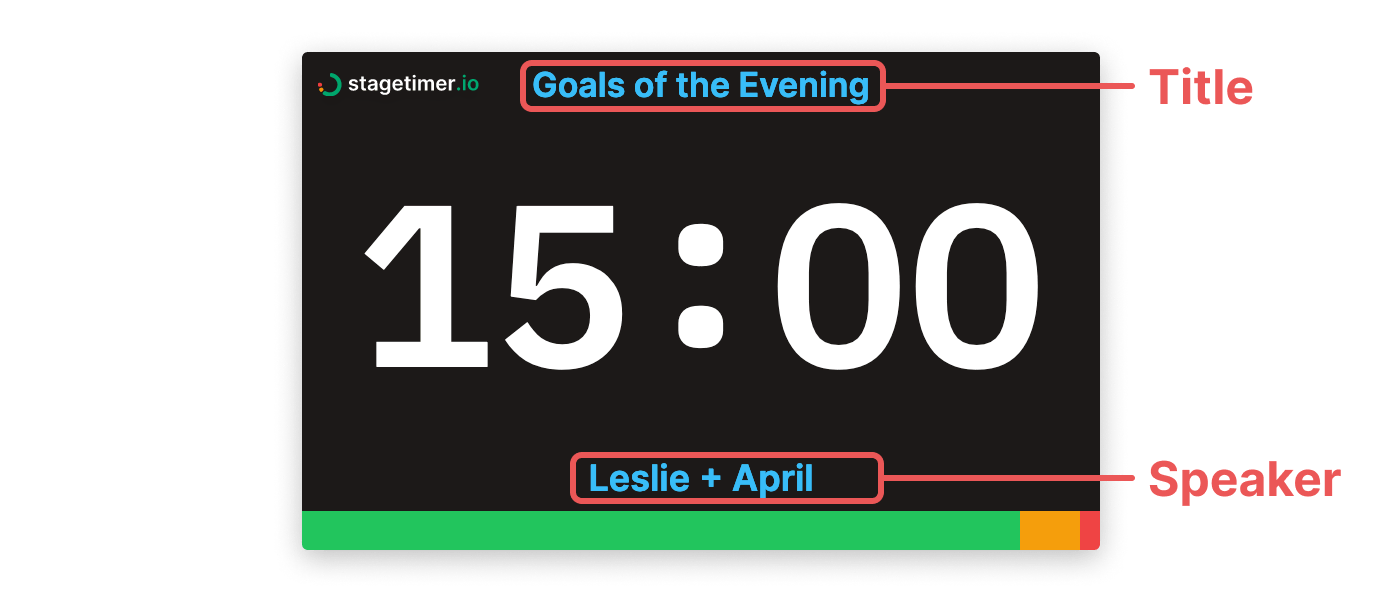
By default, the current title appears at the top of the Viewer (aka confidence monitor) and the current speaker is shown at the bottom. The speaker field doesn’t need to contain the talent name - it can be used for other information. Premium users can customize the output layout to remove either text element or change what it displays.
Notes are primarily for the show caller. Premium users can display notes on the agenda or moderator page via element settings, or show them on the Viewer by adding a text element with the $CURRENT_NOTES placeholder. See Text Element Placeholders for details.
Labels
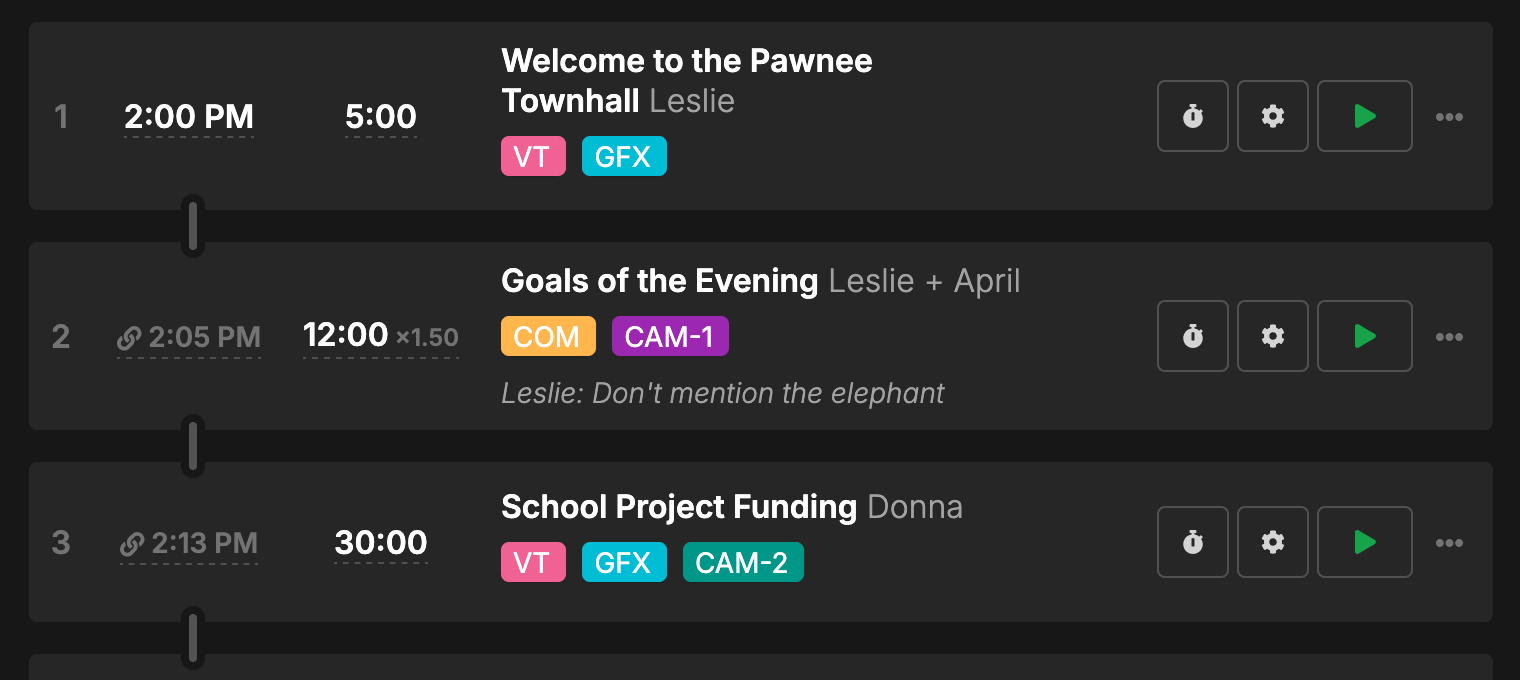
Labels are colored tags on a timer, like VT, GFX or CAM.
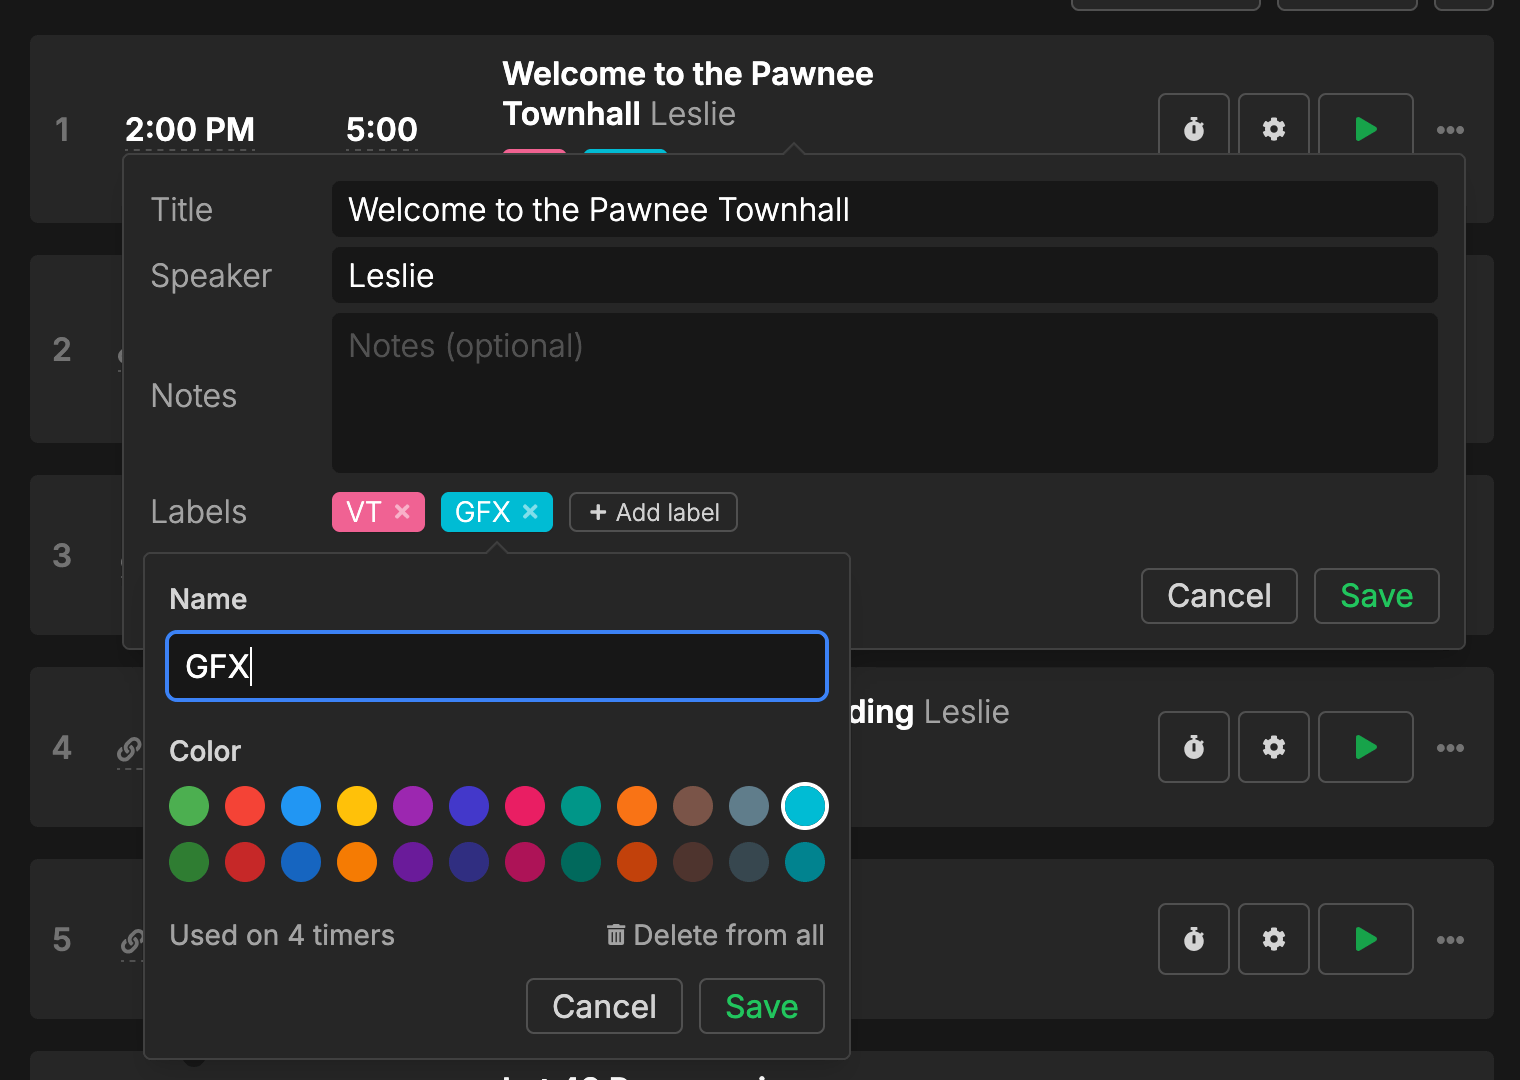
To add a label, open the timer’s title/speaker editing area and click “Add label”. You can choose from 24 color options and set a custom name. Labels are managed at the room level: editing a label’s name or color in the label picker updates it on every timer that uses it, and deleting a label removes it from all timers.
Labels show on the Agenda output and in any text element that uses the $CURRENT_LABELS or $NEXT_LABELS placeholder.
Footnotes
-
Image credit: Thanks to James McMaster, CEO of Huel, for sharing this great example of Stagetimer in action on LinkedIn. ↩