Controller Page Documentation
The controller page is the main interface for every room. It provides complete access to add and run timers, create messages, share output links and manage all live connections. Designed for production staff and collaborators who need full control over the event timing.
Contents
- Room Title
- Output Links
- Timer Preview
- Transport Controls
- Live Connections
- Timers
- Select Mode & Bulk Actions
- Blackout and Flash
- Room Menu
- User Menu
- Messages
- Room Progress
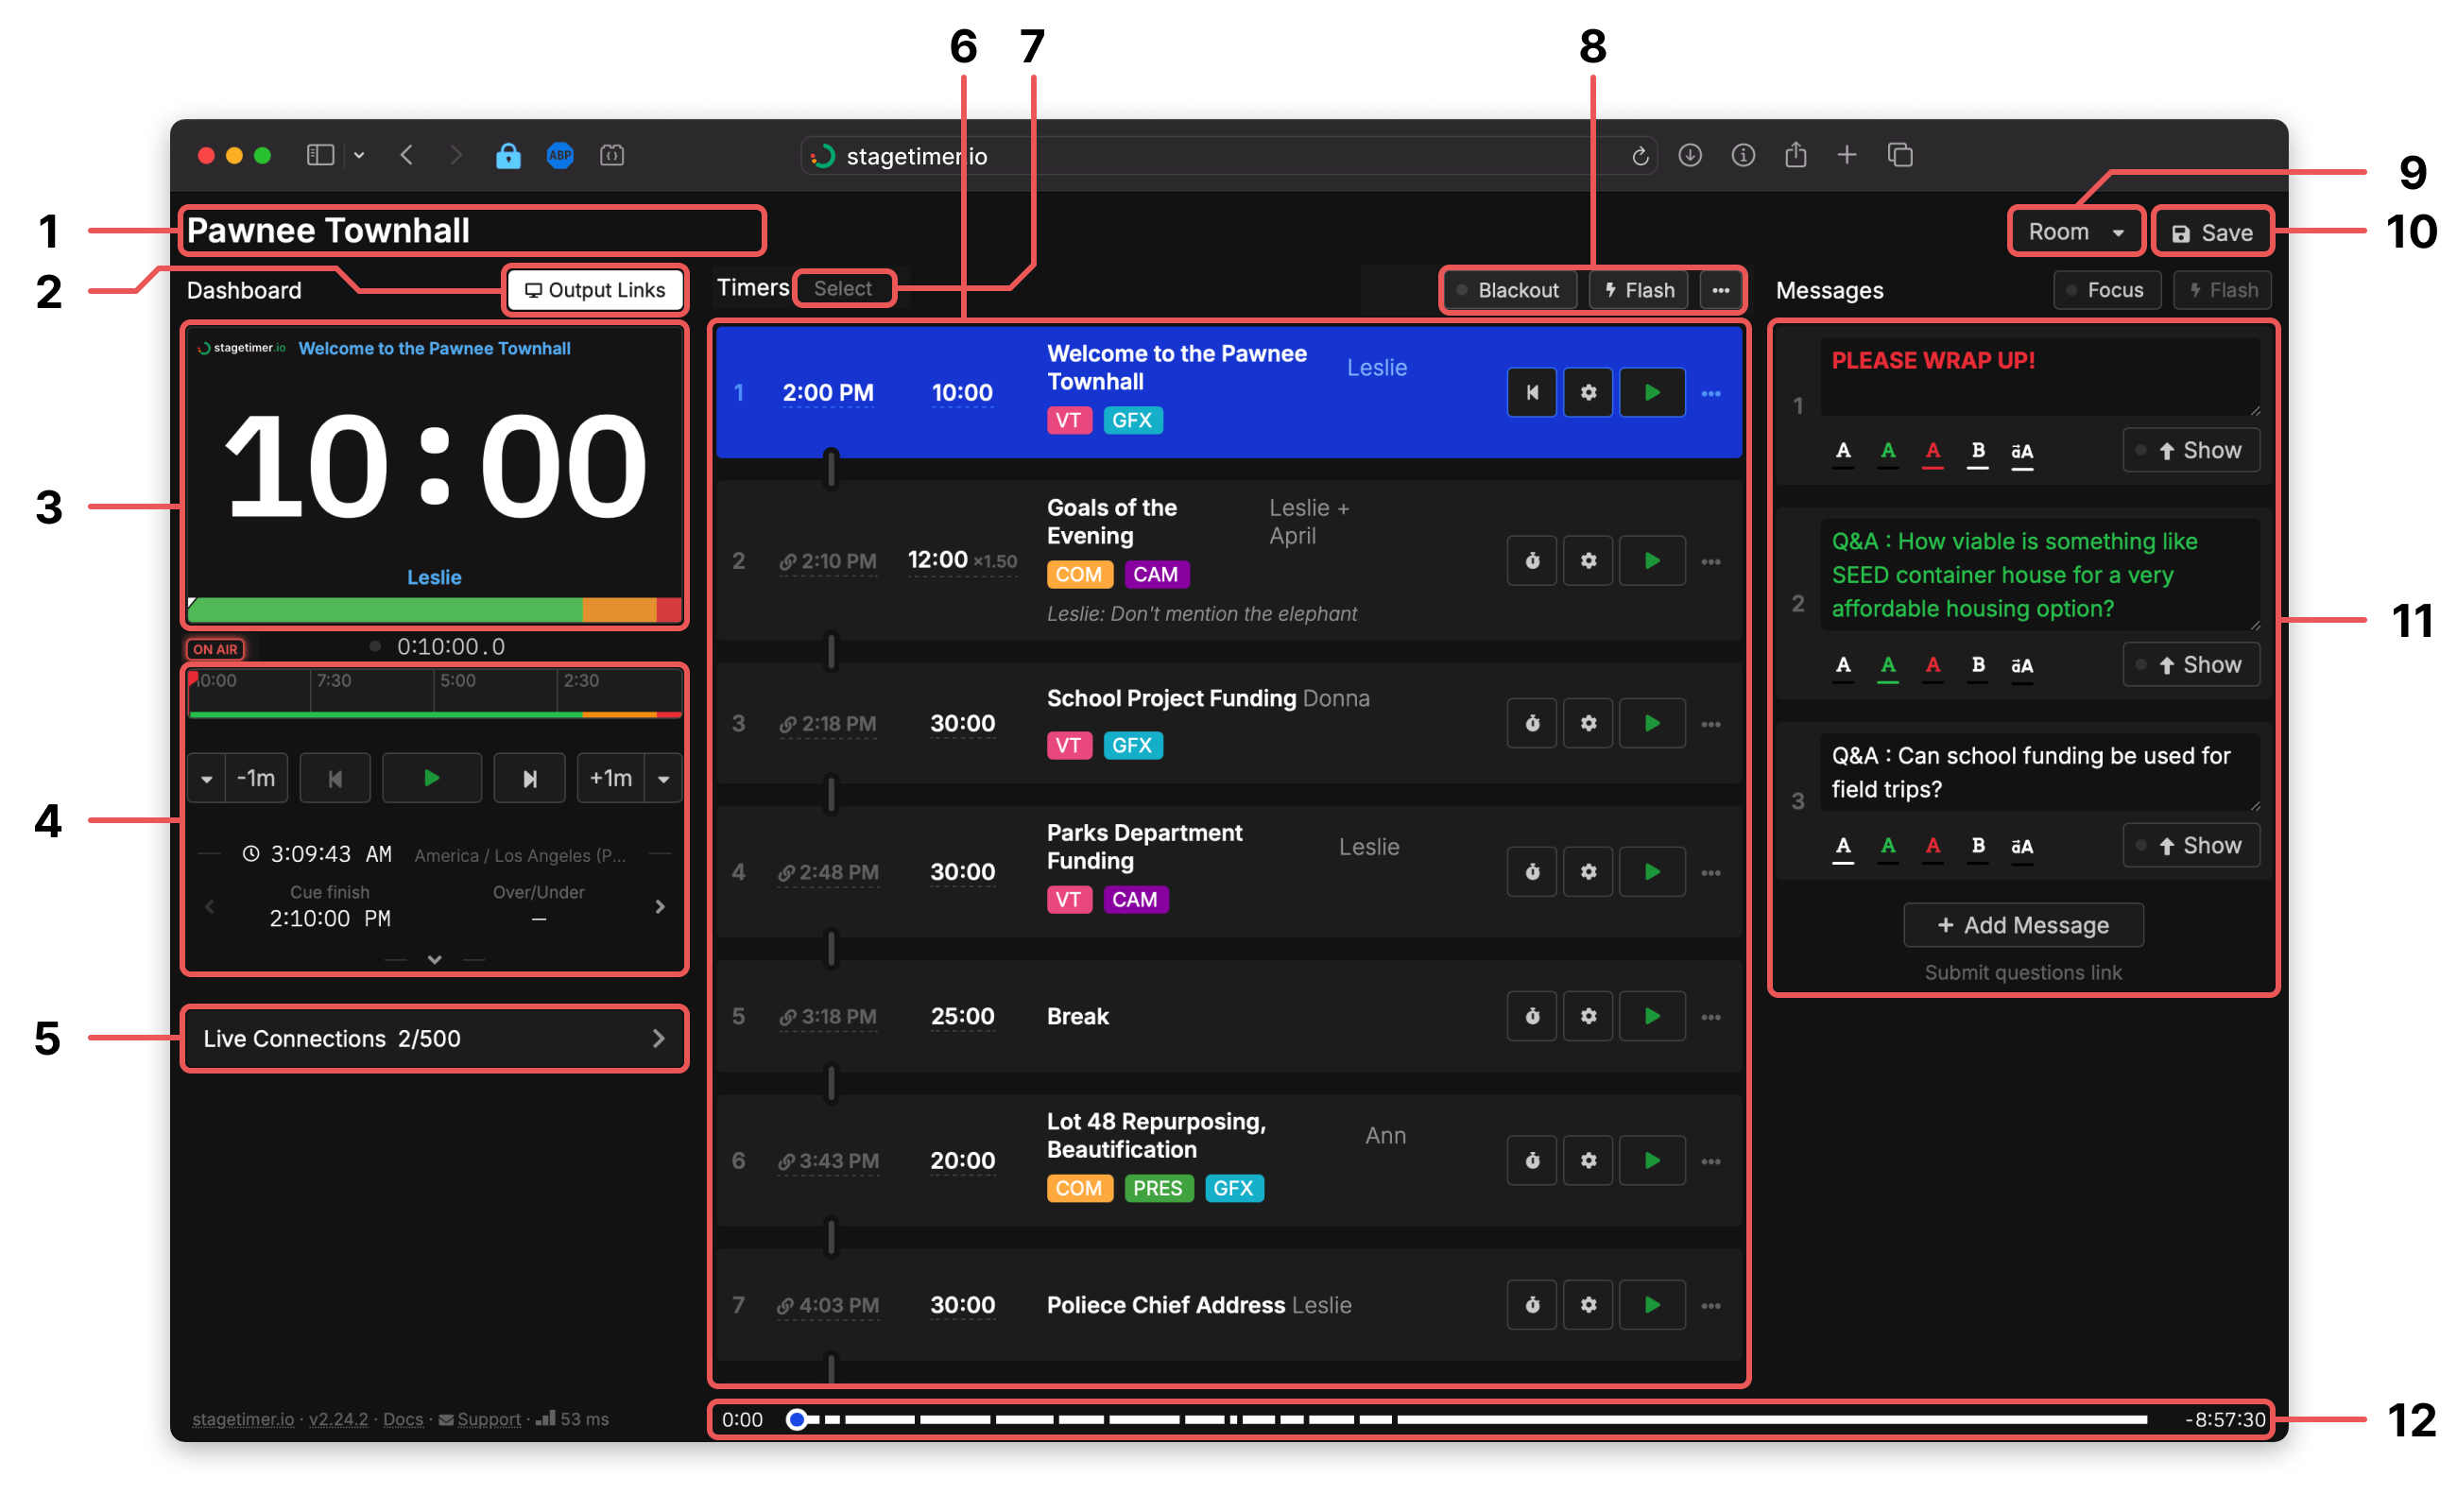
1. Room Title

The room title, displayed in the top-left corner of the screen, appears on the controller, agenda, and moderator and submit question pages. While it doesn't have to be unique, we recommend using a short and descriptive title.
2. Output Links
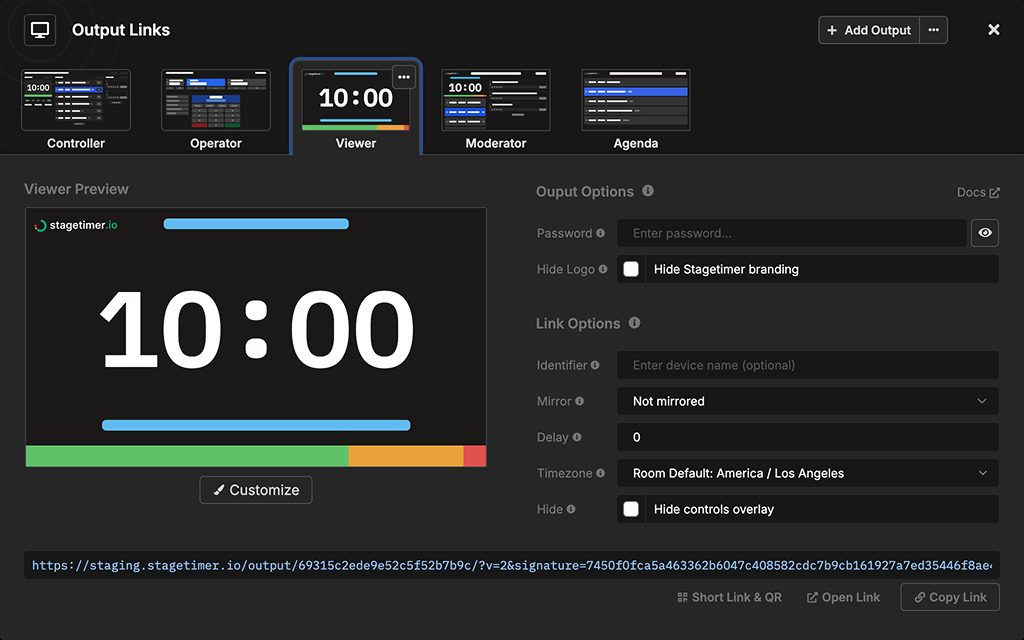
Output Links lets you create and share multiple views of your room with different people. Each link syncs in real-time with your Controller.
You can open the same link on multiple devices - each one syncs independently and counts toward your plan's live connection limit. Use identifiers to distinguish devices (e.g., "Stage Left", "Backstage").
The following default outputs are available:
- Viewer - Fullscreen timer display (confidence monitor) for presenters or broadcast overlays
- Controller - Full control for production staff
- Operator - Simplified controls for show callers
- Agenda - Event schedule for staff and audience
- Moderator - Message management for stage managers
Premium users can fully customize layouts with the drag-and-drop editor. Paid plans can also password-protect outputs and hide the Stagetimer logo. See the pricing page for plan details.
Learn more about Output Links →
3. Timer Preview
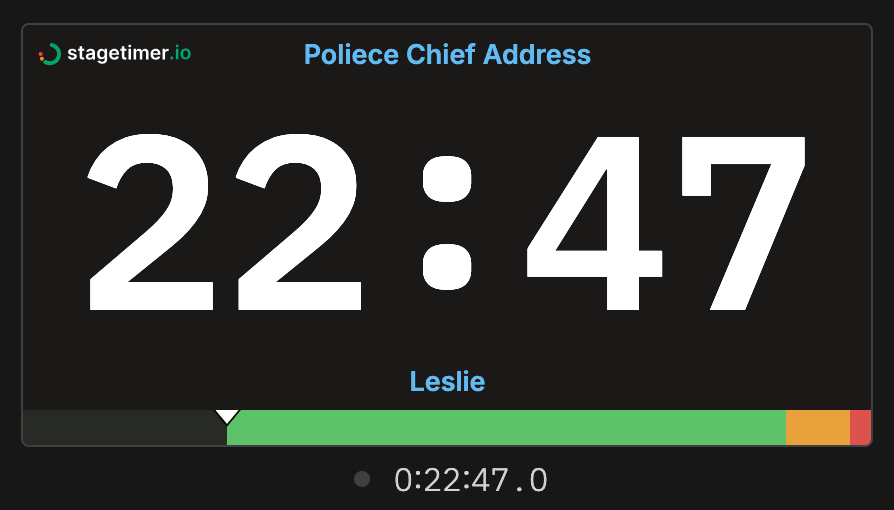
The timer preview shows what the talent sees on their screen. Share the "Viewer Link" with your talent or open it on a separate screen. The timer is lightweight and can easily run on devices like a Raspberry Pi.
Below the preview is a small countdown monitor. This monitor always shows a countdown including fractional seconds. The small indicator is red when the timer is running.
4. Transport Controls
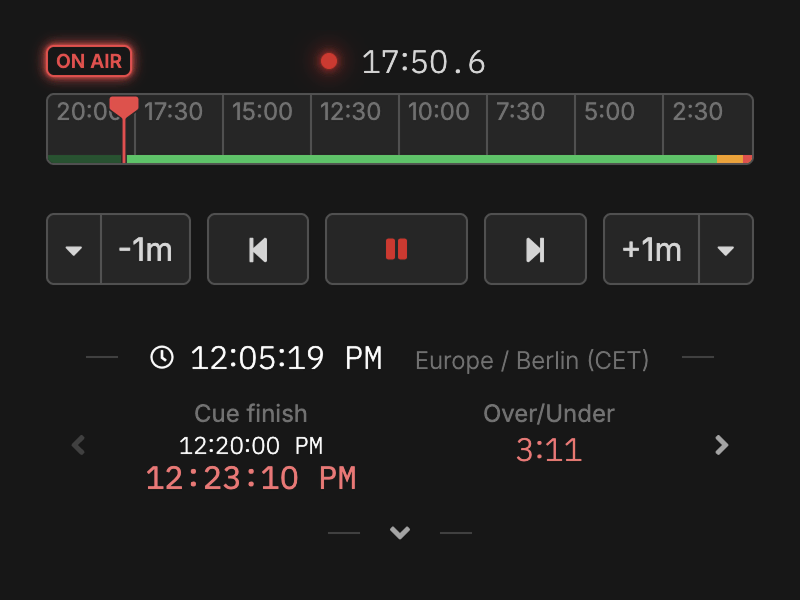
The transport controls are the central place to control the timer and rundown. Here you can start, stop, reset and advance the timer.
The timeline operates similarly to video editing software, allowing you to click and drag the playhead to move forward or backward in time.
Use the "-1m" and "+1m" buttons to adjust a running timer by adding or subtracting a minute. A dropdown menu offers finer control, ranging from adding 10 minutes to subtracting a single second.
Timestamps show the current time of day, the start time of the current cue, and its end time. The arrow buttons next to the timestamps let you jump to the start or end of the entire event.
The transport area also contains the On Air toggle — a small button that controls the room's on-air state. When active it lights up red. Use it to signal to outputs that you're live. See the On Air element for details on how outputs respond to this toggle.
5. Live Connections

A live connection is any browser window actively viewing one of your outputs - whether it's a Viewer on a stage monitor, an Agenda on a lobby screen, or a Controller on your laptop. Each open window counts as one connection toward your plan's limit. When someone closes a tab or navigates away, that connection is freed.
Click the connection count to open a popup showing all live connections grouped by output. Use identifiers (e.g., "Stage Left", "Backstage", "Green Room") set via Link Options to track which displays are connected. Each connection also shows its transport (WebSocket or polling) and how long it's been connected. The three-dot menu lets you rename, identify (flash the screen), force-reload, or disconnect a single connection.
To act on everyone at once, use the buttons at the bottom of the popup: Force reload all refreshes every connected device (handy after a styling or layout change), and Kick all disconnects them. Both spare the device you're controlling from, so you won't kick or reload yourself.
6. Timers
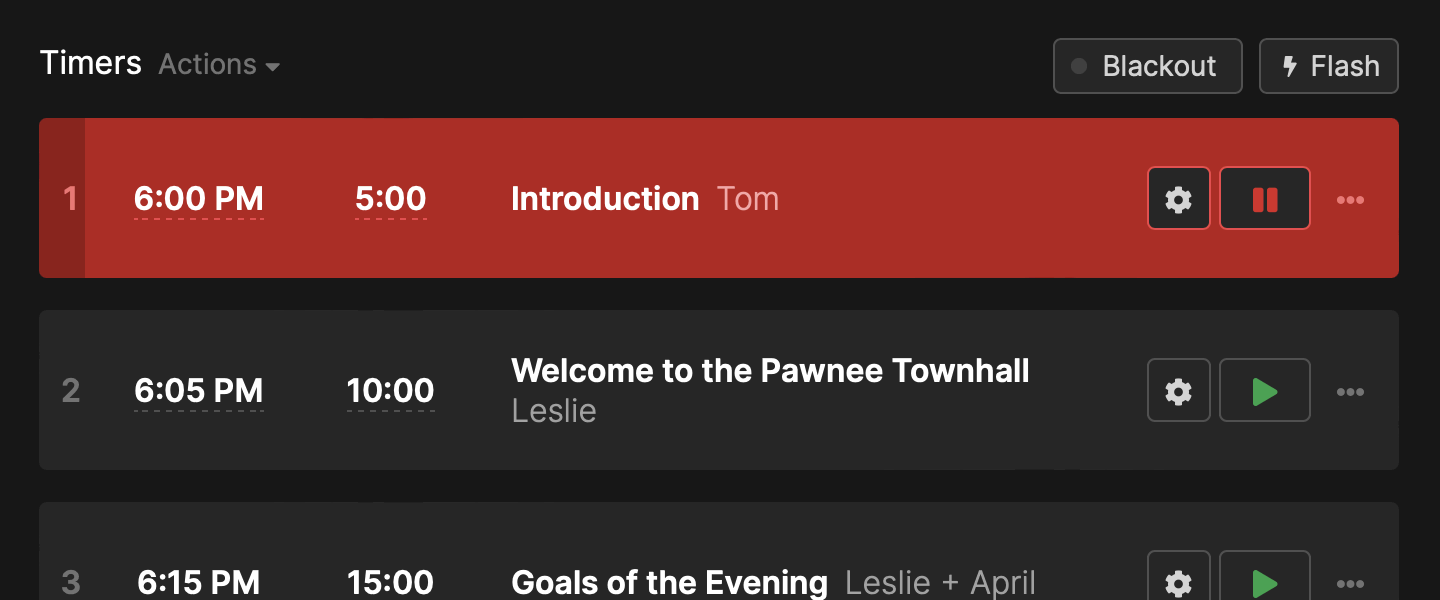
Timers are the primary element of the controller page and the heart of Stagetimer. You can add timers by clicking the "Add timer" button. Each timer has a title, an optional start time and a duration. The settings popup also gives you further options for wrap-up actions.
The list allows you to edit, delete and duplicate timers. You can also drag and drop timers to reorder them. Use the flash button to briefly flash the viewer screen to get attention.
Start time

The start time is an optional setting. You can set it to a specific time or to a specific day. By default, the start time is always relative to the current time of day.
This setting comes with three triggers:
Manual: The start time is just a reference and has no function otherwise. You need to start the timer manually.Linked: The timer starts automatically right when the previous timer finishes, regardless of the start time you entered.Scheduled: The timer starts automatically at the specified time (and optionally date).
Duration
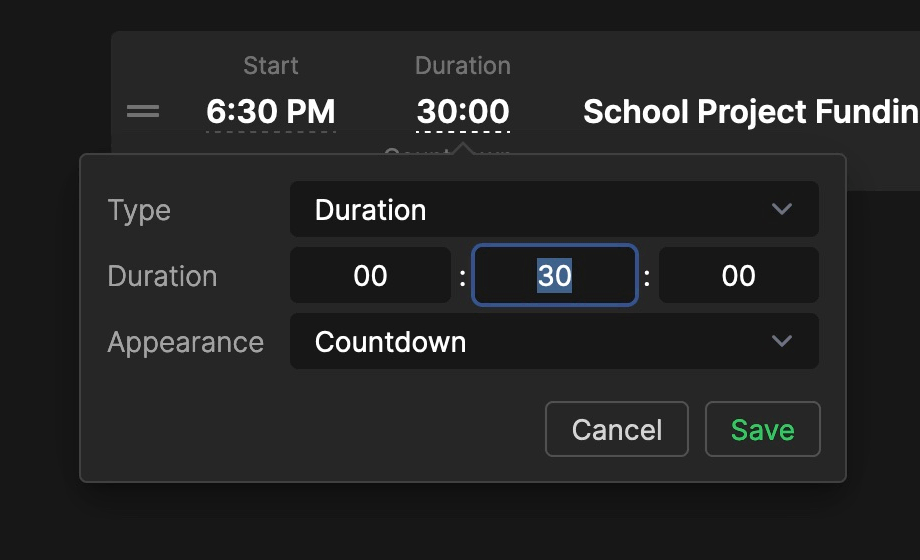
The duration is the most important setting for the timer. The duration is always required. Instead of a fixed duration you also have the option to define a finish time. In this case the duration is calculated automatically so the timer finishes at the given time.
Here you can also choose the timer appearance. You have the choice between "Countdown", "Count Up", "Time of Day" or a combination of these, and "Hidden". This defines how the timer is represented in the viewer window.
Title, Speaker and Notes
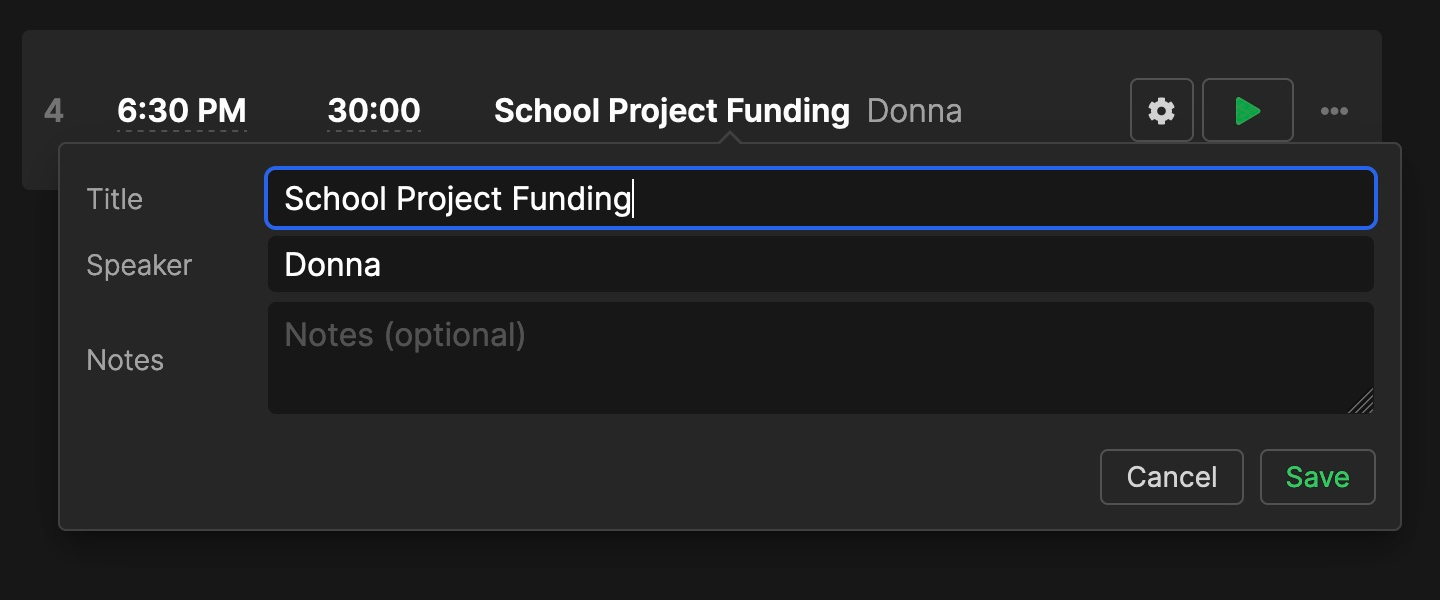
The title, speaker and notes are optional. You can leave them empty if you don't want to use any of them. By default, the title is shown at the top of the Viewer Output and the speaker at the bottom. The speaker field doesn't need to contain the talent name - it can be used for other information. Premium users can customize the output layout to remove either text element or change what it displays. The notes are a place to write internal info. Premium users can display notes on the agenda or moderator page via element settings, or show them on the Viewer by adding a text element with the $CURRENT_NOTES placeholder. See Text Element Placeholders for details.
Timers can also have colored labels (e.g. VT, GFX, COM) for visual organization. See Timers — Labels for details.
Wrap-up Times & Actions
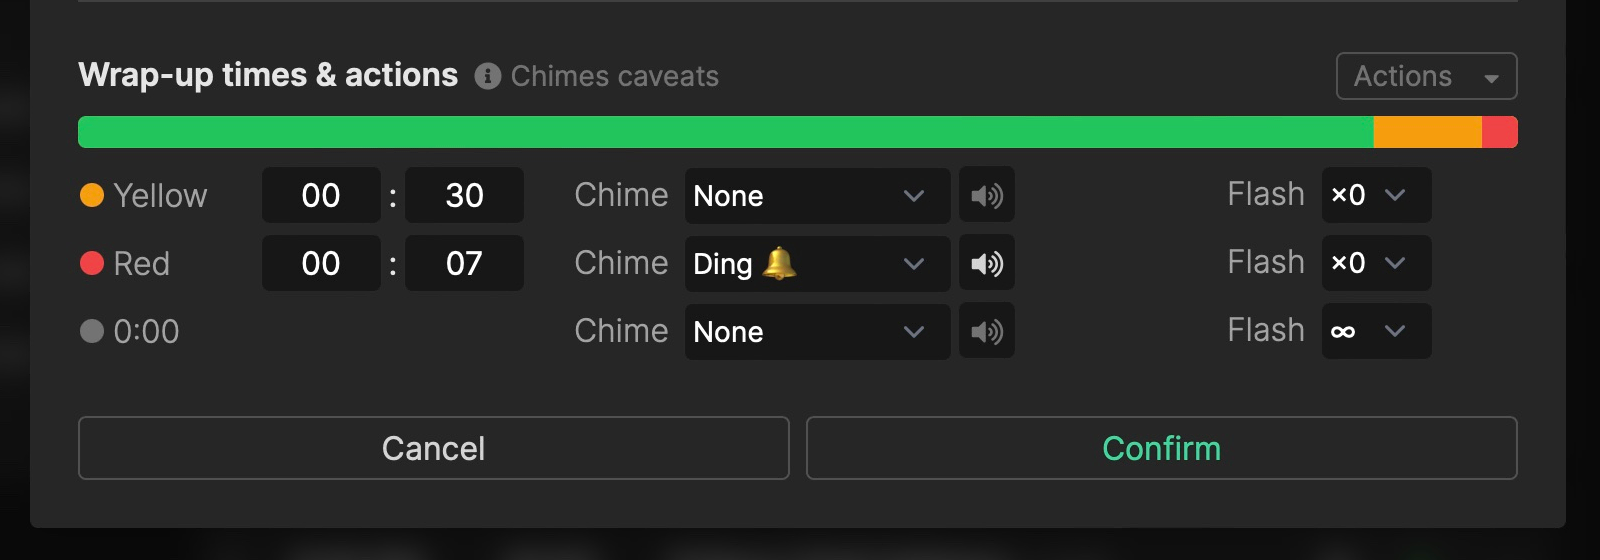
The wrap-up time setting defines when the timer turns yellow and red to warn the speaker that they approach the end. This section is found by clicking on the gear icon. The wrap-up actions define what happens when the timer reaches the red and yellow stages, or zero. You can use chimes, and let the timer flash, to reinforce to the talent that they are about to finish. See Wrap-up Times & Actions for details.
7. Select Mode & Bulk Actions
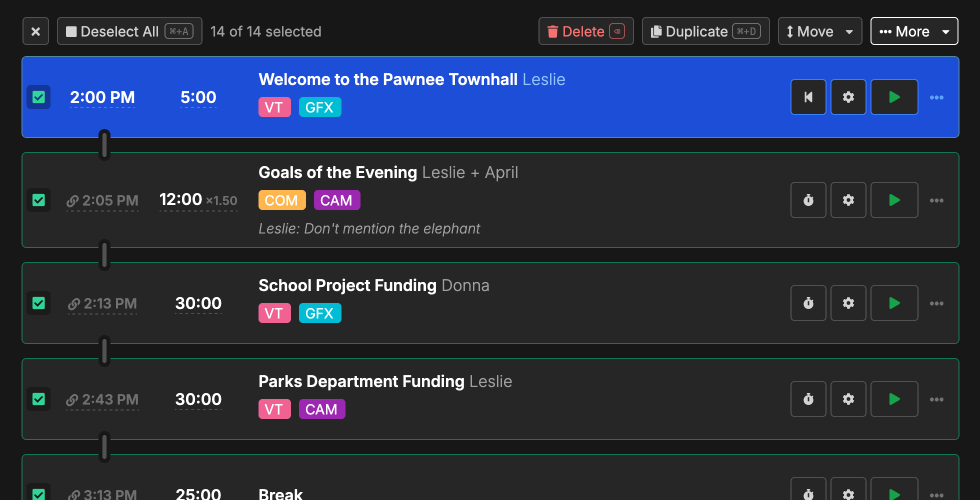
Select mode lets you act on multiple timers at once. Enter it by clicking the "Select" button above the timer list or by Cmd/Ctrl+clicking any timer.
Selecting timers:
- Click a timer to toggle its selection
- Shift+click to select a range
- Cmd/Ctrl+A to select all
Once you've selected timers, a toolbar appears with these actions:
- Delete (Backspace) — remove selected timers
- Duplicate (Cmd/Ctrl+D) — duplicate selected timers
- Move — move to top, bottom, or after a specific timer
- More dropdown — Link / Unlink selected, Fix times, Clear start times, Timer Appearance
Exit select mode by clicking the × button or pressing Escape.
8. Blackout and Flash
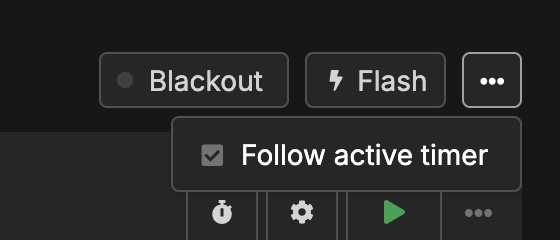
These toggle buttons control viewer behavior across all connected outputs.
The Follow option (auto-scroll to the active timer) is available in the timer section "..." menu.
Blackout
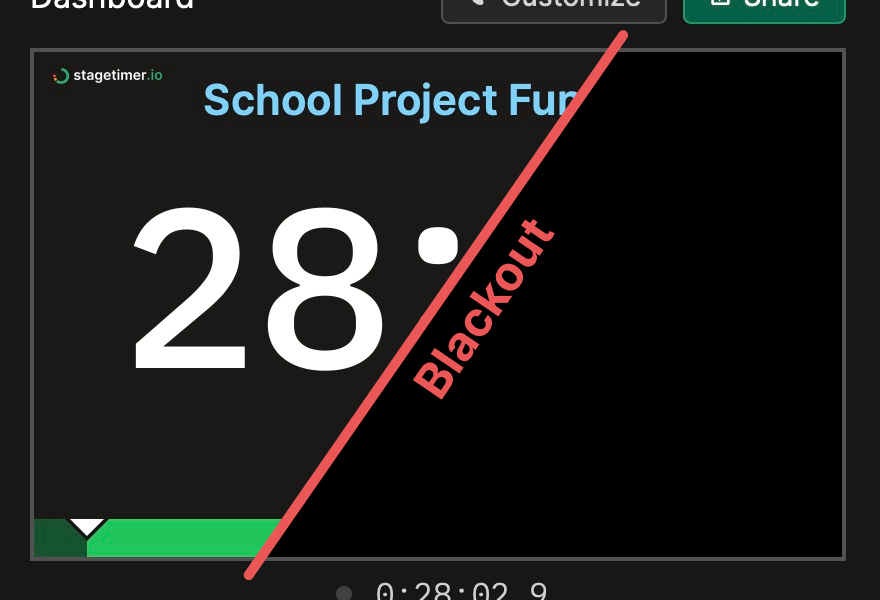
The blackout button switches all viewer outputs to a blackout state. This is useful when capturing the timer with OBS or vMix, or during breaks when you don't want to display anything to the audience.
You can customize what appears during blackout for each output: a solid color, custom image, time of day, or transparent background. This is configured in the output customizer under "Blackout Setting". See the Custom Outputs documentation for details.
Flash
The flash button makes all viewer screens blink several times to grab the presenter's attention. Use this when you need to urgently communicate with talent on stage. Flash can also be triggered automatically via wrap-up actions when a timer reaches certain thresholds.
9. Room Menu
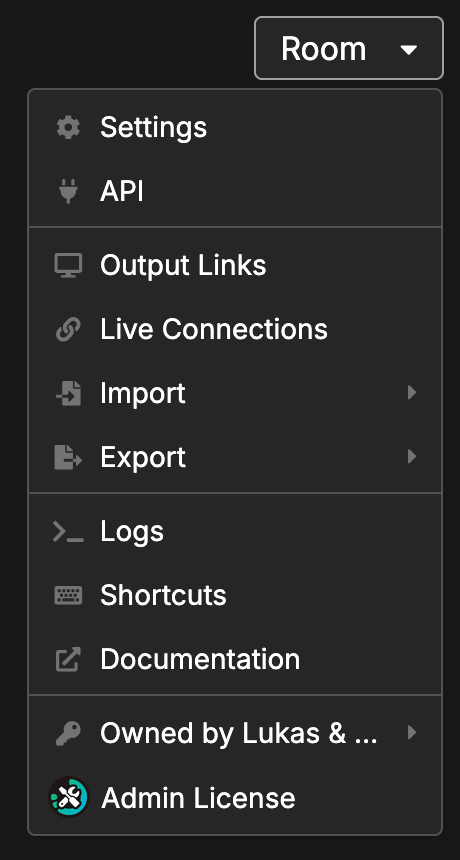
The room menu provides access to room-wide settings, import/export options, and administrative features.
• Settings
Configure room-wide options including timezone, timer display format, and overtime behavior. See Room Settings for all available options.
• API
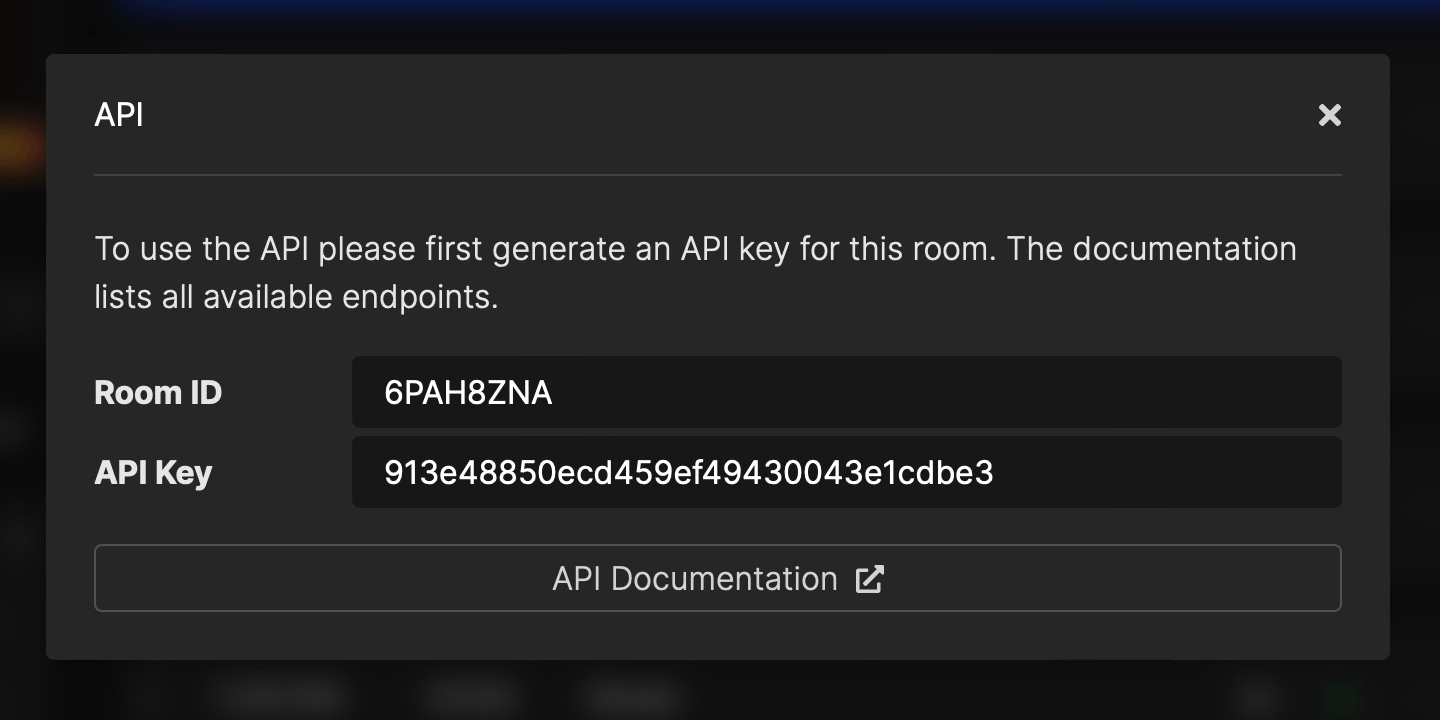
The Stagetimer API provides an easy way to remote control your timer with scripts and tools like Bitfocus Companion or vMix.
See the API documentation for more information.
• Logs
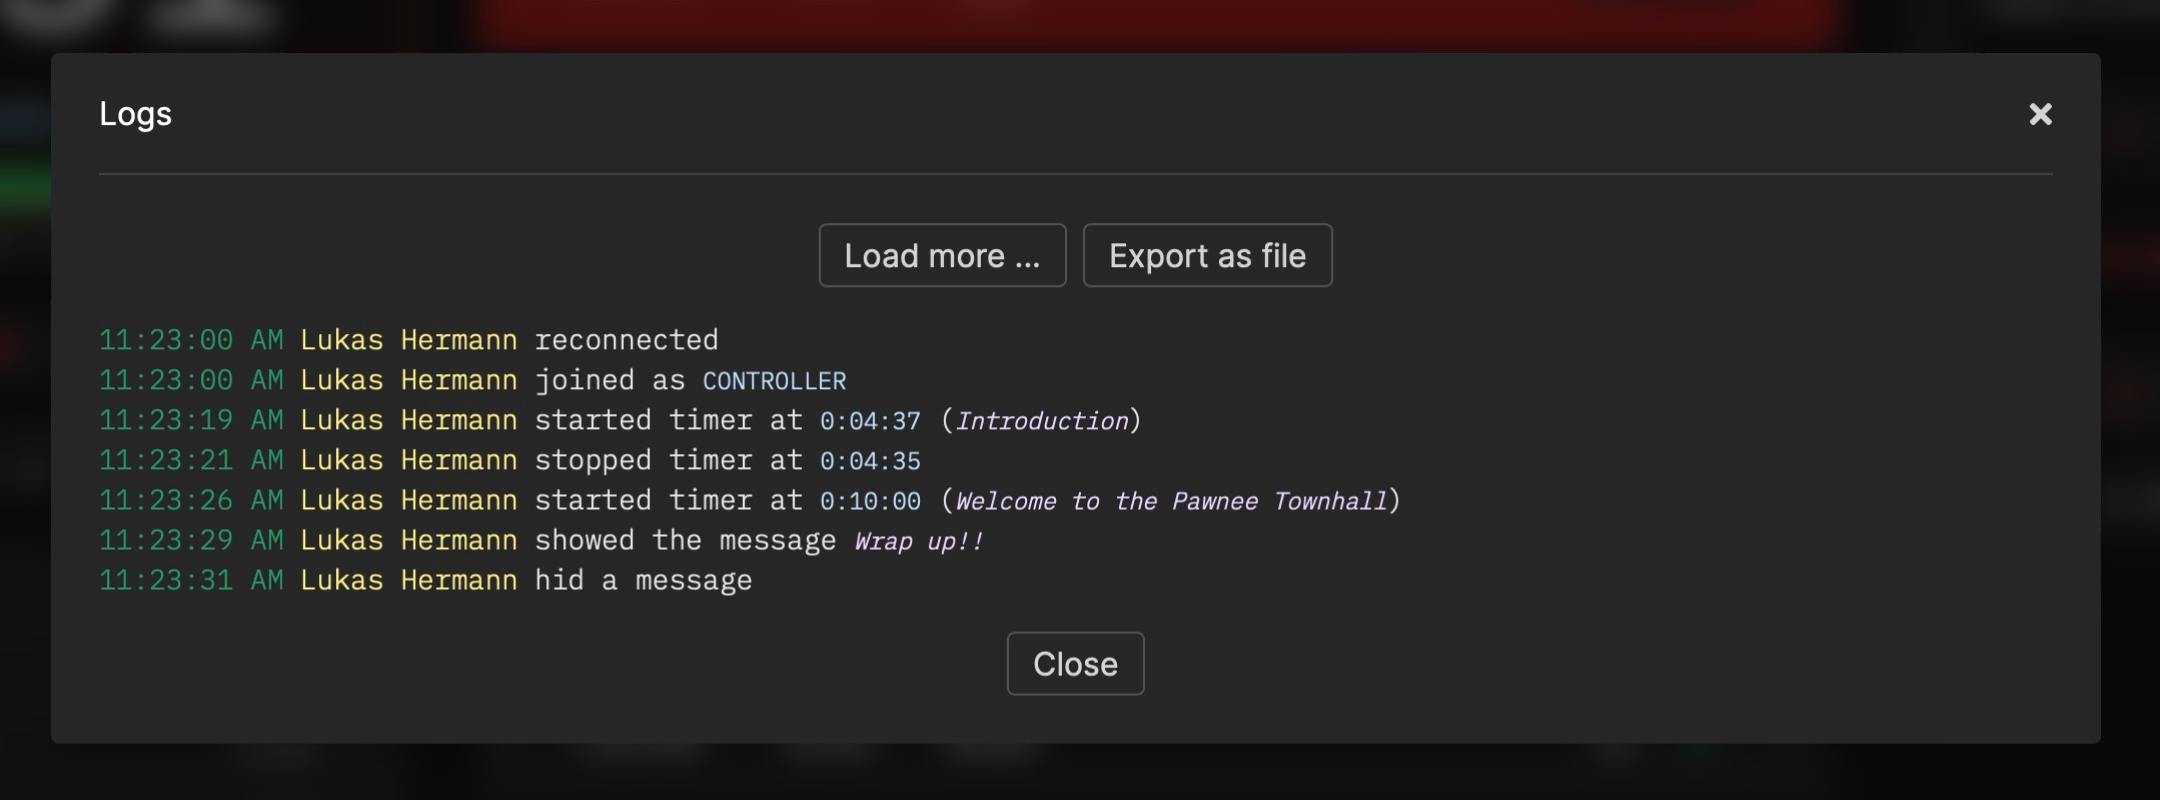
Logs are a great way to track the activity of your room. You can view the logs in the popup, or download them as a text file. Old logs are automatically deleted after a month.
• Import
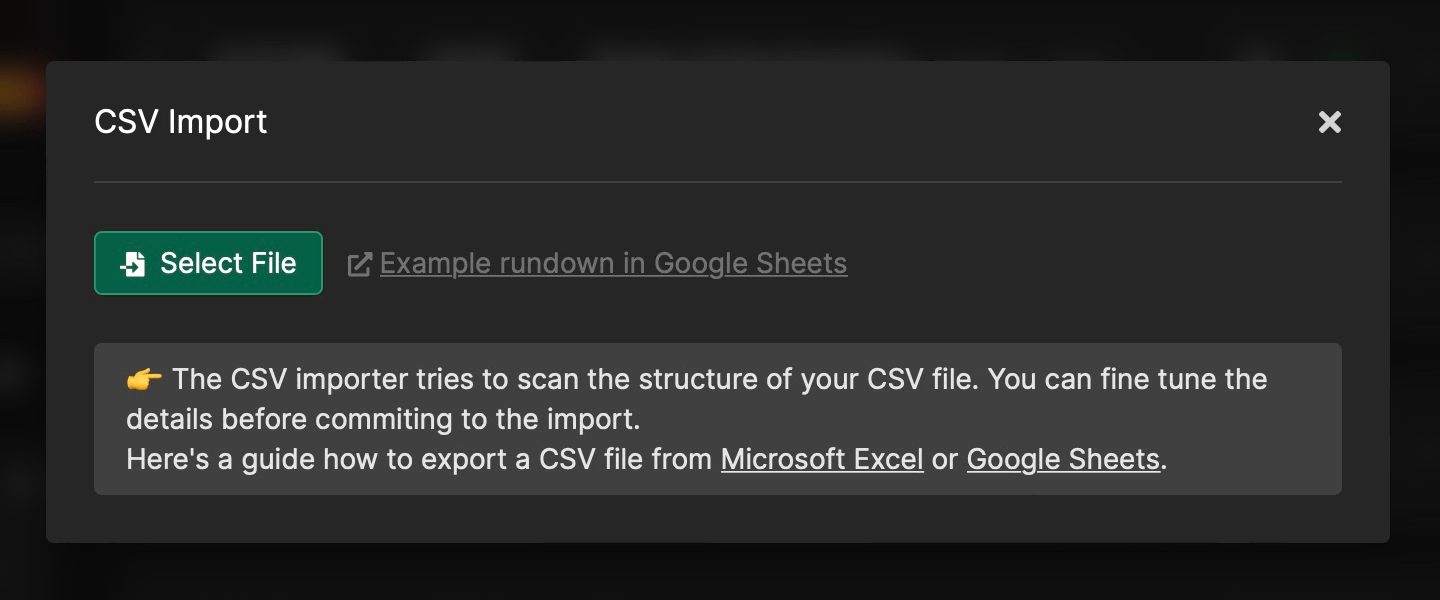
Import timers from a CSV file exported from Microsoft Excel, Google Sheets, or other spreadsheet tools.
The importer scans your CSV structure automatically - you don't need to follow a strict format. It's versatile enough to understand almost any event rundown table. Fine-tune column mappings in the second step before confirming.
- Example event rundown template (Google Sheets)
- Video tutorial showcasing the CSV import
Import is available in licensed rooms.
• Export
Export all timers to a CSV file for backup or editing in spreadsheet software. Export is available in licensed rooms.
• Shortcuts
View all available keyboard shortcuts for controlling timers, navigating the interface, and managing the rundown.
• Ownership & License
View the room's license status and owner. You can claim an unowned room, or move the room to a different team if you belong to multiple teams.
10. User Menu
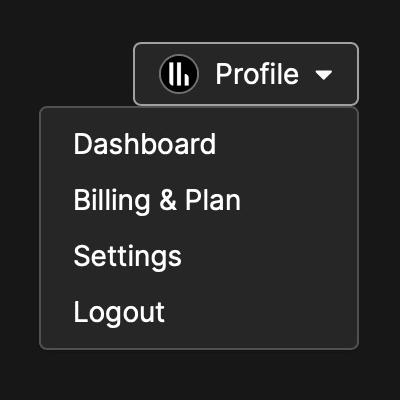
For logged-in users, this dropdown gives quick access to the dashboard, account settings, and other profile pages.
Anonymous users will see a "Save" button instead, which prompts them to create an account or log in to save their room and access it later.
11. Messages
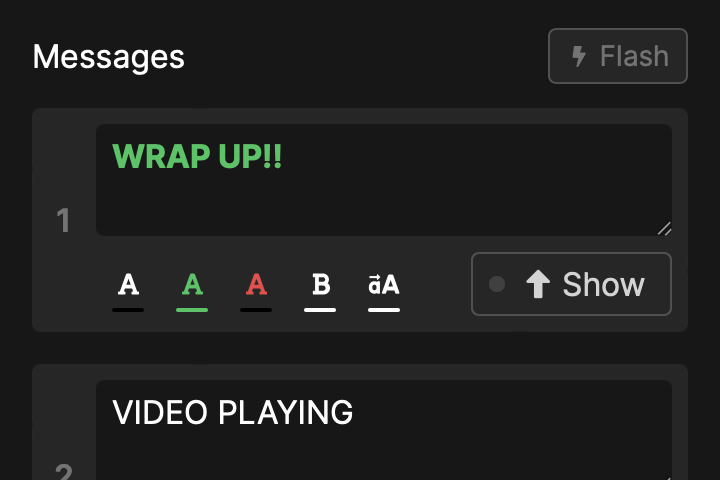
Messages allow you to communicate with presenters on stage. Create messages in advance and show them with a single click. Messages appear prominently on the viewer screen alongside the timer.
Messages come in three signal colors (white, green, red), and you can make them bold and uppercase for emphasis. Use the
Collecting Audience Questions
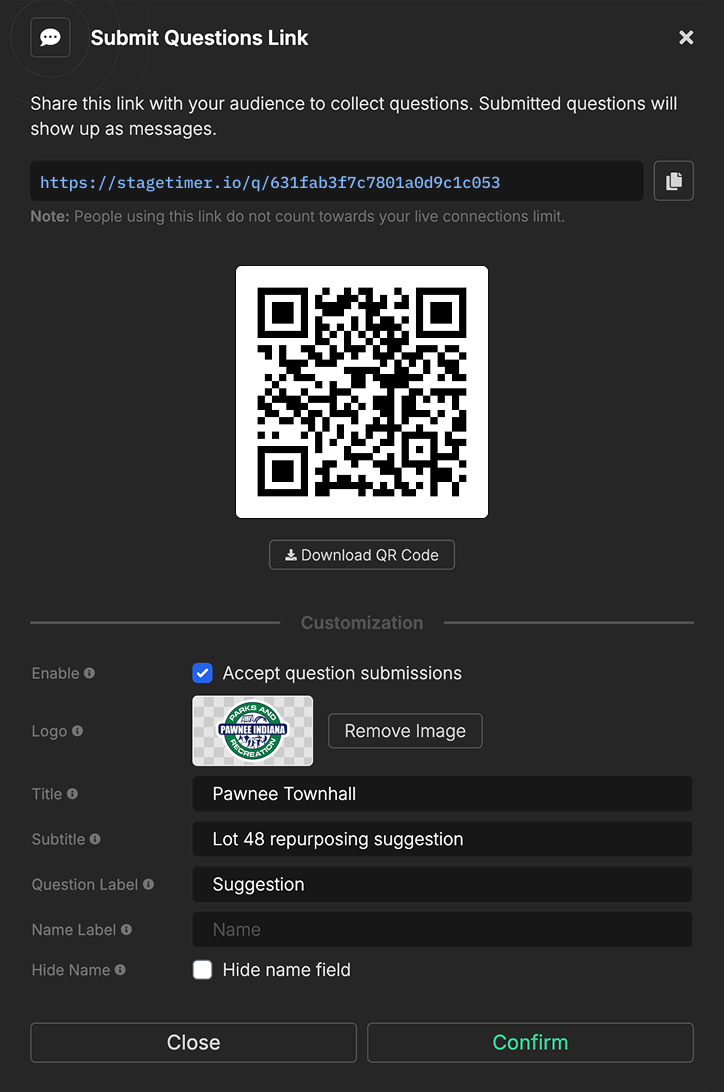
Stagetimer includes a built-in audience interaction feature. Click "Submit questions link" in the Messages section to generate a shareable link and QR code. Audience members can submit questions directly to your message queue without counting towards your live connections limit.
Questions appear as new messages that you can review, edit, color-code, and display to presenters as needed.
Premium users can customize the submission page with their own branding: add a custom logo, set a title and subtitle, rename form labels, or hide the name field entirely. You can also temporarily disable submissions and display a custom "closed" message.
12. Room Progress

The room progress bar shows the total progress of the current event in real-time. The number on the left shows the total time expired, and the number on the right shows the total time remaining.