
How to Use Stagetimer with ATEM Switchers
Introduction
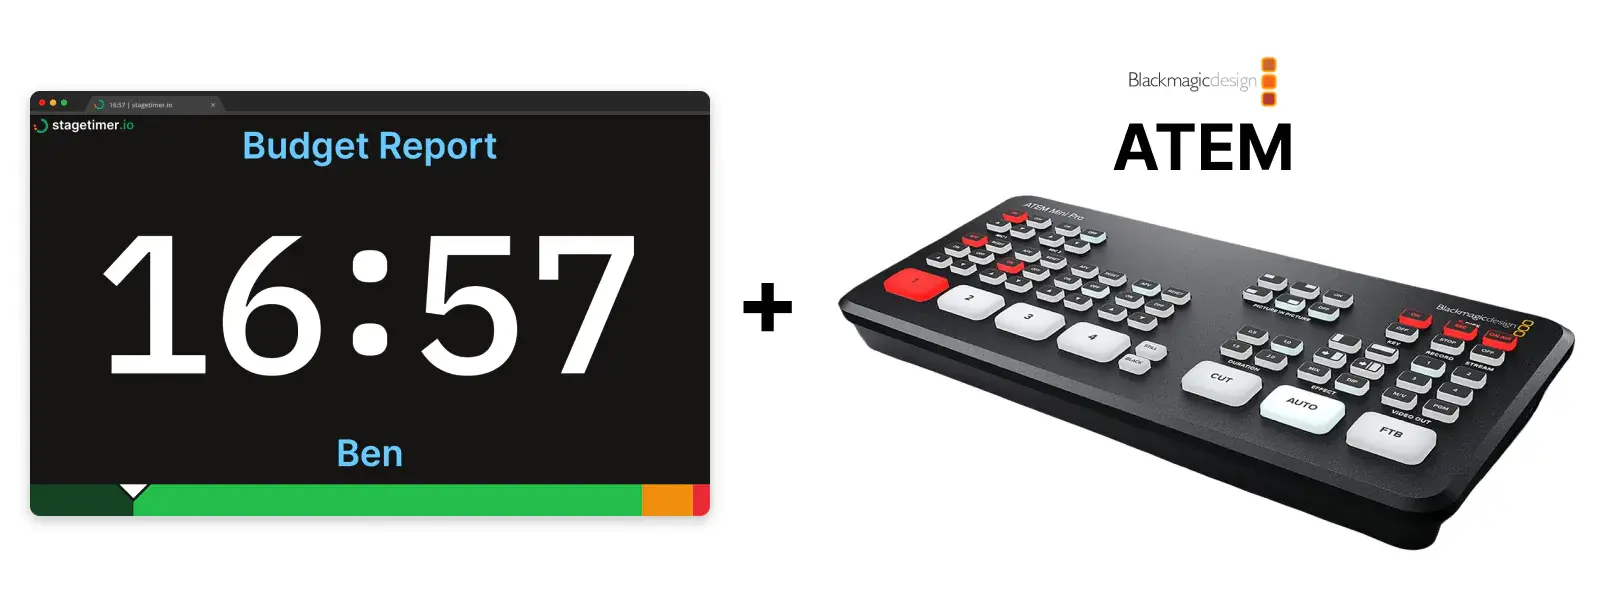
Blackmagic ATEM switchers are a staple in live production — from church services and corporate events to concerts and broadcast studios. One of the most common needs in these setups is overlaying a countdown timer onto your program feed so presenters, speakers, or talent can see how much time they have left.
This guide covers three ways to get Stagetimer onto your ATEM program output. The first one needs no keying at all — you just crop the timer out of the input and drop it on screen as a picture-in-picture box. Everything here works on the whole ATEM family, from the compact ATEM Mini to the ATEM Constellation 8K.
Which method should you use?
-
Crop and overlay as picture-in-picture. The ATEM’s DVE key is a picture-in-picture box: you point it at your Stagetimer input, crop away everything except the countdown, and place it wherever you want. No keying, no color sampling, no plan requirements. Every color survives exactly as designed, including the red flash when time runs out. The trade-off is that the box is opaque, so you get the timer sitting on its dark background. That’s the same look as a broadcast clock bug. Start here. It’s the fastest to set up and the hardest to get wrong.
-
Key out the background. If you want the timer floating directly on the video with nothing behind it, you need a key. On any plan you can luma key the Viewer’s default dark background. On Premium you can set a proper chroma color, which keys far more cleanly.
-
A dedicated overlay output (Premium). Build an output that contains only the elements you want, on a background chosen for keying. It takes five minutes of setup and gives the cleanest result of the three, because you’re not fighting a layout that was designed for a confidence monitor.
Prerequisites
To follow this guide, you’ll need:
- A Blackmagic ATEM switcher (any model)
- A computer with HDMI output connected to an ATEM input
- ATEM Software Control installed on your computer (or another computer on the same network)
- A Stagetimer room — create one for free
Connect your computer to one of the ATEM’s HDMI inputs. Enable “Extended Desktop” mode (not mirrored) so you can drag the timer display to the ATEM-connected output while keeping your controller visible on your primary screen.
Method 1: Crop and overlay as picture-in-picture
Prefer a video?
Blackmagic’s own walkthrough covers this exact panel. It uses a camera as the source instead of a timer, but every control is the same one you’ll be touching. The DVE tab starts at 0:32 and the Mask crop at 1:49.
1 — Open the Viewer on your ATEM display
- In your Stagetimer room, click Output Links above the output preview
- Select the Viewer tab
- Click Open Link at the bottom to open it in a new window
- Drag that window to your extended display (the one connected to the ATEM)
- Make it fullscreen (F11 on Windows/Linux, Cmd+Ctrl+F on macOS)
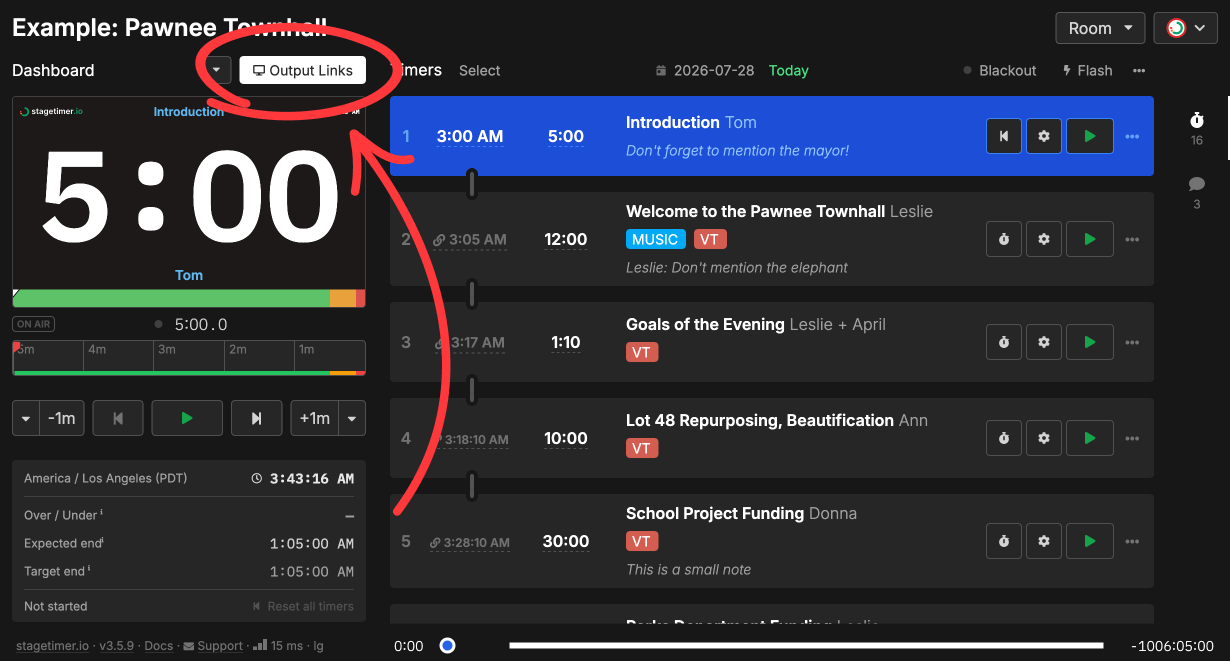
No background changes needed. This method works with the default Viewer on every plan, free included.
2 — Set the upstream key to DVE
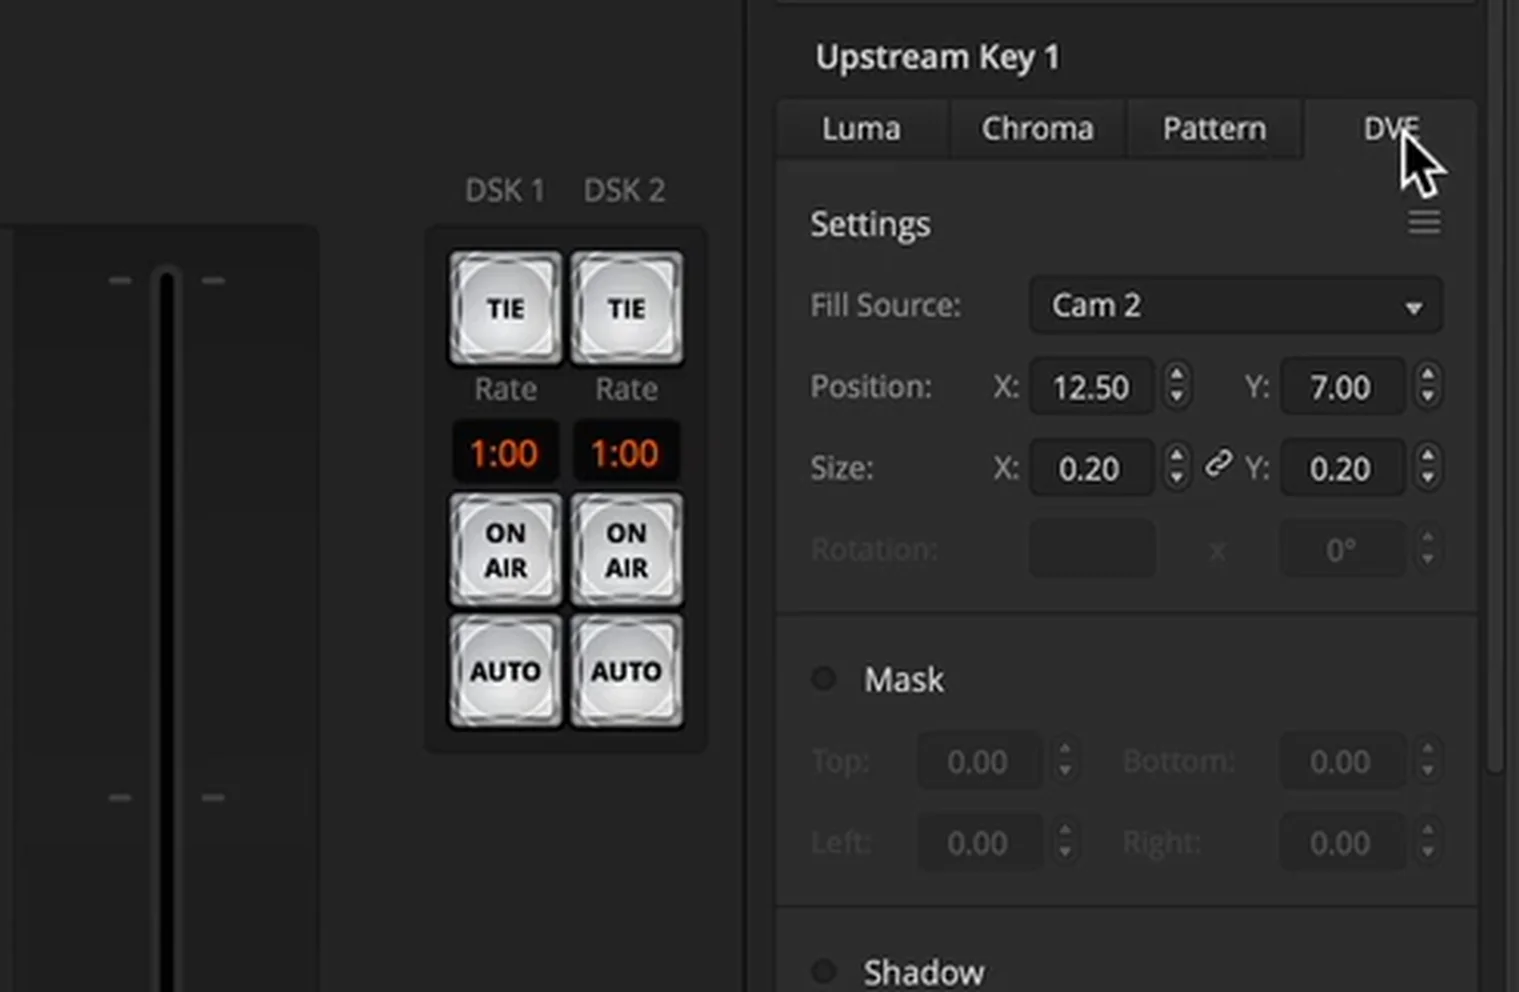
Open ATEM Software Control and go to the Palettes panel on the right. Expand Upstream Key 1 and select the DVE tab. Set Fill Source to whichever input your Stagetimer computer is on.
A DVE key is a picture-in-picture box — the ATEM generates the key signal internally from the box’s shape. That’s why you don’t need a key source, a chroma color, or any sampling.
3 — Crop to the timer with Mask
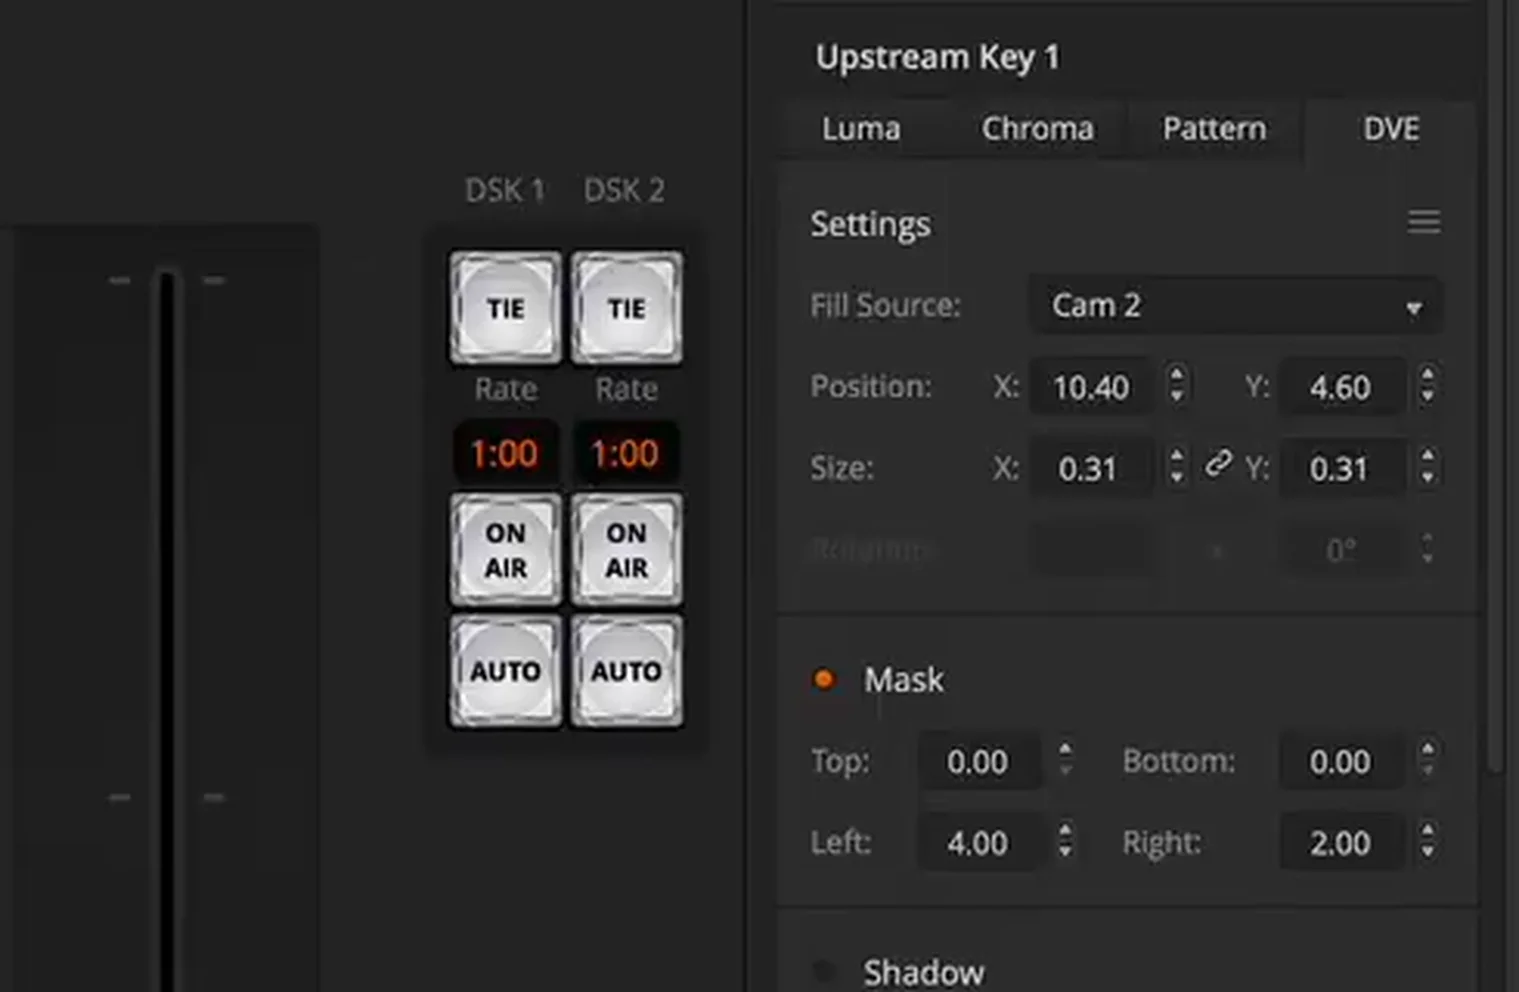
Still in the DVE tab, enable Mask and adjust the Top, Bottom, Left, and Right values until only the countdown is left. Crop away the logo, the timer title, the progress bar, and the empty space around the digits.
4 — Size and position the box
Use Position X/Y and Size X/Y to place the cropped timer where you want it — bottom-right and bottom-left corners are the usual choices. Expect some back-and-forth between the mask and the position values before it lands; that’s normal.
Two optional touches under the same tab make the box look deliberate rather than accidental:
- Border — a thin border in your brand color frames the timer nicely
- Enable Shadow — a drop shadow lifts it off the video
5 — Put it on air
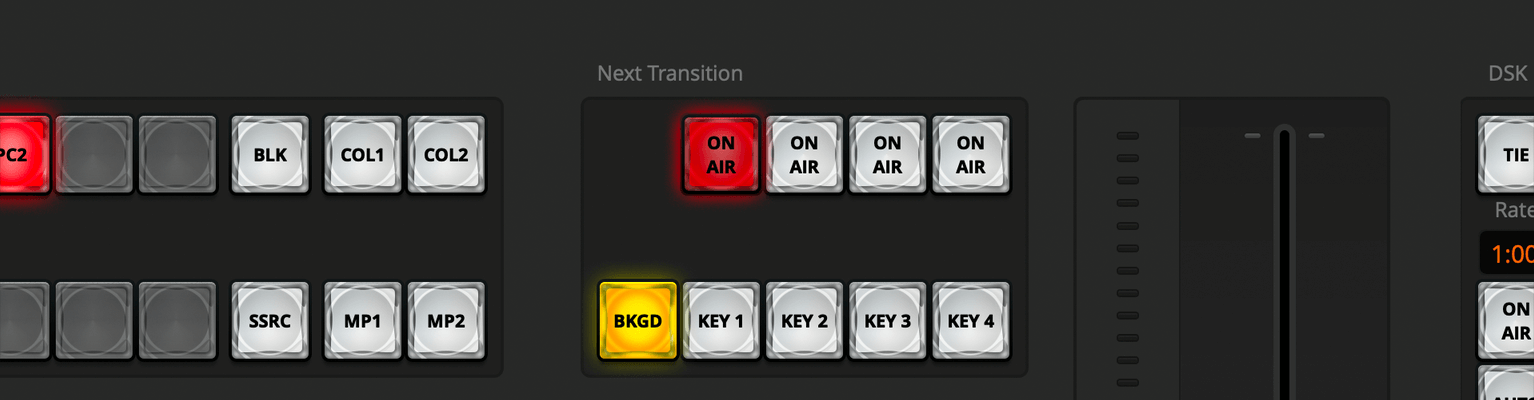
Press the ON AIR button above KEY 1 for an instant cut, or press KEY 1 in the Next Transition row to bring it in with your next transition.
Method 2: Key out the background
Cropping gives you a box. Keying gives you a timer floating directly on the video with nothing behind it. Which key type you use depends on your plan.
Any plan: luma key the default background
Luma keying uses brightness instead of color: bright pixels (the timer text) stay, dark pixels (the background) drop out. The Viewer’s default background is nearly black, which makes it a workable luma key source without changing a thing.
- Open the Viewer output link on your ATEM-connected display, fullscreen, exactly as in Method 1
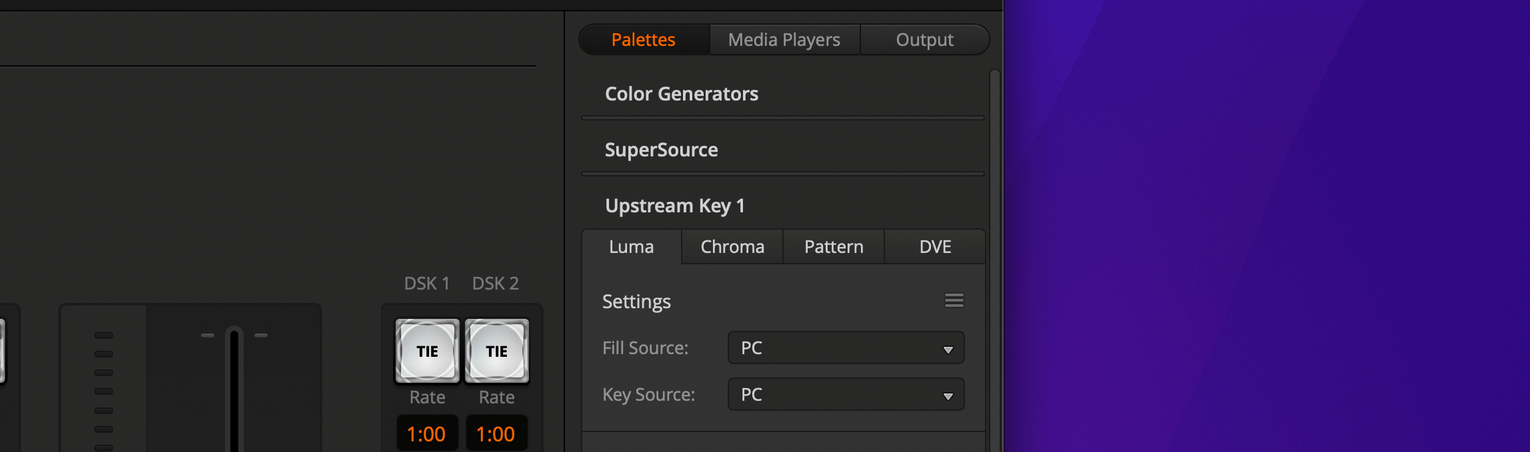
- In ATEM Software Control, expand Upstream Key 1 and select the Luma tab
- Set both Fill Source and Key Source to your Stagetimer input
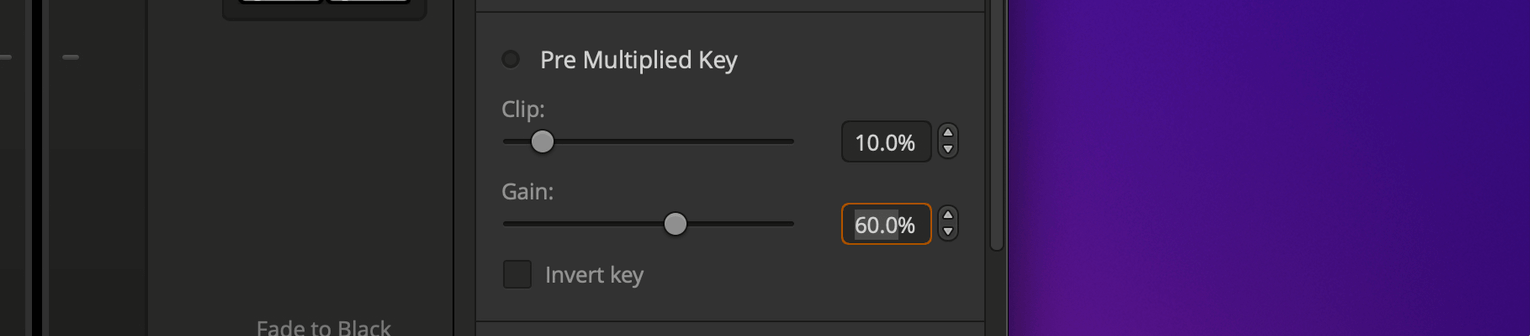
- Uncheck Pre Multiplied Key — leaving it on gives unexpected results
Turn the key on, then refine it. Set Clip low to clean up dark edges, and adjust Gain to control how aggressively dark areas get removed.
Premium: chroma key for a cleaner result
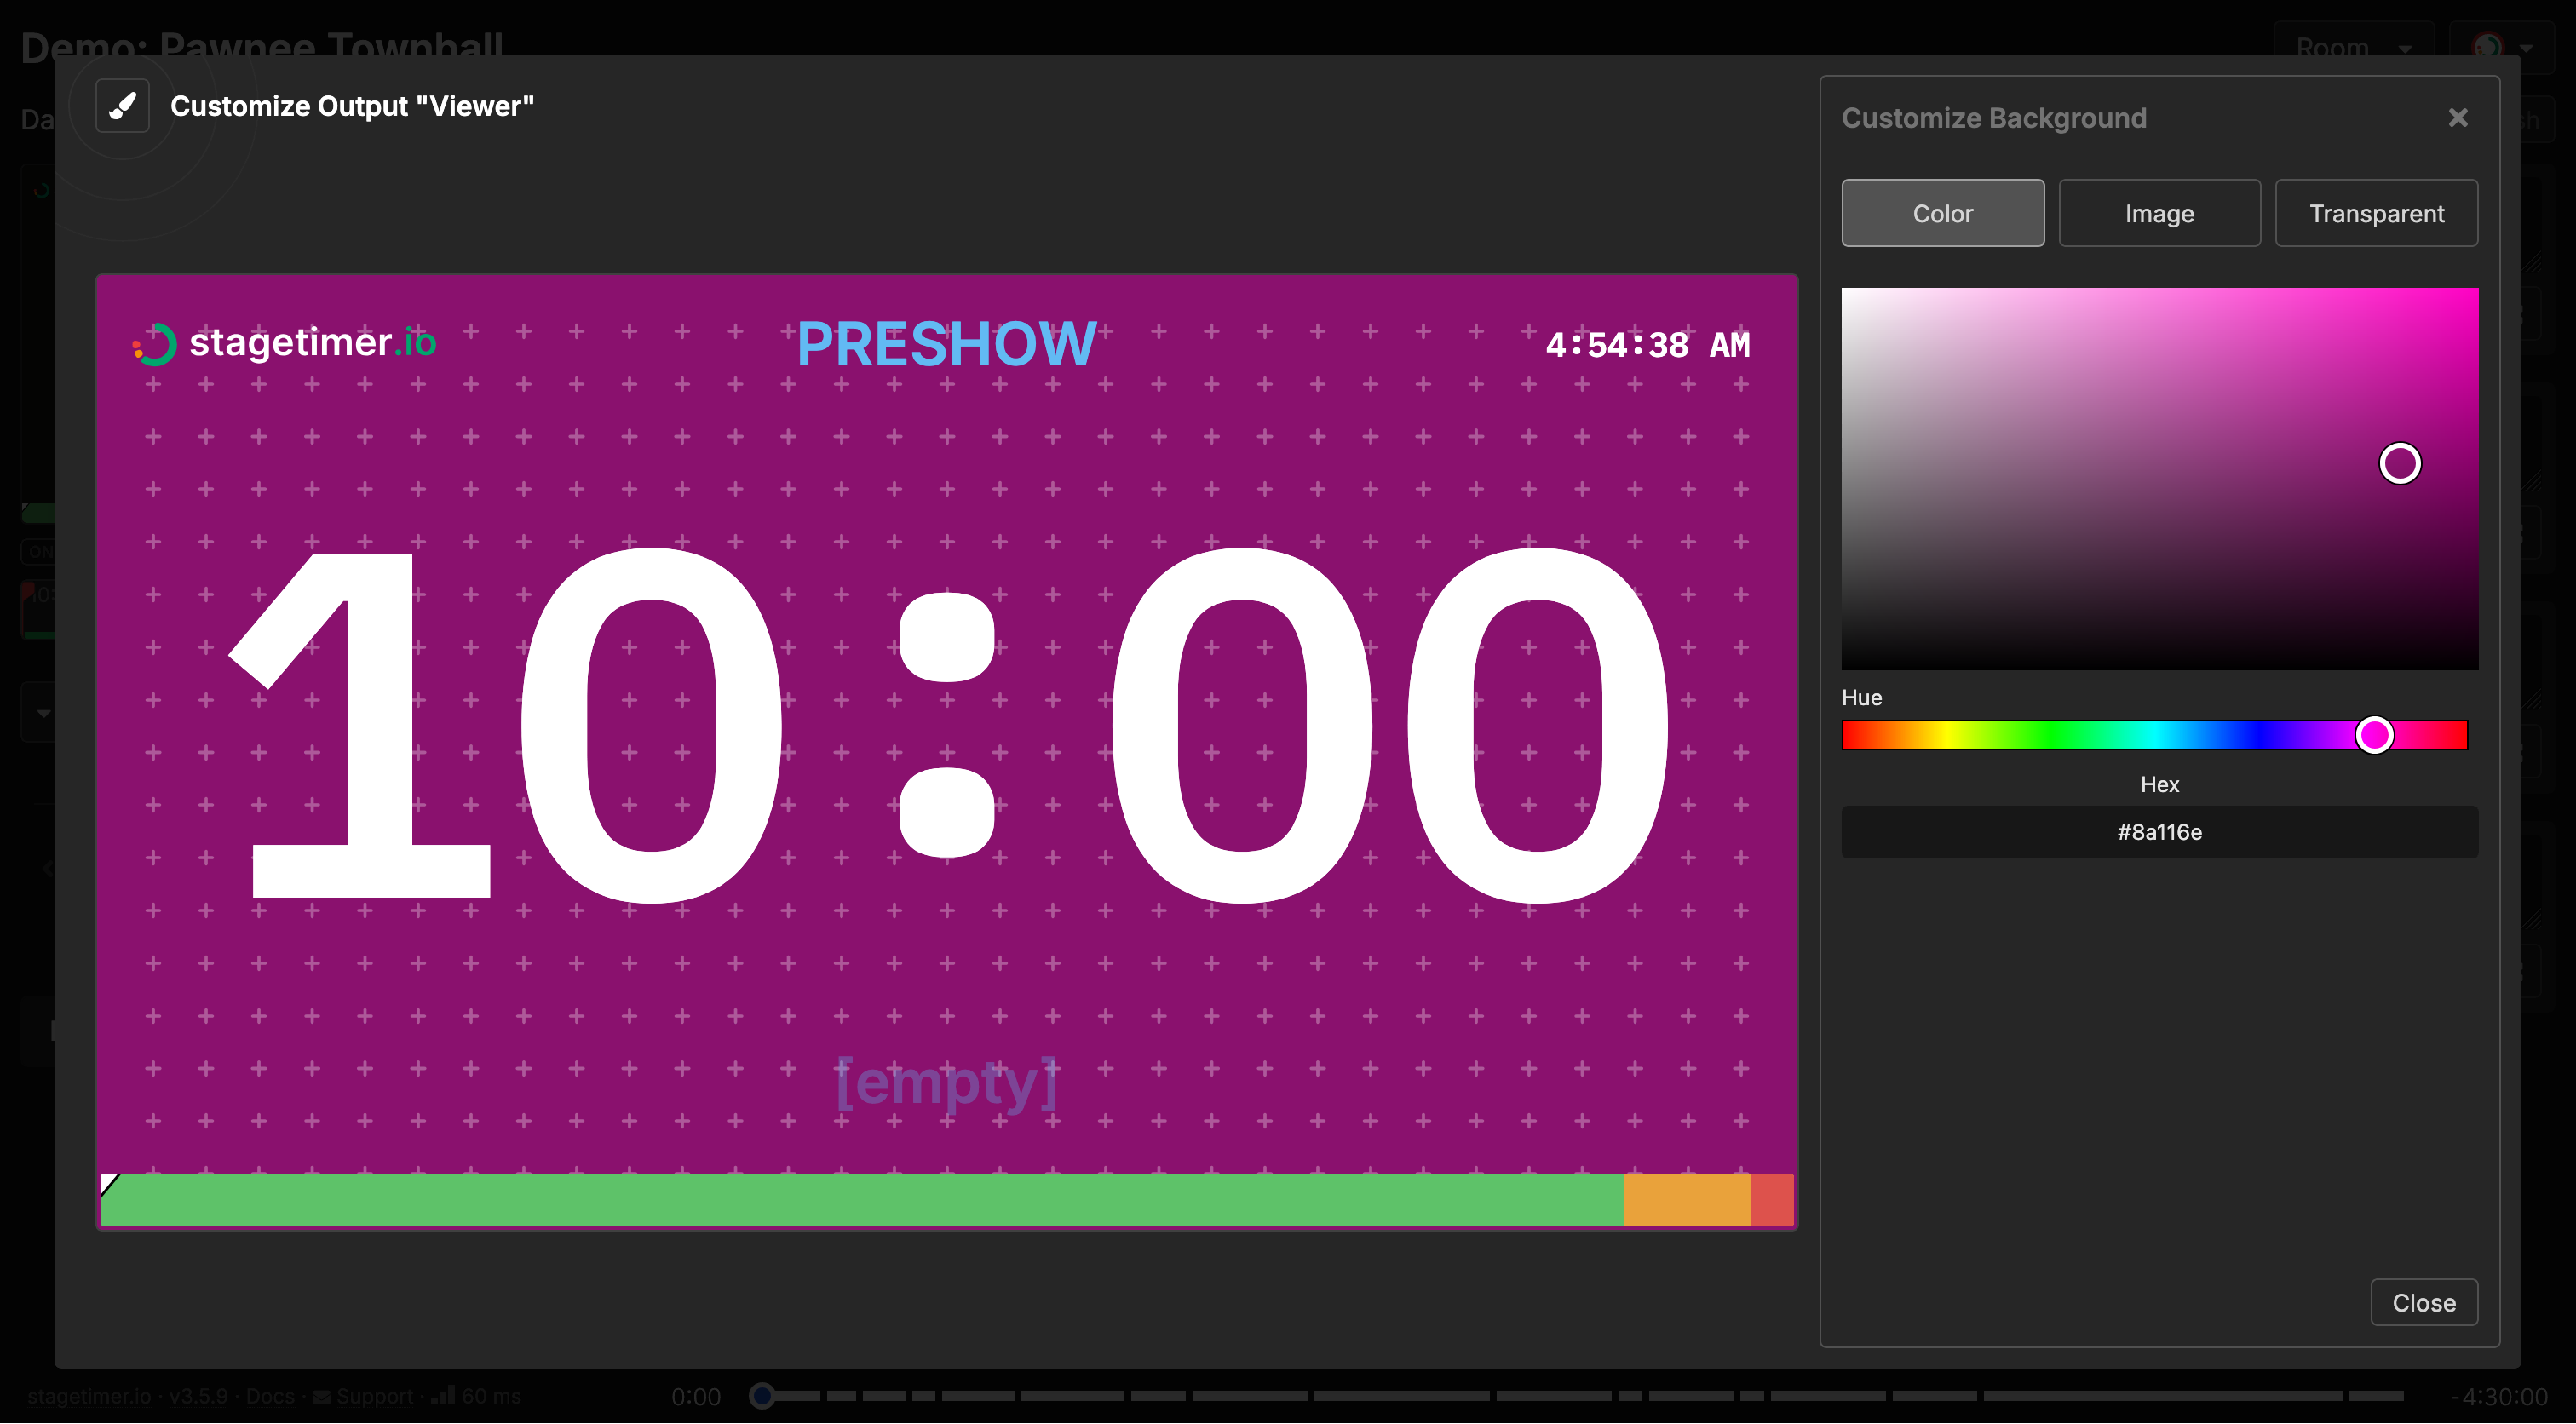
A solid, saturated background keys far better than near-black, and it keeps every timer color intact. Setting the background color requires a Premium plan.
- In Output Links, select the Viewer tab and click Customize
- In the Settings panel, click Change next to Background
- Choose Color and enter a chroma hex value —
#00B140for green,#800080for purple,#0047BBfor blue - Click Save, then open the link on your ATEM display and go fullscreen
In ATEM Software Control, expand Upstream Key 1, select the Chroma tab, and set Fill Source to your Stagetimer input. Click Chroma Sample, then drag the sample box over an area of the background color. The ATEM calibrates the key from that sample.
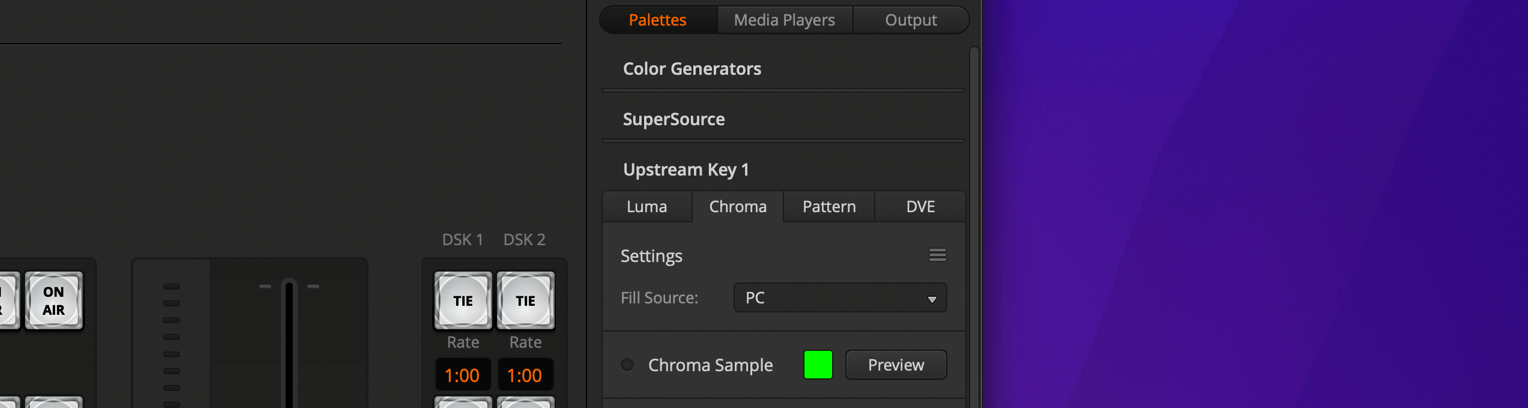
Pick a color that doesn’t appear anywhere on camera. Purple is a good default in most rooms because it rarely shows up in skin tones, clothing, or set dressing. Switch to green or blue if your branding leans purple.
Position the keyed timer
A key on its own puts the timer wherever it sits in the source frame — usually dead center, which is rarely what you want over a program feed. Two ways to move it:
- Mask. Both the luma and chroma tabs have their own Mask section with Top, Bottom, Left, and Right crop controls. Use it to trim the key down to just the countdown, the same way as in Method 1.
- Flying Key. Luma, chroma, and pattern keys all have a Flying Key checkbox. Turn it on and you get DVE position, size, and rotation controls for the key. This borrows the same DVE channel as Method 1, so on an ATEM Mini it’s one or the other.
Method 3: A dedicated overlay output (Premium)
The Viewer was designed as a confidence monitor: big centered digits, a title, a speaker name, a progress bar, messages. That’s the right layout for a screen facing the stage and the wrong one for a corner of your program feed. Cropping it works, but building a purpose-made output works better.
With a Premium plan you can create an output that already looks like the overlay you want:
- In Output Links, click + Add Output and name it something like “ATEM Overlay”
- Click Customize to open the editor
- Delete the elements you don’t need and keep only what belongs on screen — often just a timer, sometimes a timer plus a “Next up” text element
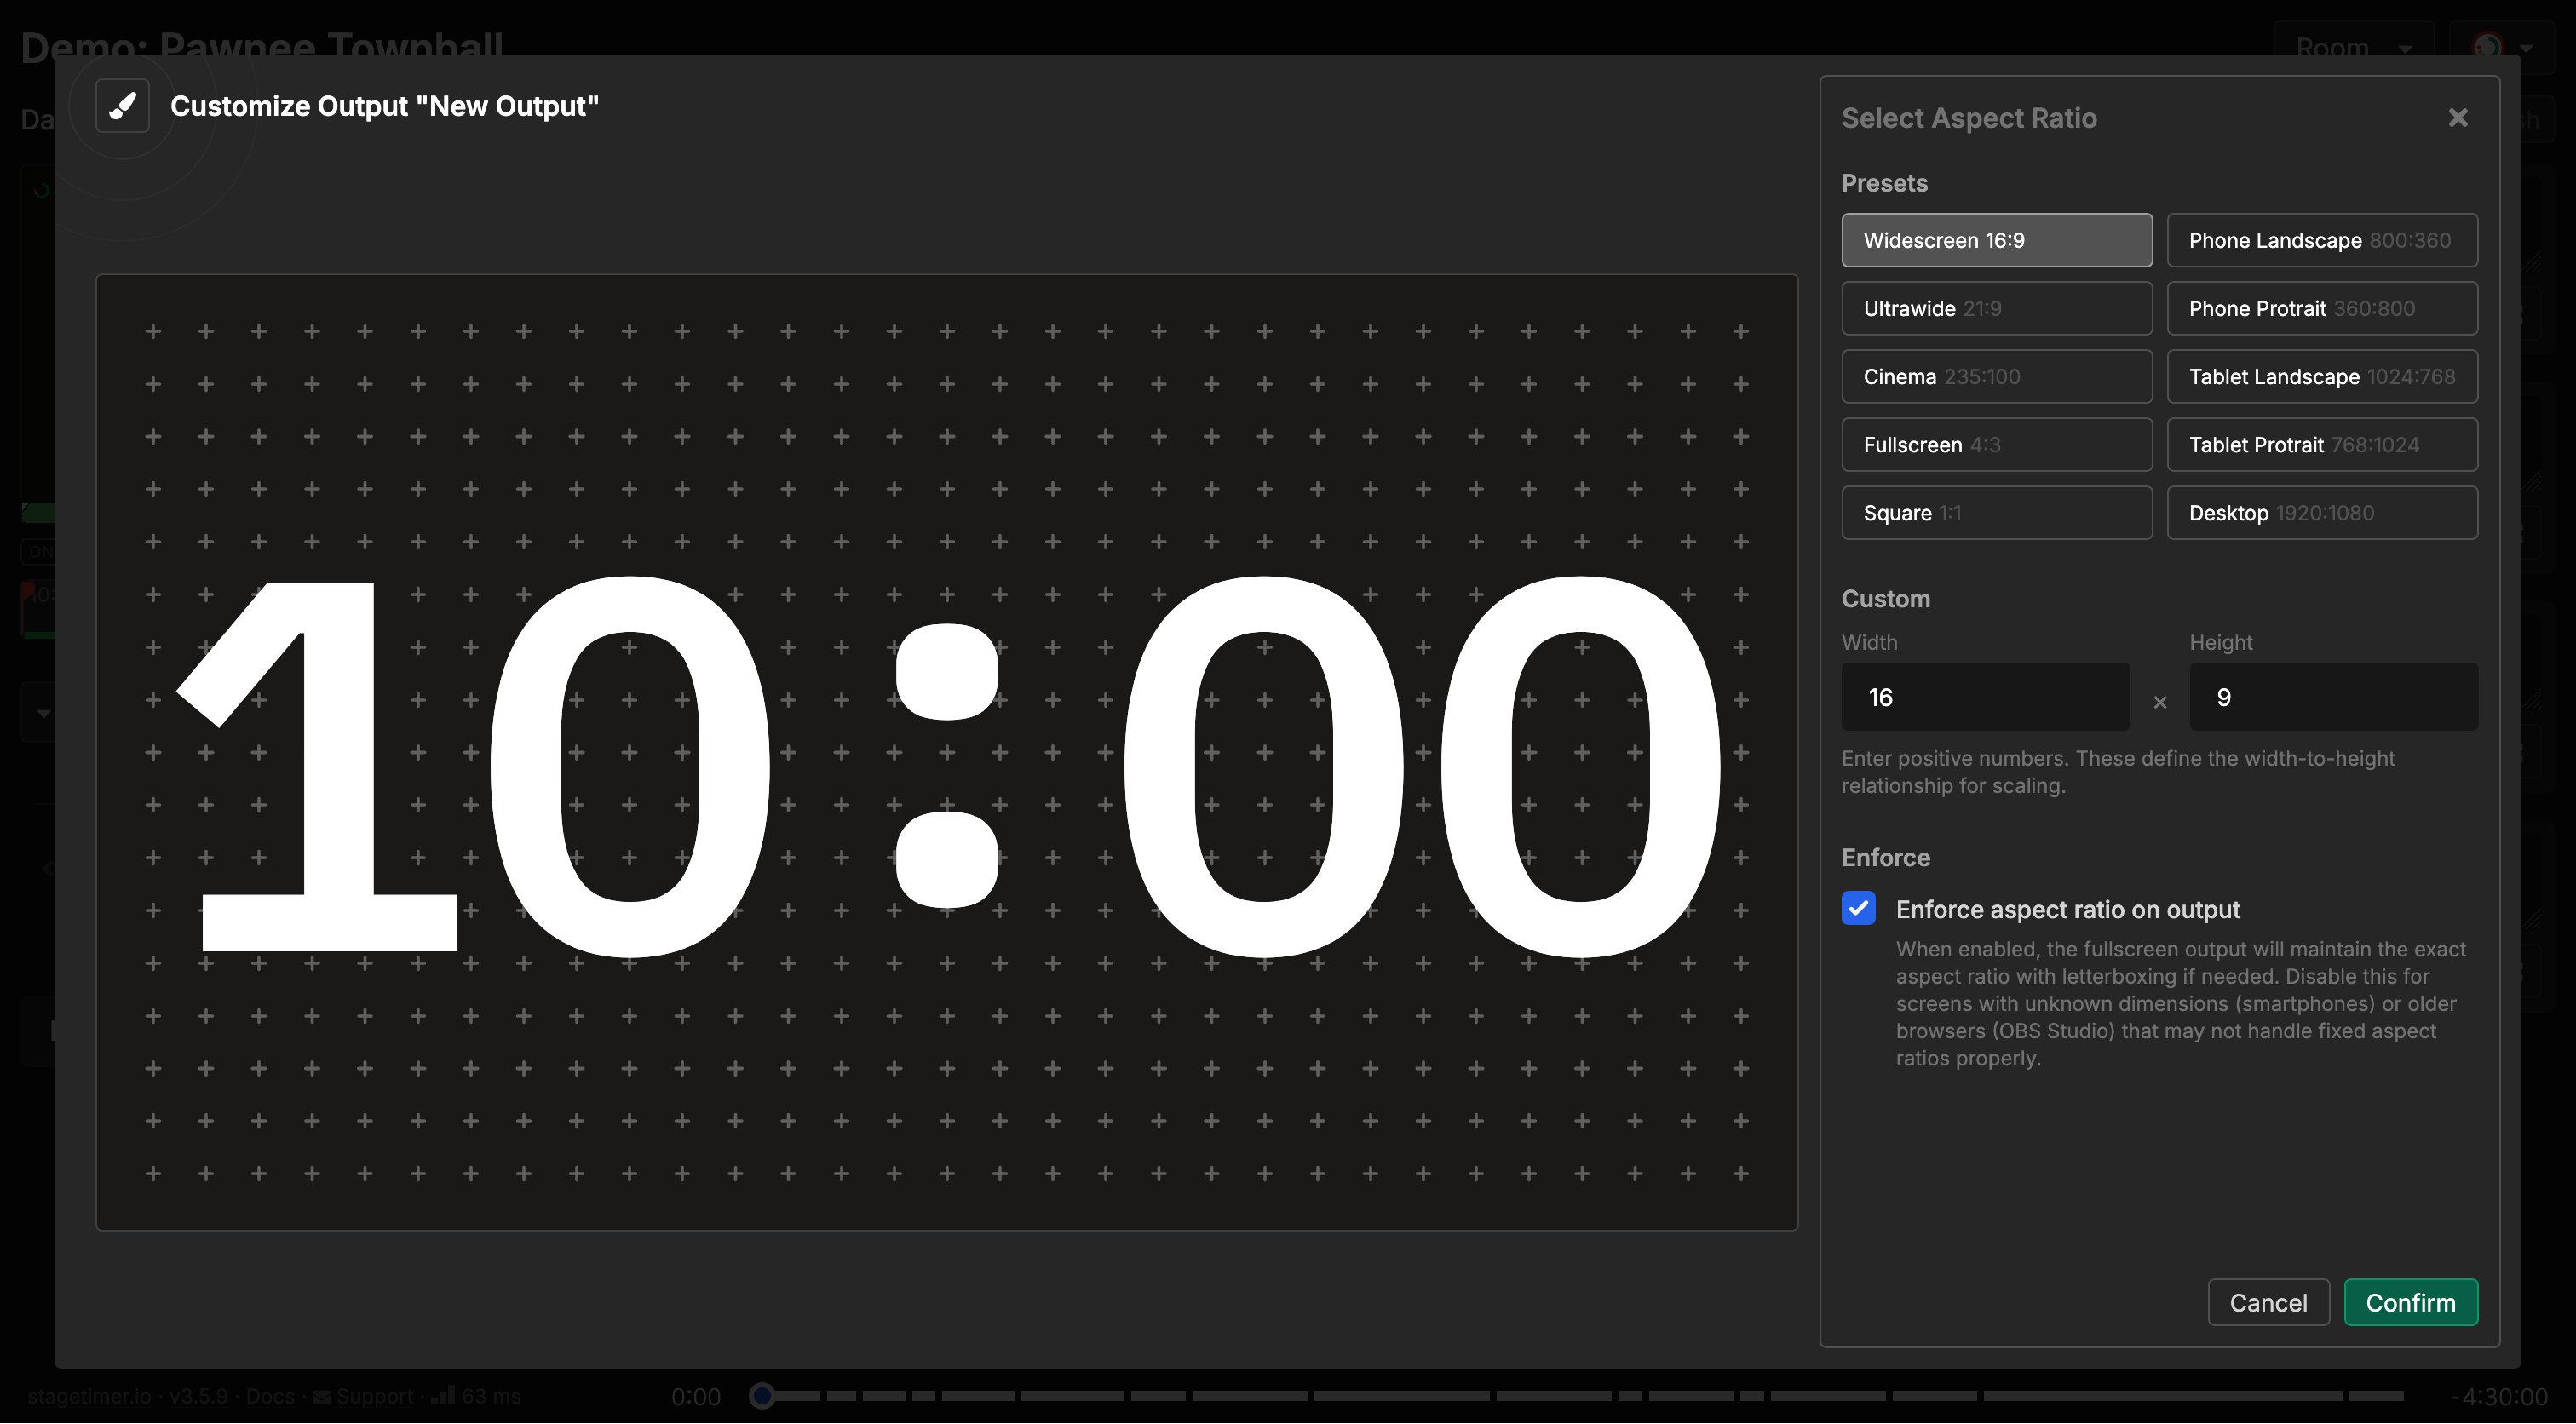
- Set Aspect Ratio to match the shape you actually want. A wide, short ratio produces a lower-third strip and saves you almost all the cropping work
- Click Change next to Background and pick your keying background: a saturated chroma color for a chroma key, or pure black (
#000000) for a luma key
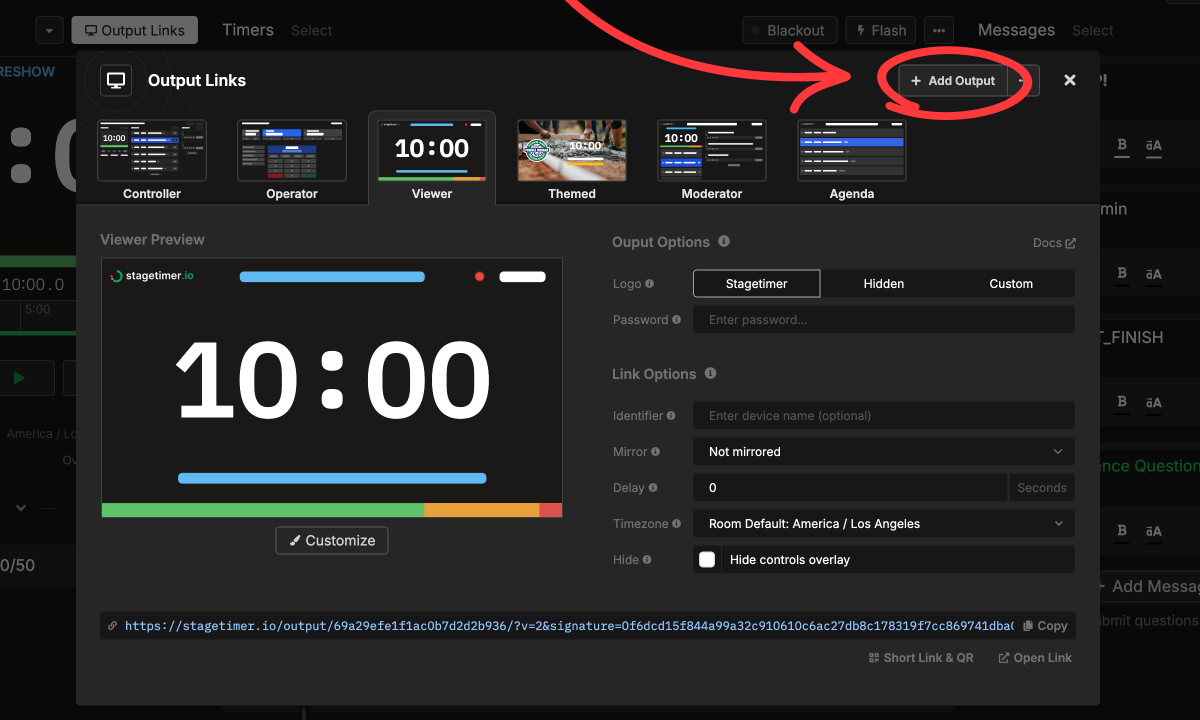
The aspect ratio is the step people skip, and it’s the one that saves the most work. Ultrawide 21:9 or Cinema 235:100 gives you a letterbox strip that’s already the shape of a lower third, or enter your own numbers under Custom — something like 32:9 for a thin clock bar. Leave Enforce aspect ratio on output checked so the fullscreen output keeps that exact shape.
Pure black plus a luma key is worth knowing about. With a true black background and Pre Multiplied Key off, the luma key behaves like a screen blend — bright text comes through and the background vanishes completely, with none of the edge artifacts you get from keying a not-quite-black color.
Then set it up on the ATEM exactly as in Method 2. Because the output only contains what you want to see, there’s little or nothing left to crop.
Full details on building outputs are in the Custom Outputs documentation.
Tips & troubleshooting
Transparent backgrounds don’t work over HDMI. Stagetimer’s transparent background option is built for OBS, vMix, and NDI — HDMI carries no alpha channel, so a transparent output arrives at your ATEM as solid black. Use a chroma color or pure black and key it instead.
Use a Downstream Key if your upstream keys are busy. DSKs work just as well for timer overlays and the configuration is nearly identical. They sit after the upstream keys in the chain, so the timer stays on screen through upstream transitions — often exactly what you want for a clock.
Watch your DVE budget. ATEM Mini models have a single DVE channel shared between the hardware PIP button, DVE keys, and Flying Key. Larger ATEMs have more, but it’s still a finite resource — check what else in your show needs one before you build around it.
Audio chimes come from the computer, not the ATEM. If you use Stagetimer’s chimes to cue speakers, route them to a monitor speaker in the room. The browser window plays audio independently of the HDMI video signal, so it won’t reach your ATEM’s audio mix.
Test before going live. Keying behaves differently depending on lighting, scaling, and HDMI signal quality. Run through your timer workflow during rehearsal, including the moment the timer turns red.
Related documentation: Output Links · Custom Outputs · Viewer · OBS Studio Guide · vMix Guide
Footnotes
-
ATEM Software Control screenshots in this section are from Blackmagic Design’s video Using Picture in Picture with Your ATEM Switcher. ↩