Operator Page Documentation
What is the Operator Page?
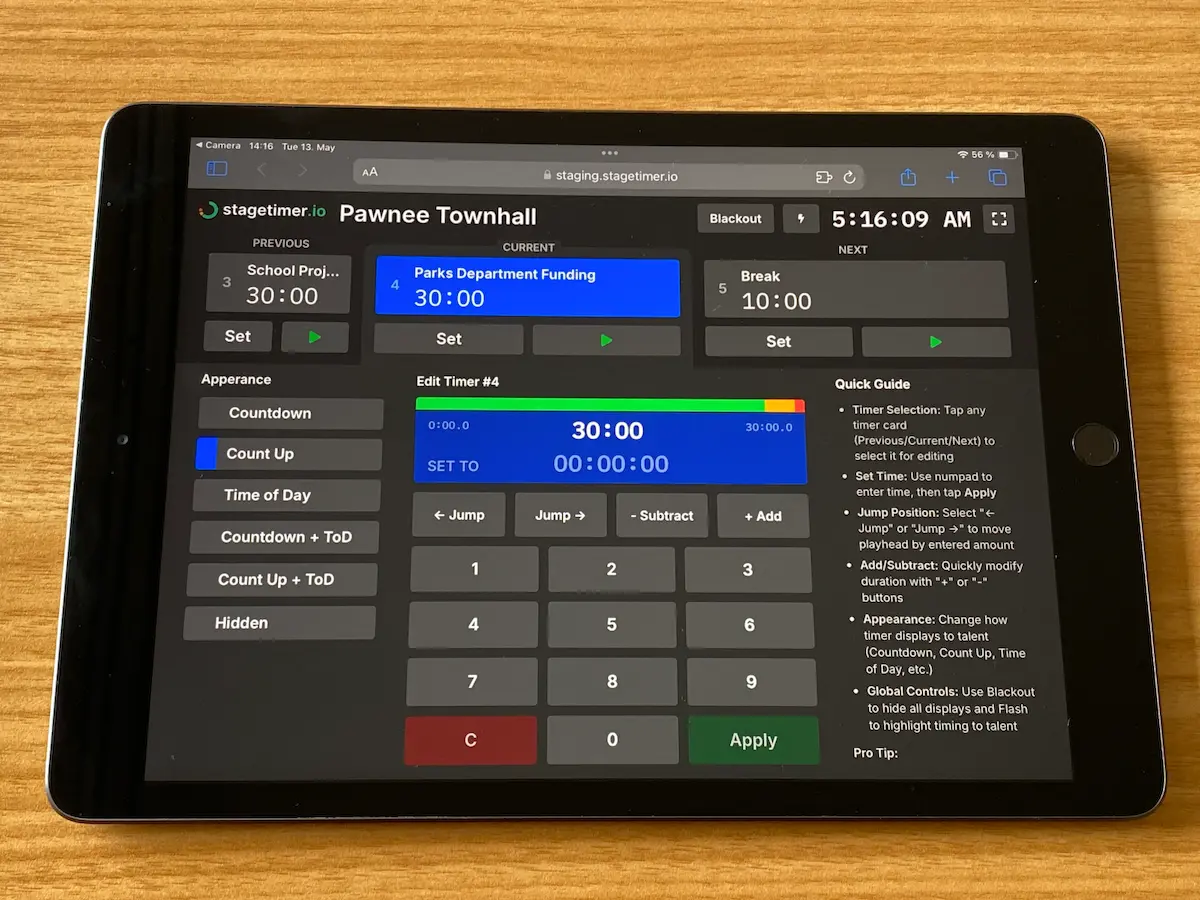
The Operator page provides a streamlined interface specifically designed for show callers and technical directors managing timers during live productions. With its large buttons and simple layout, it’s optimized for tablets (especially iPads) and allows for quick, one-tap access to essential timing controls when every second counts.
Unlike the full Controller view, the Operator page focuses exclusively on timer manipulation with a distraction-free interface. This makes it ideal for technical staff who need to make quick adjustments during stressful live events without navigating through complex menus.
Note: The Operator page is an experimental feature. If you encounter any issues or have suggestions for improvements, please let us know so we can continue refining it.
Header Controls
The header section gives you quick access to essential room information and global controls.

The header shows your room name and the current time of day in your selected timezone format. It also provides three important global functions:
The Blackout button immediately hides all timer displays on connected viewer screens. This is useful when you need to quickly clear all displays between segments.
The Flash button calls attention by making all connected displays flash three times. Use this when you need to get a presenter’s attention urgently.
The Fullscreen button toggles fullscreen mode for your operator view, giving you maximum screen space on your device.
Timer Cards
The timer cards section provides a clear overview of your program flow with easy access to the previous, current, and next timers in your sequence.

Each timer card displays the timer’s position number in your agenda, its name, and the current duration setting. The active timer also shows a progress bar indicating elapsed time and time remaining.
Every card includes simple control buttons - a “Set” button to reset or initialize the timer, and a Start/Stop button to control playback.
To select a timer for editing, simply tap its card. The selected timer will be highlighted, and its details will appear in the control sections below for further adjustments.
Appearance Options
The appearance section lets you control how the timer appears on viewer displays without changing its actual timing functions.
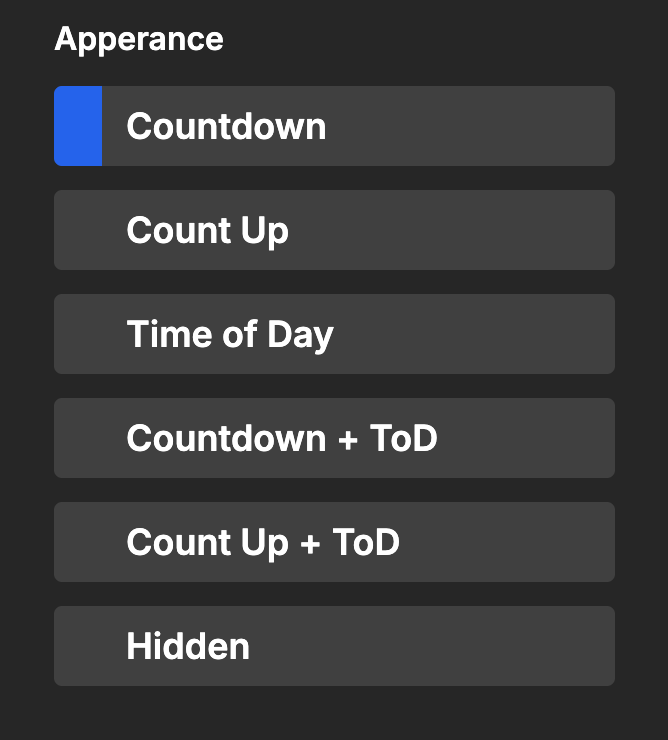
You can choose from several appearance options that instantly update all connected viewer displays:
Countdown shows a standard countdown timer (e.g., 05:00 → 00:00), ideal for keeping presenters aware of their remaining time.
Count Up displays time elapsed from zero (e.g., 00:00 → 05:00), perfect for tracking how long a segment has been running.
Time of Day shows the actual clock time (e.g., 10:30 AM), helpful for maintaining schedule awareness.
Countdown + Time of Day and Count Up + Time of Day combine these displays for maximum information.
Hidden keeps the timer active but invisible to viewers, useful during transitions or when timing should not be visible to the audience or presenters.
Numpad Controls
The numpad section is where you’ll make precise timer adjustments using a familiar numeric input format.
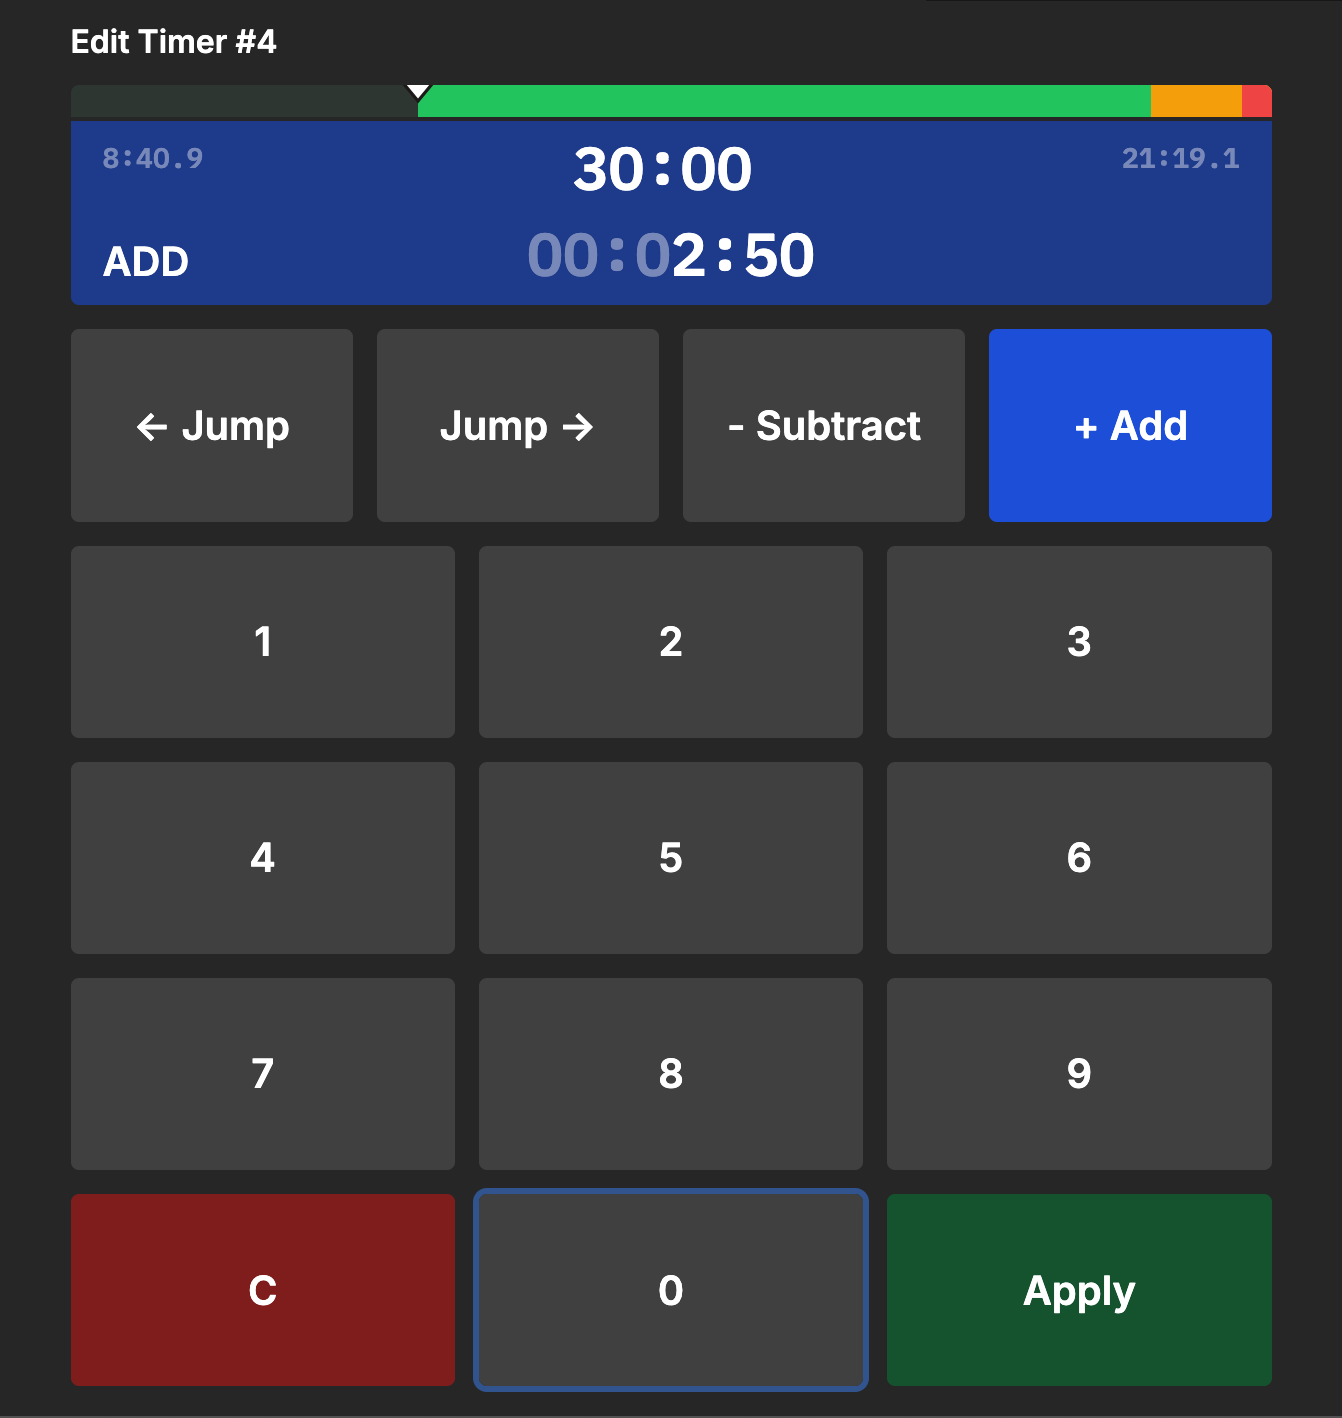
The numpad area has several key components:
The Timer Display shows the currently selected timer and its status at a glance.
The Operation Mode selector lets you choose how your numeric input will affect the timer:
- “SET TO” lets you enter a new duration for the timer (this is the default mode)
- ”← JUMP” moves the playhead backward by your entered amount
- “JUMP →” moves the playhead forward by your entered amount
- ”- SUBTRACT” decreases the timer duration by your entered amount
- ”+ ADD” increases the timer duration by your entered amount
Enter time values using the Numpad in HHMMSS format. For example, entering “130” will set 1 minute and 30 seconds. The “C” button clears your entry if you make a mistake.
When you’re ready, tap the Apply button to implement your changes.
For timers set to “Target Time” mode (with a fixed end time rather than a duration), certain duration controls will be unavailable, as shown below:

Sharing the Operator Link
You can access the Operator link by clicking the “Share” button on the controller page and selecting the “Operator” tab.
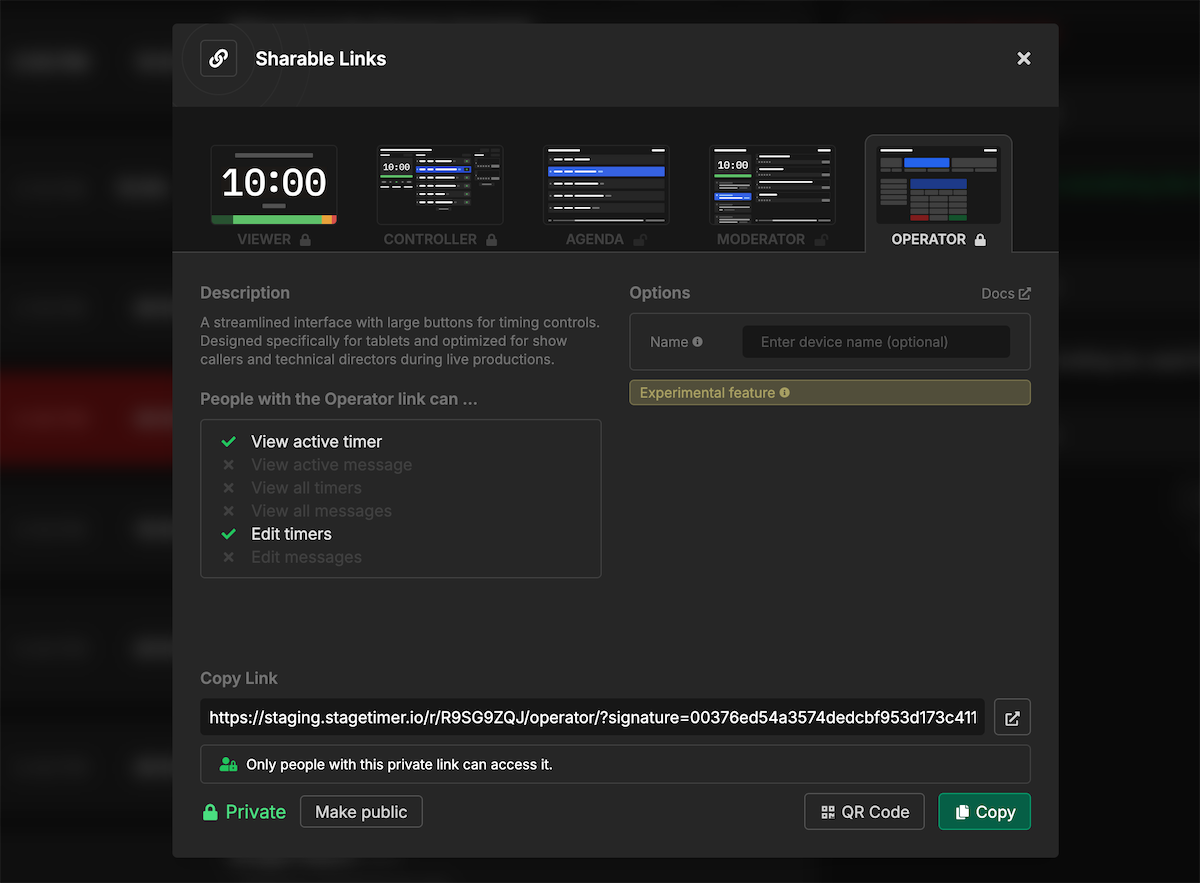
Remember that users with the Operator link can view the active timer and edit timers, but cannot view or edit messages. Share this link only with production team members who need direct timer control but don’t require access to the full controller interface.
Available URL Options
When sharing the Operator link, you have two main options to customize access:
Device Name: You can pre-set a name for the device that will appear in the Live Connections list on the controller page. Instead of manually editing the URL, use the identifier field in Output Links to set this.
Link Protection: If you have a Pro subscription, you can make the link private by clicking the “Make private” button in the sharing dialog. This adds an unguessable signature to the link, preventing unauthorized access.
We no longer recommend manually editing URL parameters, as this can interfere with the security signature for private links. Instead, use the options provided in the sharing dialog to customize your links.