How to Embed Stagetimer on a Website
Getting Your Output Link
Before embedding Stagetimer, you need to get the output link from your room:
- Open your Stagetimer room
- Click Output Links above the output preview
- Select the output you want to embed (Viewer, Agenda, Moderator, or a custom output)
- Copy the link using one of two options:
Short Link (for temporary/event embedding):
- Click “Short Link & QR” to generate a short URL like
https://stagetimer.io/o/ABC1234 - Easier to share and type
- Expires after 30 days
Full Output Link (for permanent embedding):
- Click “Copy Link” to get the full URL with security signature
- Does not expire (as long as the room exists)
- Longer URL but works indefinitely
For complete details on creating and customizing outputs, see Output Links.
Using an iFrame to embed Stagetimer
You can embed Stagetimer’s viewer, agenda, and moderator pages on any Website.
To embed Stagetimer in another website, you will need to use HTML code called iFrame.
When you embed an iframe on a website, you are essentially adding a new page to the website that is hosted on another server. This new page will appear as a part of the website but will be hosted on the other server.
Here is an example of code that would allow you to embed Stagetimer:
Using a short link:
<iframe
  src="https://stagetimer.io/o/ABC1234"
  width="600"
  height="400"
  frameborder="0"
  allow="accelerometer; autoplay; clipboard-write; encrypted-media; gyroscope; picture-in-picture; screen-wake-lock"
></iframe>
Using a full output link:
<iframe
  src="https://stagetimer.io/output/abc123def456/?v=2&signature=..."
  width="600"
  height="400"
  frameborder="0"
  allow="accelerometer; autoplay; clipboard-write; encrypted-media; gyroscope; picture-in-picture; screen-wake-lock"
></iframe>
Replace the src URL with your own output link from the Output Links panel. The width and height parameters can be adjusted to change the size of the embed window.
No-code dashboards with Dashmaster 2k
If you’d rather not write HTML, Dashmaster 2k is a dashboard tool for video professionals with a dedicated Stagetimer module. You paste your room ID, choose which page to display (Viewer, Controller, Agenda, or Moderator), and it handles the rest.
It’s a good option when you need to combine Stagetimer with other tools — like YouTube, Twitch, VDO.ninja, or webcam feeds — on a single screen without writing code. See the Dashmaster 2k Stagetimer docs for setup details.
For full control, you can also build custom dashboards with HTML. Let’s look at two example dashboards you can build with iFrames:
- A multi-screen dashboard with four timers
- A custom dashboard with a timer, agenda, and a YouTube live stream
Create a dashboard with multiple timers
One use-case could be combining multiple timers on a single page.

A dashboard with multiple timers may have a timer for each team member, or a timer for each task. The dashboard may also have a timer for the total time remaining on an event.
To create a dashboard page:
-
Use any text editor to create a new file and save it as “dashboard.html” in your project folder.
-
Add the following code to the “dashboard.html” file:
<!DOCTYPE html>
<html lang="en" >
<head>
  <meta charset="UTF-8">
  <title>Timer Dashboard</title>
  <link rel='stylesheet' href='https://cdnjs.cloudflare.com/ajax/libs/tailwindcss/2.2.19/tailwind.min.css'>
</head>
<body translate="no">
  <main class="grid grid-cols-2 grid-rows-2 h-screen w-screen bg-black">
    <div class="border-2 border-black">
      <!-- 1. Timer -->
      <iframe
        src="https://stagetimer.io/o/YOUR_LINK_1"
        frameborder="0"
        class="w-full h-full"
        allow="screen-wake-lock"
      ></iframe>
    </div>
    <div class="border-2 border-black">
      <!-- 2. Timer -->
      <iframe
        src="https://stagetimer.io/o/YOUR_LINK_2"
        frameborder="0"
        class="w-full h-full"
        allow="screen-wake-lock"
      ></iframe>
    </div>
    <div class="border-2 border-black">
      <!-- 3. Timer -->
      <iframe
        src="https://stagetimer.io/o/YOUR_LINK_3"
        frameborder="0"
        class="w-full h-full"
        allow="screen-wake-lock"
      ></iframe>
    </div>
    <div class="border-2 border-black">
      <!-- 4. Timer -->
      <iframe
        src="https://stagetimer.io/o/YOUR_LINK_4"
        frameborder="0"
        class="w-full h-full"
        allow="screen-wake-lock"
      ></iframe>
    </div>
  </main>
</body>
</html>-
Replace each
srcURL with output links from your Stagetimer rooms (use short links or full output links). -
Save the “dashboard.html” file and open it in your web browser.
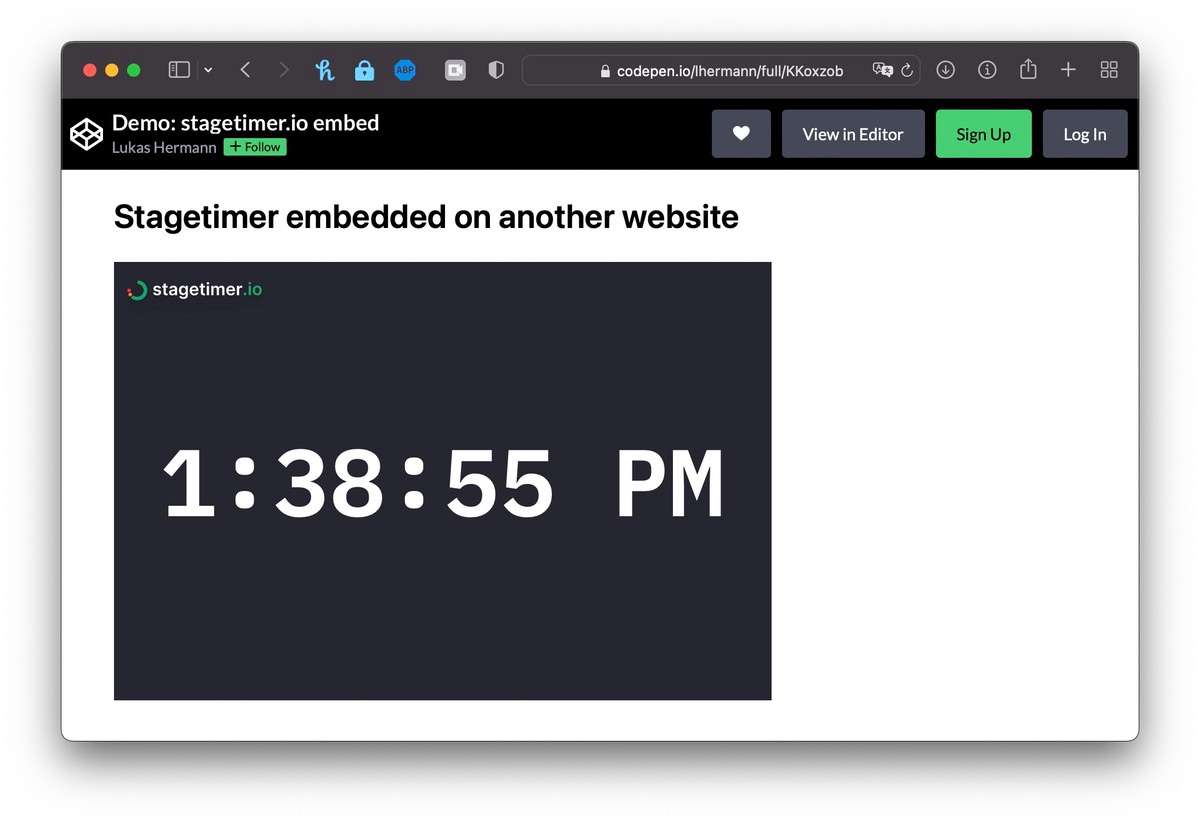
Here’s a working example: https://codepen.io/lhermann/pen/WNzMqmz
Create a dashboard with YouTube Livestream
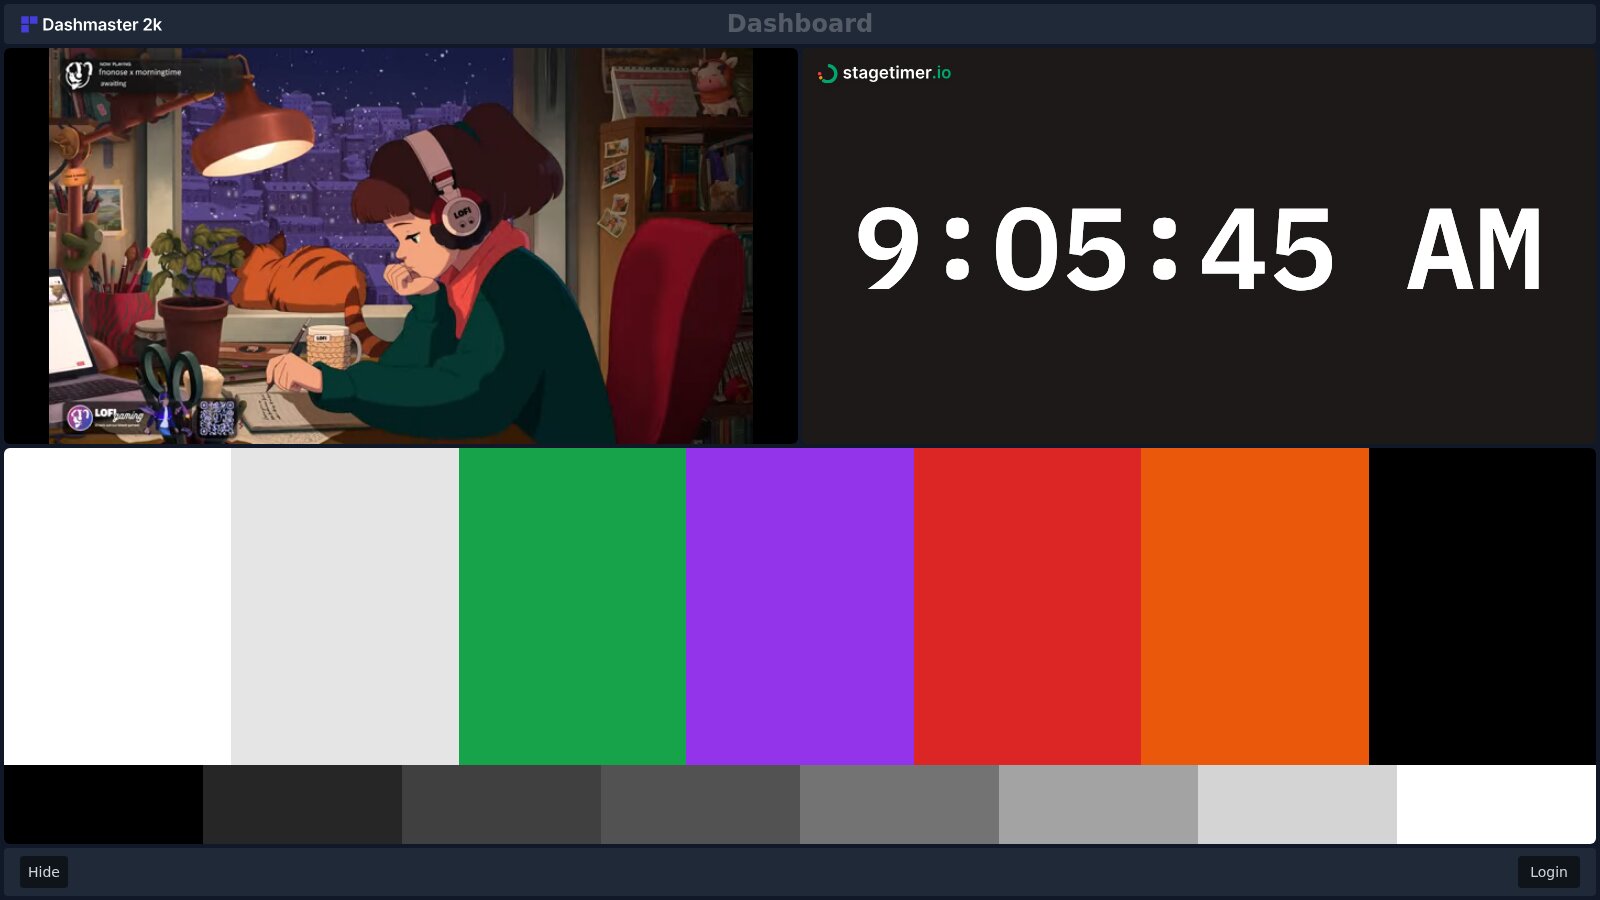
In this example, we want to place the timer, the agenda, and a YouTube live stream on the same screen.

A dashboard with a timer and live stream preview is useful for keeping track of time and seeing what is happening in the live stream at the same time. This is not only useful as feedback for the video producer but can also serve as digital signage for an event venue, especially with the agenda showing the current progress of the event.
To create a dashboard page:
-
Use any text editor to create a new file and save it as “dashboard.html” in your project folder.
-
Add the following code to the “dashboard.html” file:
<!DOCTYPE html>
<html lang="en" >
<head>
  <meta charset="UTF-8">
  <title>Timer Dashboard</title>
  <link rel='stylesheet' href='https://cdnjs.cloudflare.com/ajax/libs/tailwindcss/2.2.19/tailwind.min.css'>
</head>
<body translate="no">
  <main class="grid grid-cols-2 grid-rows-2 h-screen w-screen bg-black">
    <div class="border-2 border-black">
      <!-- Timer Frame -->
      <iframe
        src="https://stagetimer.io/o/YOUR_VIEWER_LINK"
        frameborder="0"
        class="w-full h-full"
        allow="screen-wake-lock"
      ></iframe>
    </div>
    <div class="row-span-2 border-2 border-black">
      <!-- Agenda Frame -->
      <iframe
        src="https://stagetimer.io/o/YOUR_AGENDA_LINK"
        frameborder="0"
        class="w-full h-full"
      ></iframe>
    </div>
    <div class="border-2 border-black">
      <!-- YouTube Frame -->
      <iframe
        width="560"
        height="315"
        class="w-full h-full"
        src="https://www.youtube.com/embed/jfKfPfyJRdk?controls=0&autoplay=1"
        title="YouTube video player"
        frameborder="0"
        allow="accelerometer; autoplay; clipboard-write; encrypted-media; gyroscope; picture-in-picture"
        allowfullscreen
      ></iframe>
    </div>
  </main>
</body>
</html>-
Replace the timer and agenda
srcURLs with your output links from the Output Links panel. -
Change the YouTube link with your own video ID
https://www.youtube.com/embed/<YOUR_YOUTUBE_ID>?controls=0&autoplay=1(tip:autoplay=1starts the playback as soon as the page is loaded). -
Save the “dashboard.html” file and open it in your web browser.
Here’s a working example: https://codepen.io/lhermann/pen/RwMYPdj
Embed websites into Stagetimer
Everything above covers embedding Stagetimer into your website. But you can also go the other direction — show external websites inside your Stagetimer output using the Iframe element.
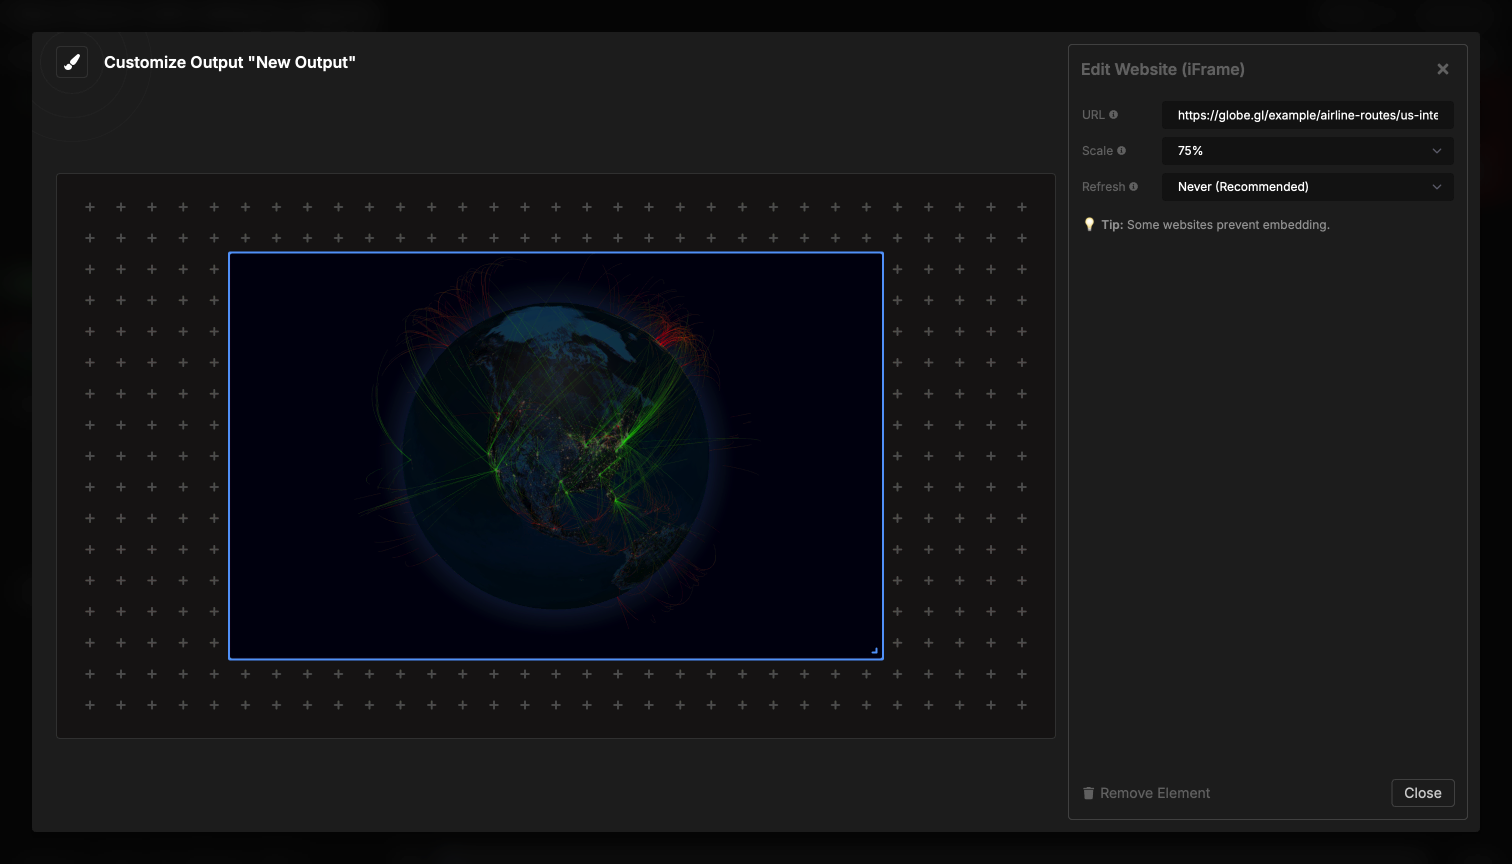
This is useful for displaying live dashboards, data feeds, weather, donation trackers, or any web page right next to your timers. The embedded website loads in real-time and continues to update just like it would in a regular browser.
You can adjust the scale (zoom in or out) and set an optional refresh interval. Some websites block iframe embedding for security reasons — see the Iframe element docs for details and workarounds.