Stagetimer Desktop App
What is the Desktop App?
Stagetimer’s desktop app is designed for environments where internet connectivity is unavailable or unreliable, such as remote event locations, conference centers with restricted network access, or corporate environments with regulated internet use. Additionally, using the desktop app can prevent disruptions caused by unexpected internet outages.
This version is available as an installable application for both Mac and Windows. It mirrors the capabilities of the web version, allowing a seamless transition between online and offline modes. The basic features of the offline app are free to download. Each Stagetimer plan includes an offline license key that activates the corresponding paid features in the desktop app.
Downloading the Desktop App
Download the latest version of the offline application from our official page: https://stagetimer.io/desktop-app/.
After downloading, run the installation file and follow the on-screen instructions. The setup process is straightforward, designed to get the app up and running with minimal hassle.
Starting the Stagetimer App for the First Time
The Stagetimer desktop app operates fully without an internet connection, using your local area network (LAN) to connect devices within the same network to your Stagetimer rooms.
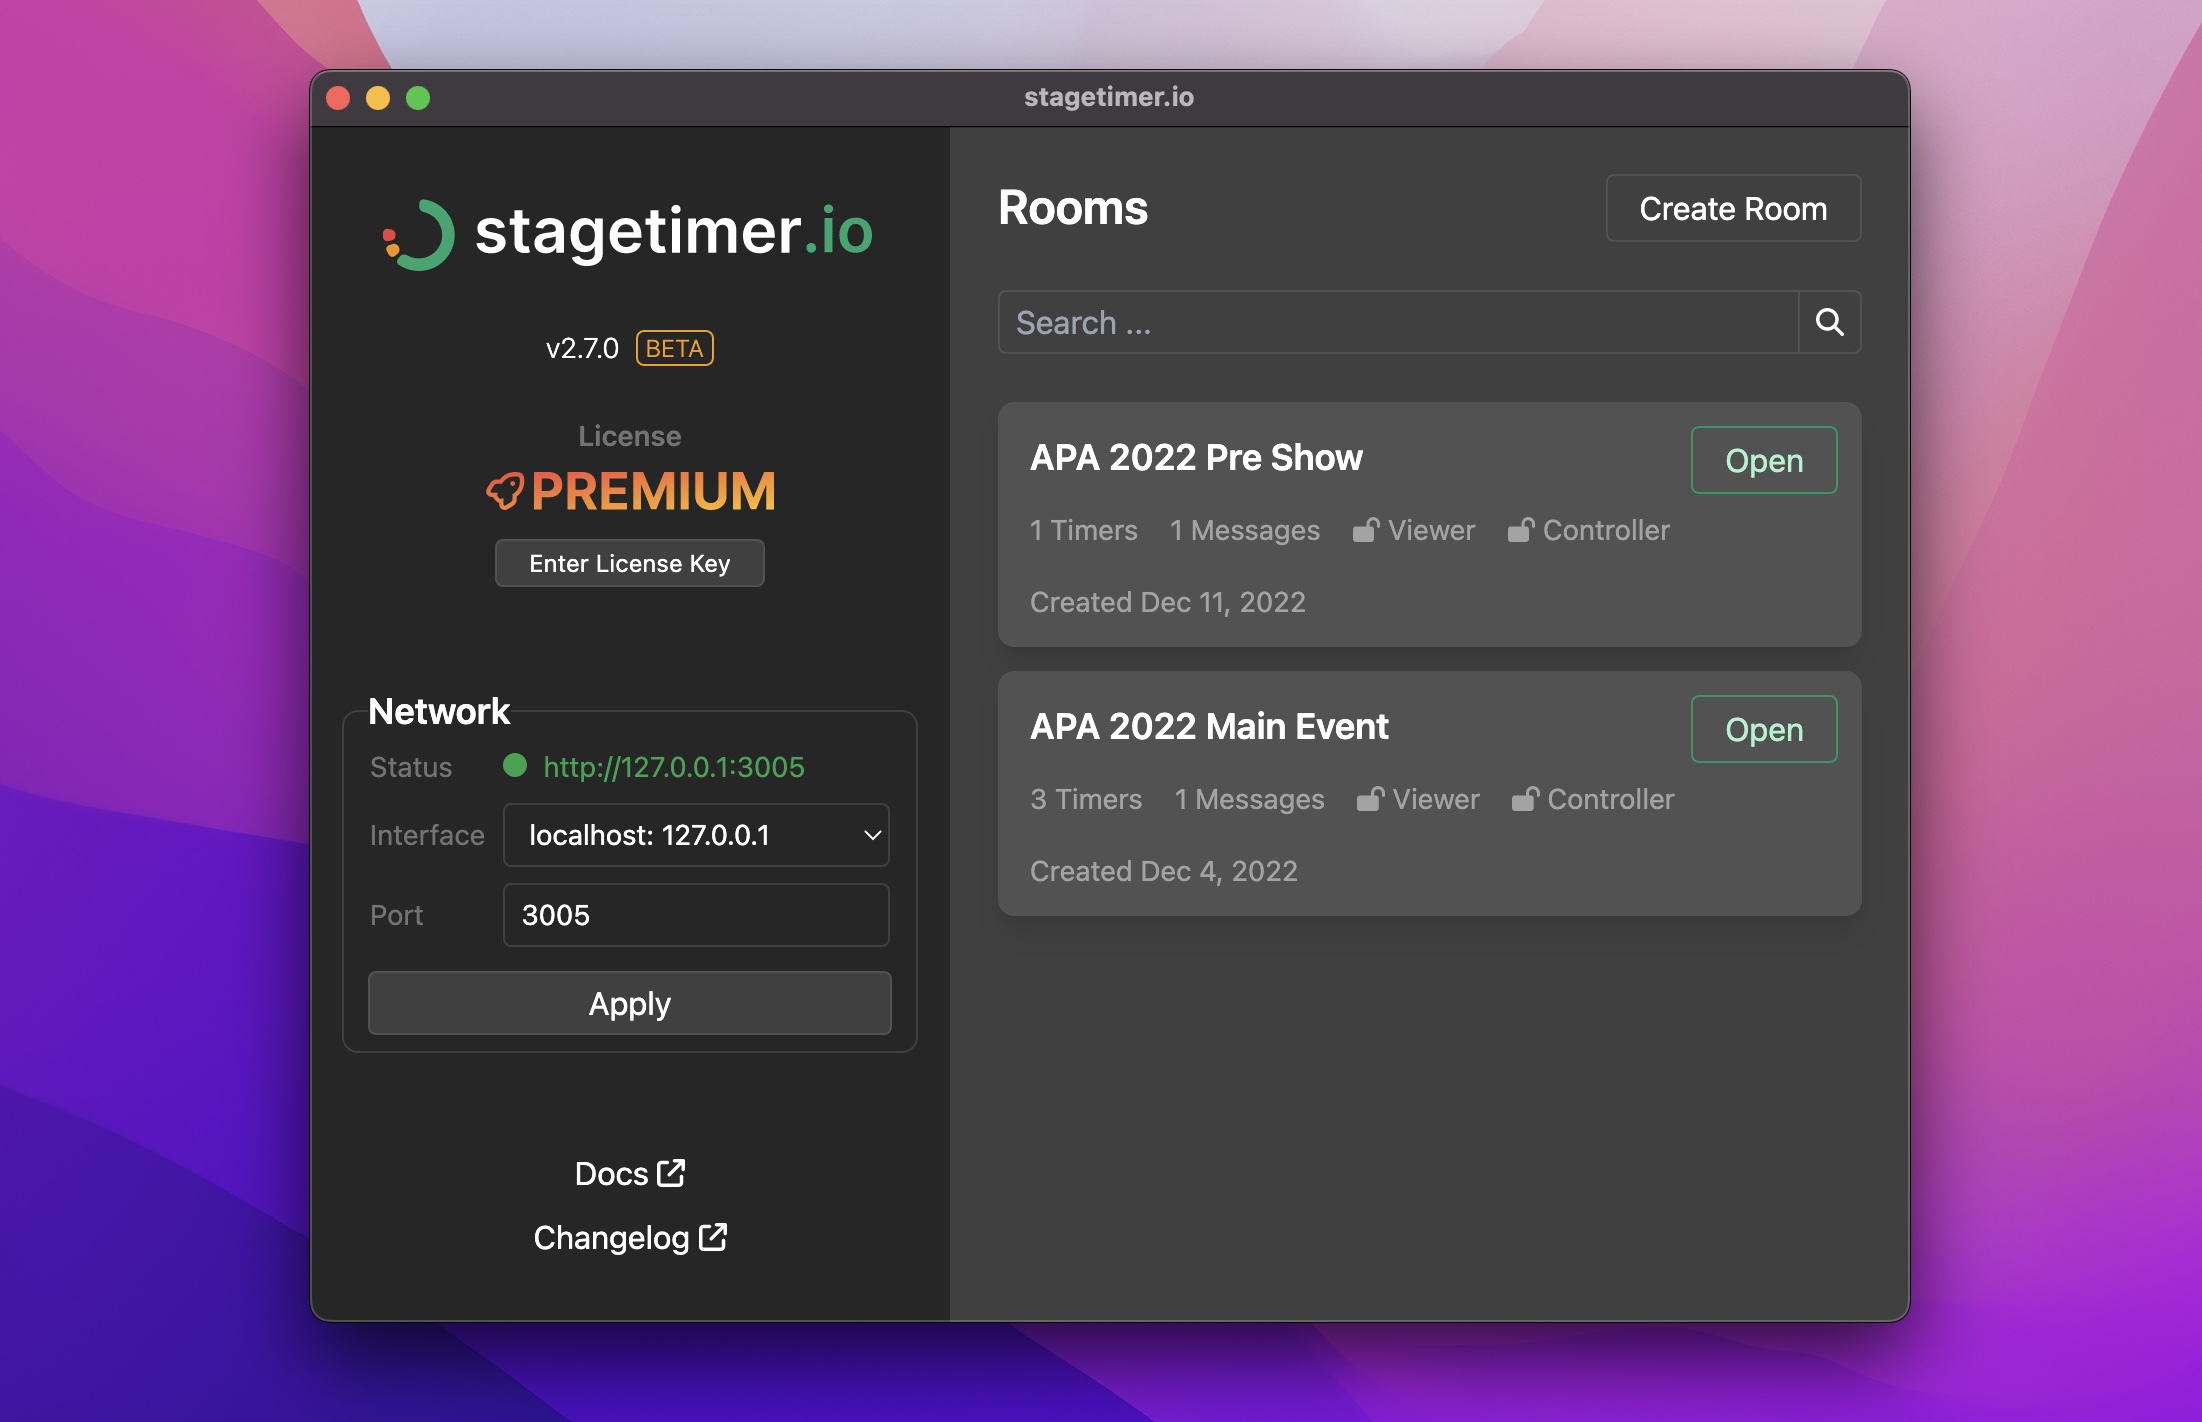
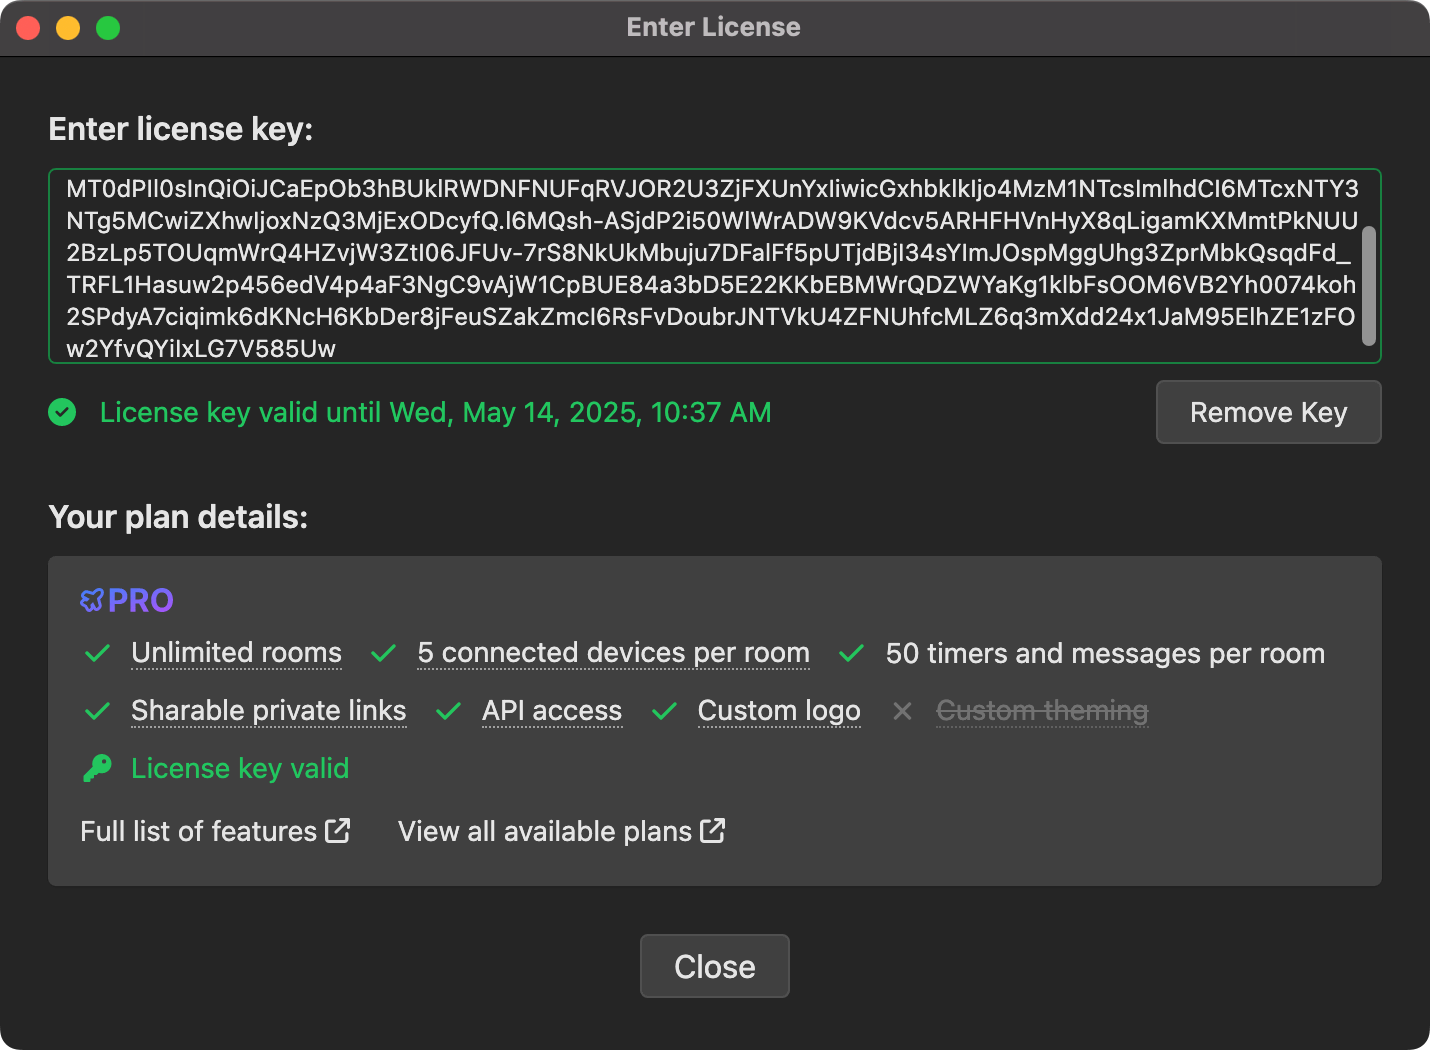
If you have a paid Stagetimer plan, you’ll find an desktop app license key in the dashboard of the web interface. This key enables the premium features available online in your offline application.
For those unfamiliar with networking terms like IP addresses, refer to our “Working with Local Network” section below, which guides you through connecting devices on your local network.
Since the offline app operates independently of the internet, it does not maintain a connection with our servers. To transfer setups or room configurations from the web version to the desktop app, see the “Exchanging Data Between Web Version and Desktop App” section.
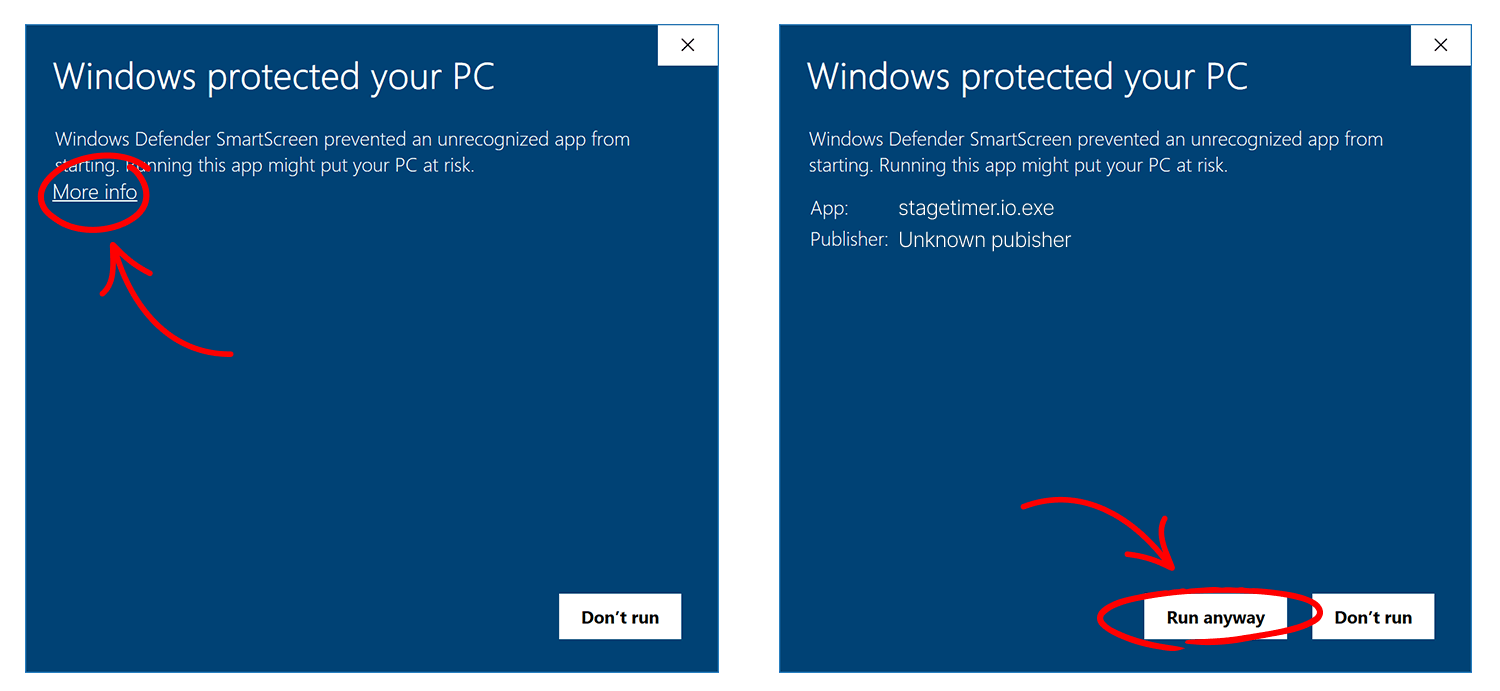
Windows Warning
When running the Stagetimer app on newer versions of Windows for the first time, a security warning may appear. This is because the app is not code-signed with an official Microsoft certificate, a process that can be challenging and costly for smaller developers. It is safe to select “Run anyway” when prompted, provided the app was downloaded directly from our official website.
Working with Local Networks
The Stagetimer app leverages your local network to enable connectivity between devices within the same space. Follow this guide to set up your devices on a common network.
Preparations
- The app needs to be running on only one computer within the network.
- All devices should be connected to the same local network, typically achieved by connecting to the same WiFi router.
- In environments like corporate or university networks with additional security protections, consult with the network administrator for assistance.
Step 1: Select the Network Interface
- Open the Stagetimer offline app.
- Navigate to the network settings and select the network interface connected to your router, often an IP address like
192.168.178.xx. - Click “Apply” to restart the server. Ensure the green “Status” URL updates to reflect the new IP address.
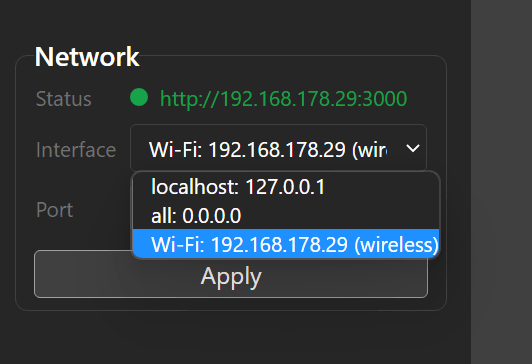
Note: Avoid using the default IP 127.0.0.1, as it is only accessible from the hosting computer.
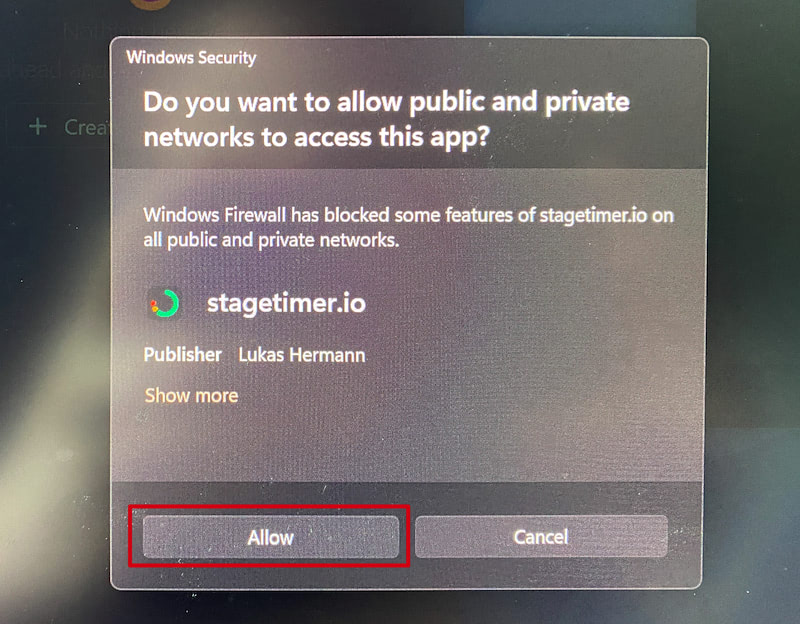
Step 1b: Allow Network Access (Windows Only)
After updating the network settings, Windows may prompt you to allow network access for the app. Ensure both public and private network access are permitted to avoid connectivity issues.
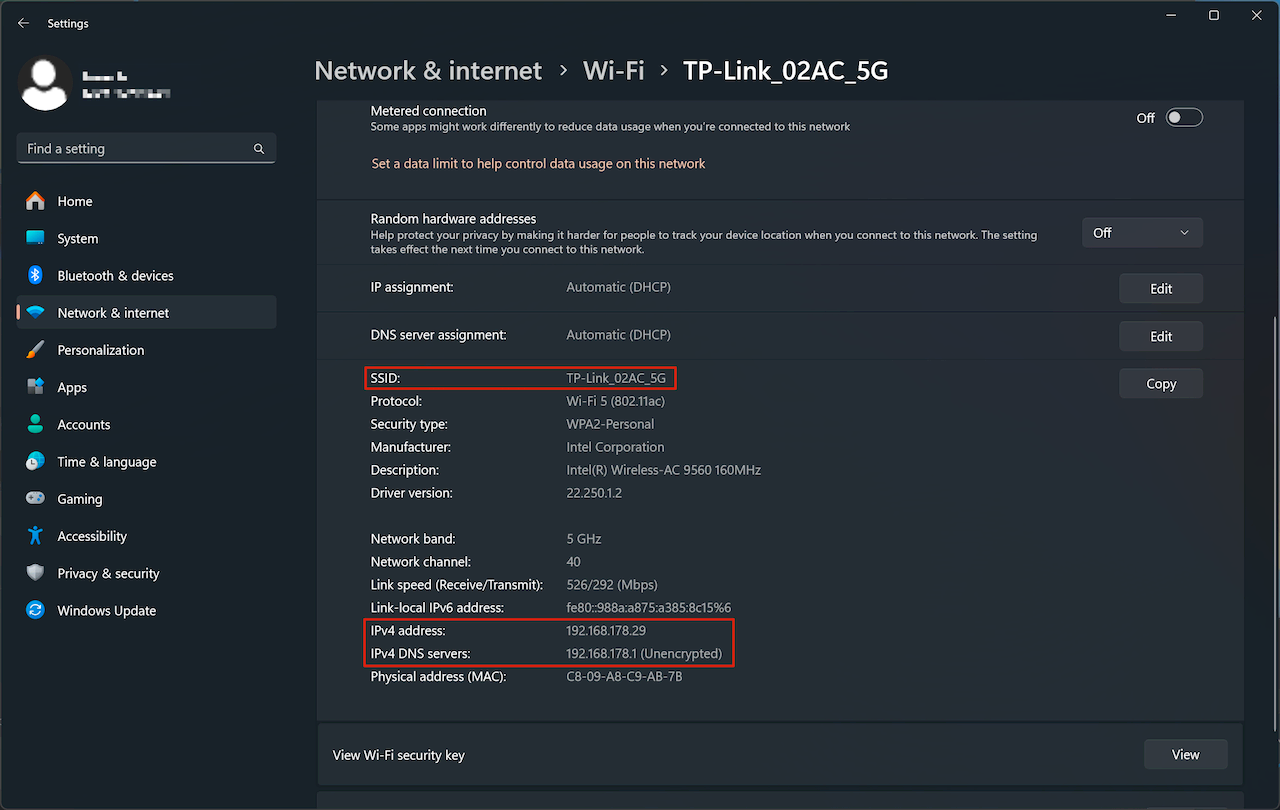
Step 2: Verify Device Connection
Ensure that all devices, such as a Windows computer and an Android phone, are connected to the same router:
- Verify that the SSID (router name) is the same on all devices.
- The IP addresses should be similar, typically matching all segments except for the last.
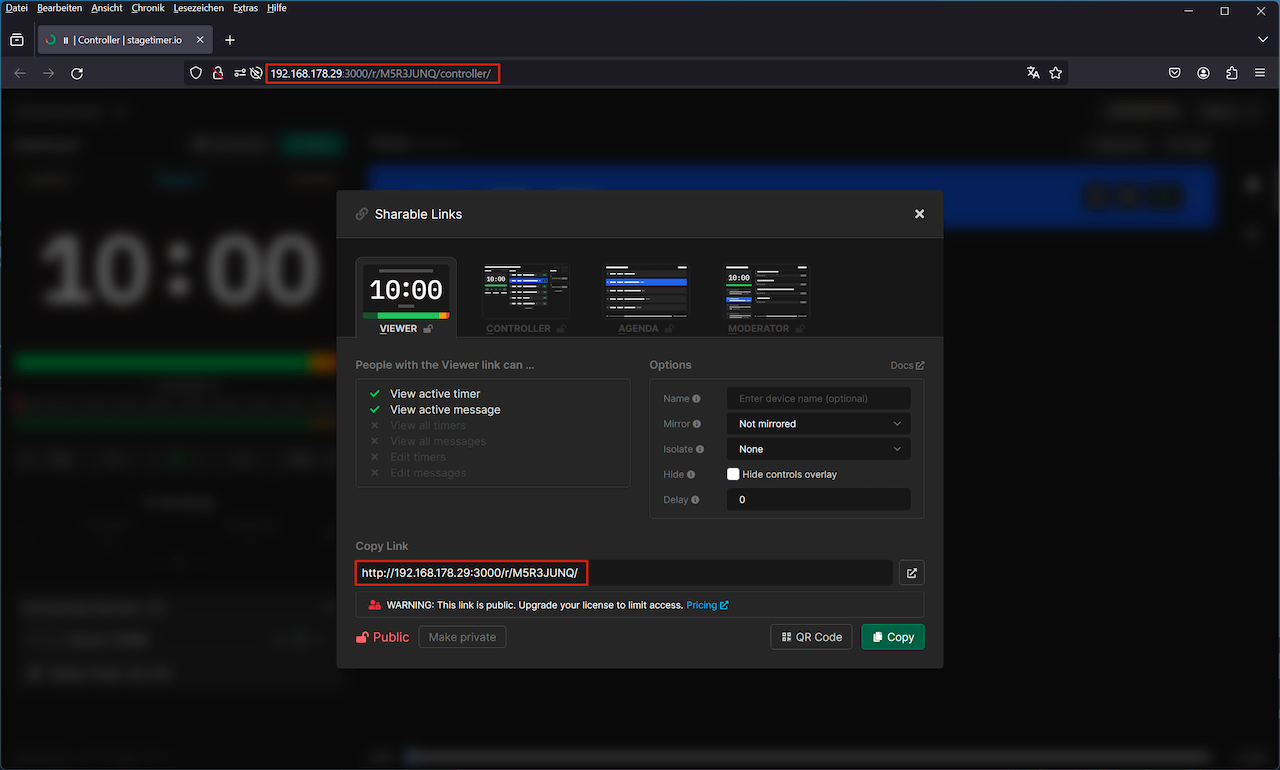
Step 3: Open and Verify Room URL
- Open a room within the Stagetimer app.
- Ensure the URL displayed in the address bar and the URL in the shareable links popup match the IP address selected in Step 1.
Step 4: Access from Another Device
Open the link or scan the QR code provided in Step 3 on your other device (e.g., a mobile phone) to join the room.
Note: Connection issues in settings with stringent security protocols, like universities or office buildings, may require consultation with your system administrator.
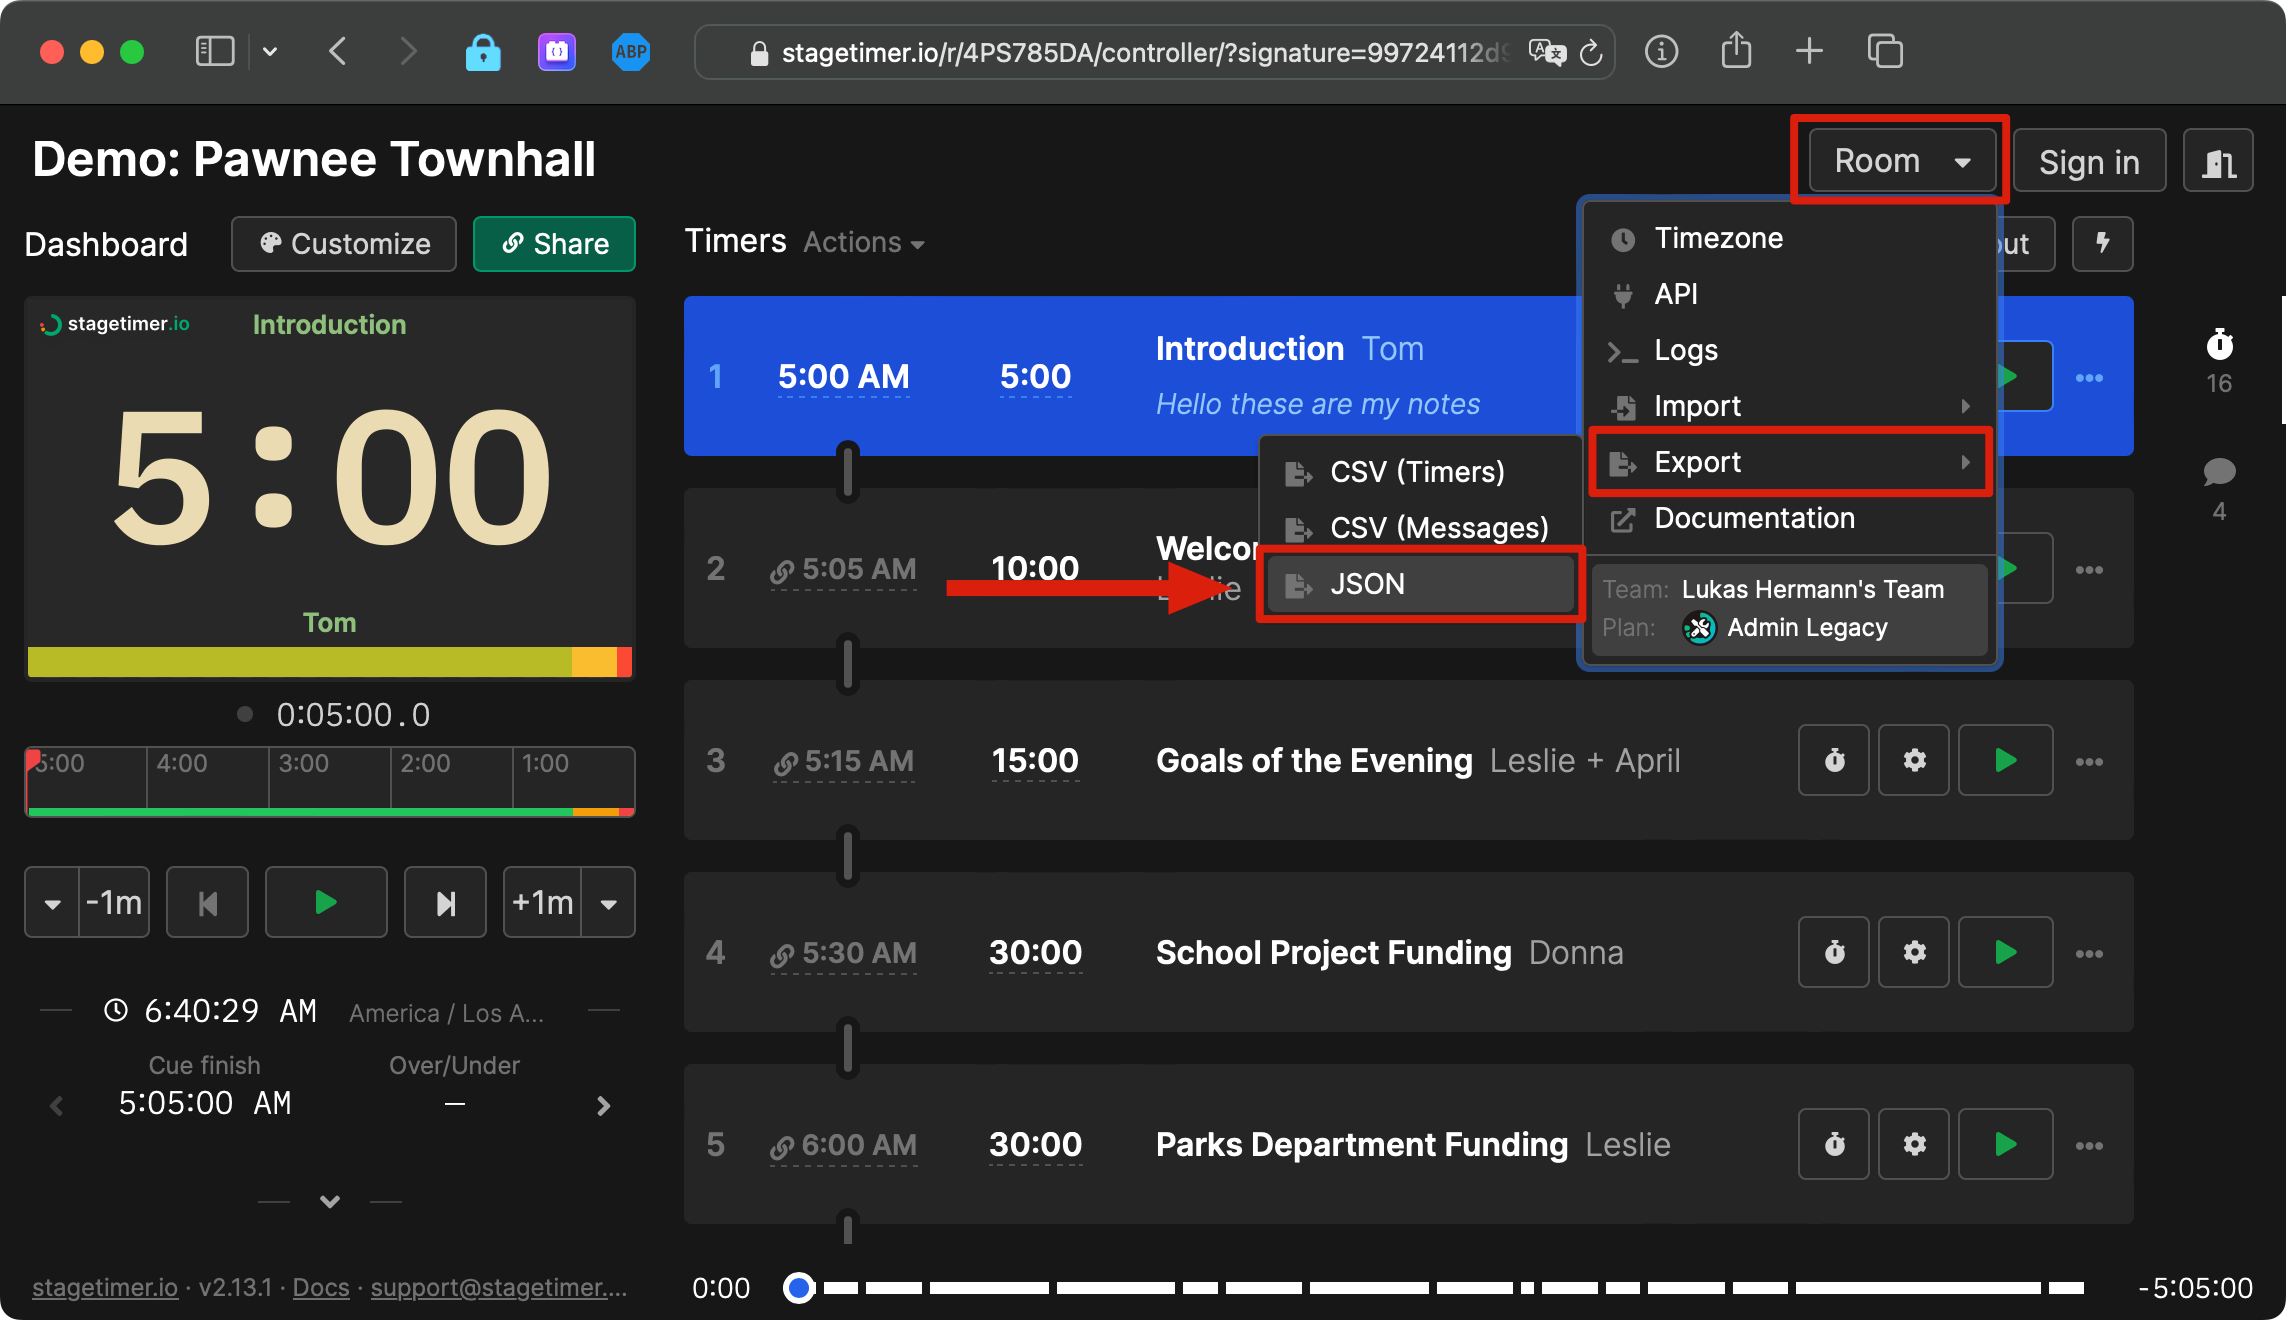
Exchanging Data Between Web and Desktop App
As of version 2.13, Stagetimer supports data synchronization between its web and offline applications. You can export your room data as a JSON file from the web version and import it into the offline app, and vice versa. This process captures all settings, timers, and messages associated with the room.
It is important to note that background images are not included in the JSON export. These images are typically linked to our servers. If you are using the desktop app in a setting without internet access, you may need to manually re-upload any background images used in your rooms.
Exporting from Web Version
- Navigate to the room you wish to export.
- Select the ‘Export’ option, found in the room settings menu.
- Save the generated JSON file to your device.
Importing to Desktop App
- Open the Stagetimer offline app.
- Go to the room where you want to import the data.
- Choose the ‘Import’ option and select the JSON file you exported from the web version.
- Upload any necessary background images separately, if applicable.