Using Timers Correctly
How to Properly Set Up a Show with Multiple Cues
Import a Rundown from Google Sheets or MS Excel via CSV
To initiate a show, you have the option to import a rundown from Google Sheets or MS Excel via CSV. Upon importing, the Stagetimer will scan the document and attempt to recognize its structure.
Don’t worry if the structure isn’t instantly recognized. You can manually tweak it before committing to the import.
To get started, here’s a template for a simple rundown on Google Sheets that you can copy.
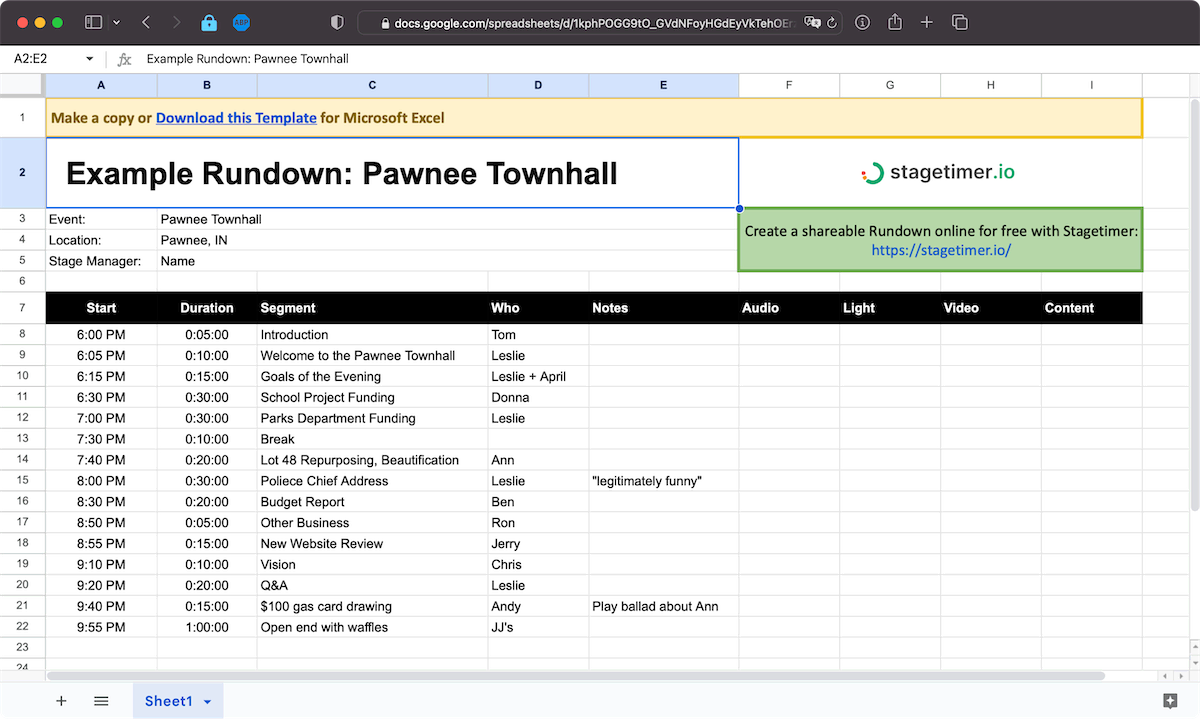
Further, you can watch this video showcasing how to use the importer for a visual walk-through.
Decide if You Want to Run Your Show Automated or Manually
Depending on your show’s needs, you can choose to run it manually or automate it.
If you have a dedicated show caller, they usually will manually advance from cue to cue. In this case, we recommend setting up the Stream Deck with Companion. This way, the show caller has easy access to all important actions like start, stop, next, and so on. You can find a detailed guide on how to set it up here.
On the other hand, if you’d like to run the show without manual intervention, you can link all timers together. This means they will run automatically one-by-one. Note that with this option, you might lose the flexibility of letting cues run overtime. However, it’s a great choice if you want to use the Agenda page on some screen in the foyer of a conference center.
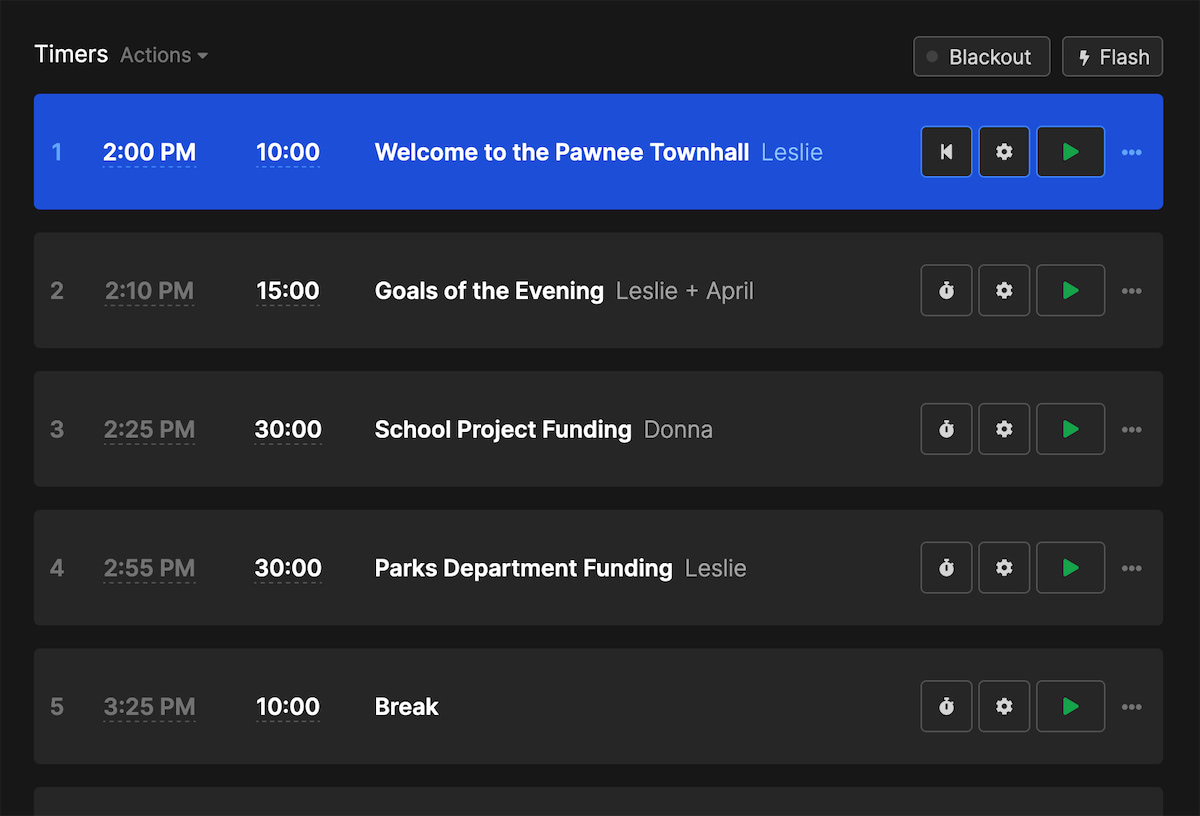
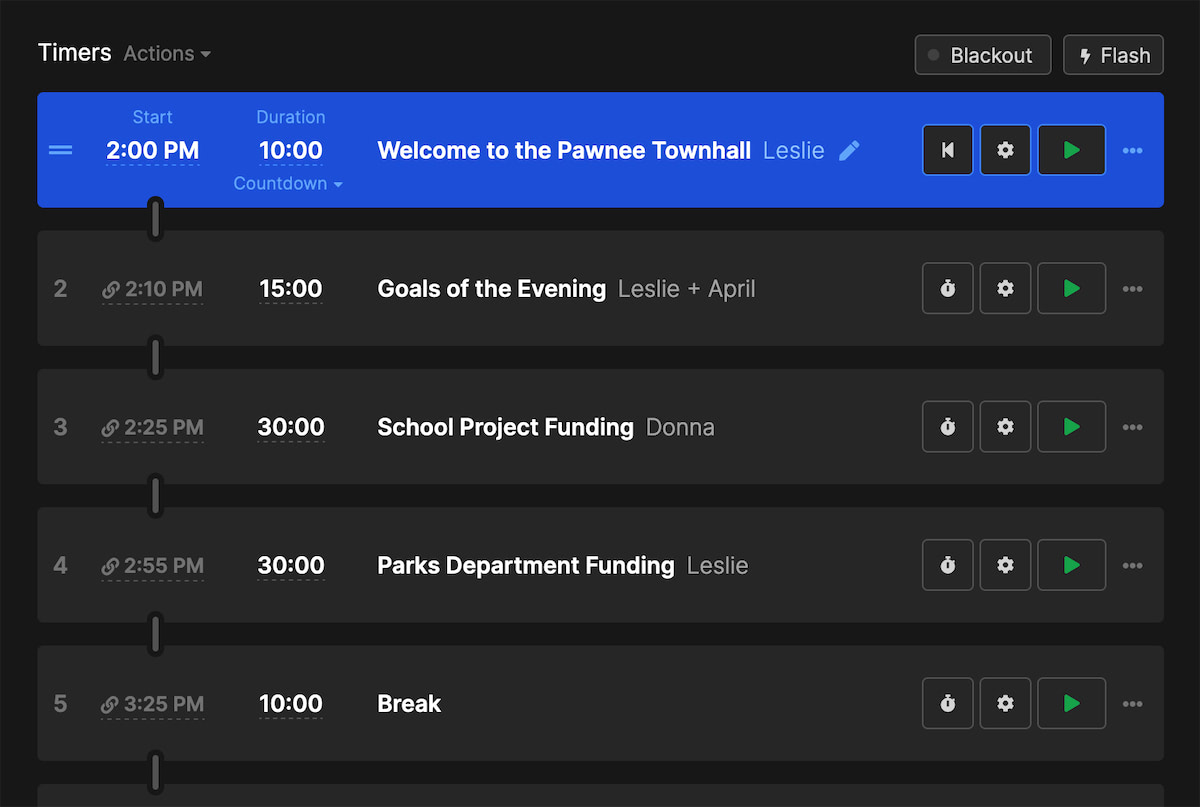
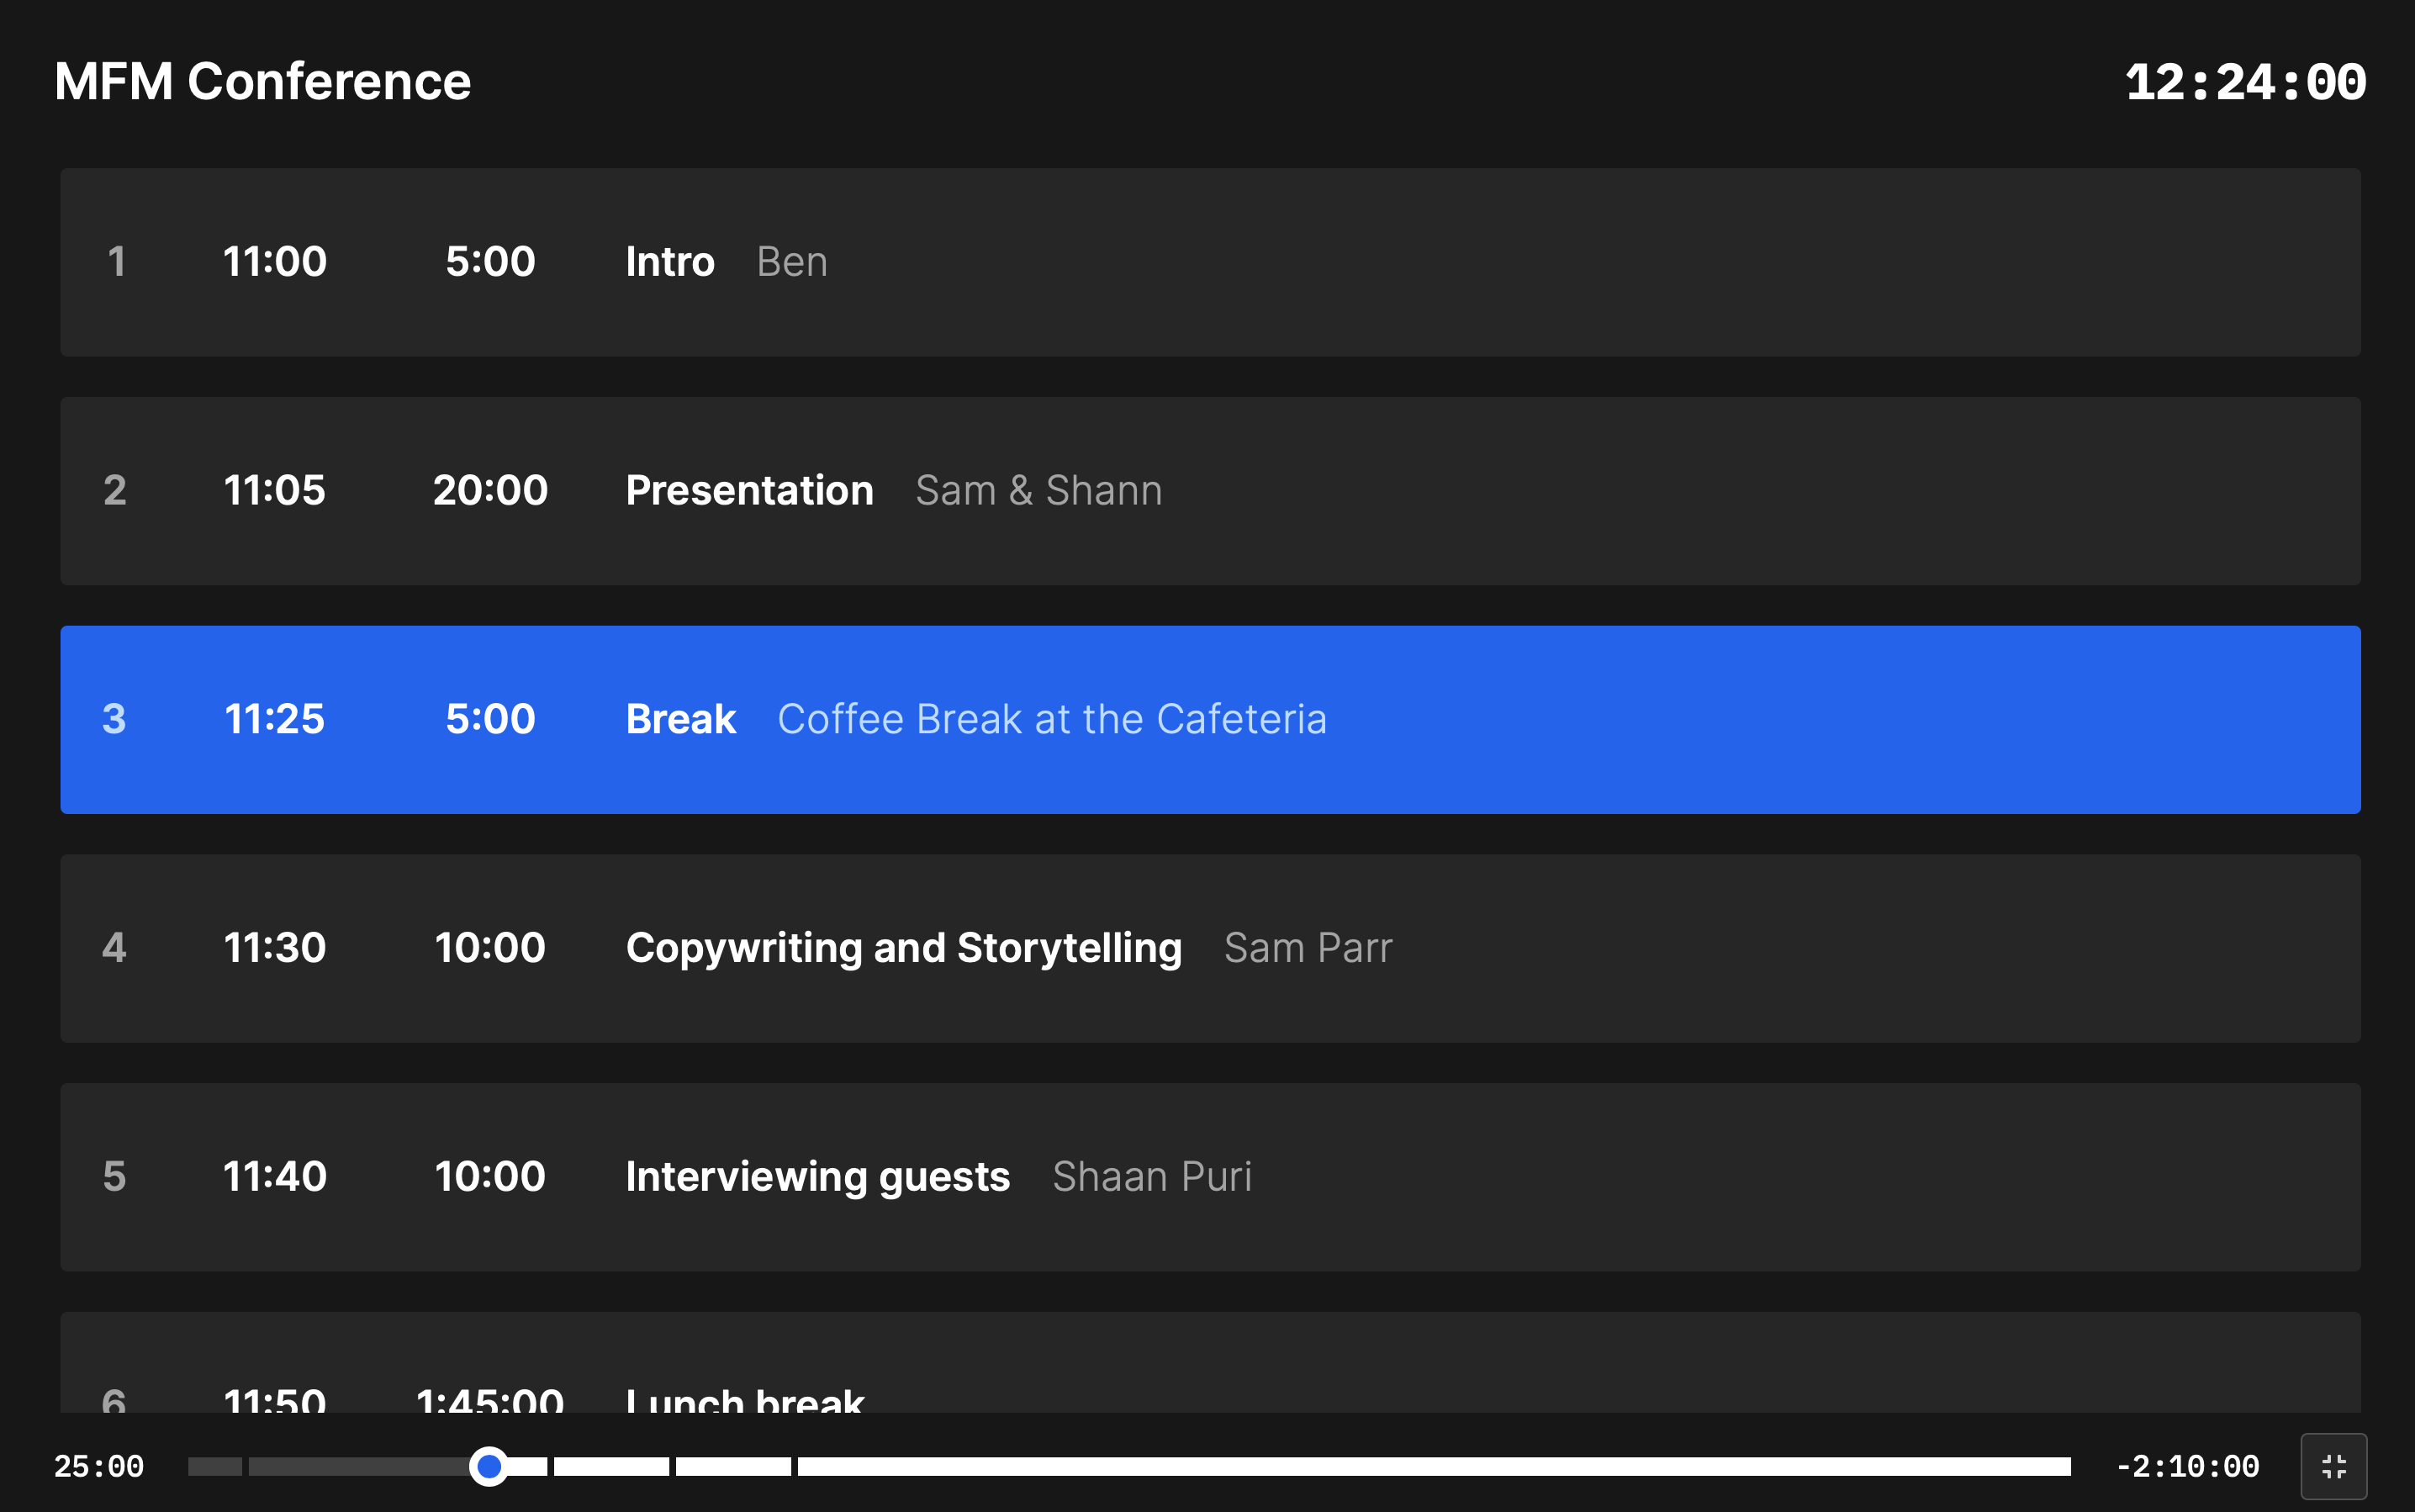
Using the Start Time Properly
Every cue can have its own start time, but remember, start times are completely optional.
The ideal approach is to set a start time on the first cue. Stagetimer will then automatically calculate the following start times based on timer durations.
If your event has a break in between, or if there are segments that have hard time constraints (e.g. an esports event reshow starts at 7PM, but the first tournament game has to start at 7:45 sharp), then you can manually set the start time on that cue as well.
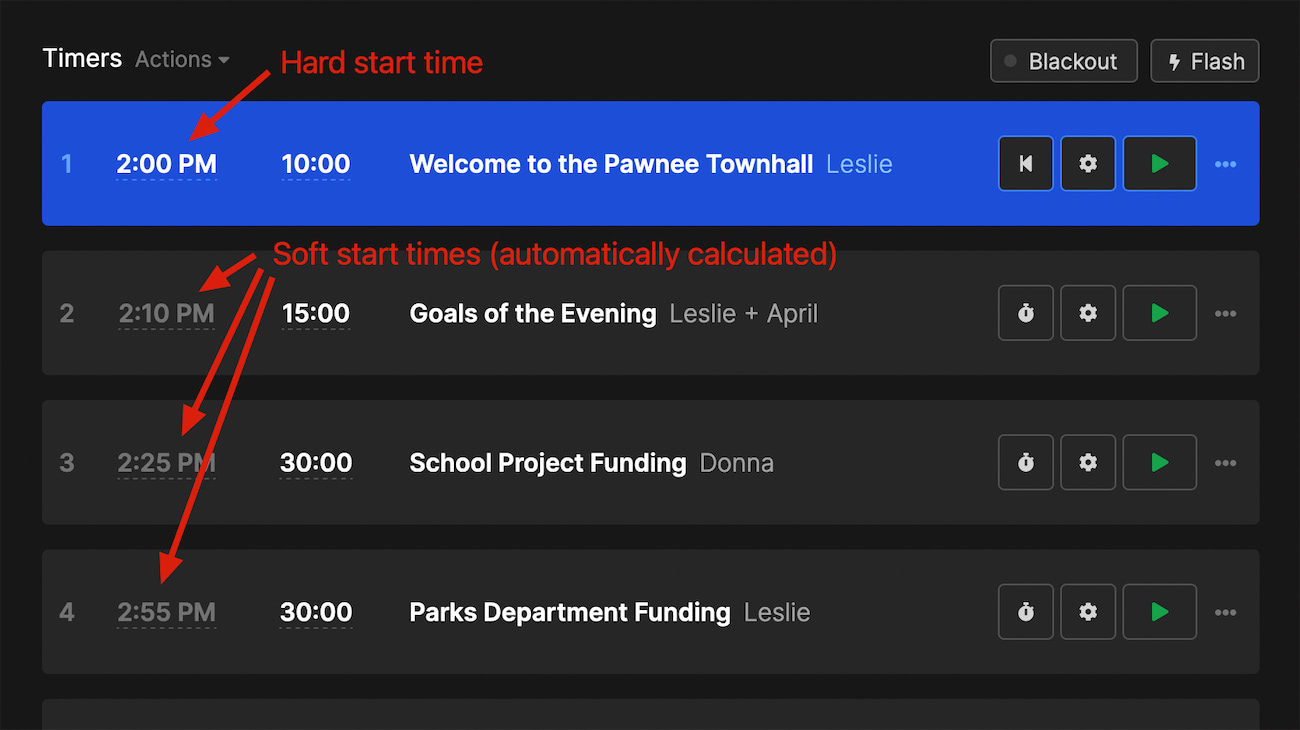
Stagetimer uses these hard (user-defined) and soft (automatically calculated) start times to calculate the Over/Under time. This tells you if you’re running late or ahead of schedule. It also shows if the cues’ durations add up properly or if there’s a gap or overlap in time.
To help you differentiate, hard start times are white while soft start times are gray.
Note that if you switch a cue to “scheduled” (under timer triggers), it will use the hard start time to auto-start that particular cue. In all other cases, the hard start time is purely a visual feedback for the controller and won’t trigger any auto-starts.
Sharing the Output with Your Talent, Team, and Audience
Sharing the output of your show is straightforward with the three primary outputs available. They’re accessible via the “Share” button:
-
The viewer link: This is the fullscreen version of the small preview in the top left of the controller page. It’s meant as a confidence monitor for your talents on stage. Additionally, it can also be used as live feedback for other teams on the show like lighting, audio, or backstage.
-
The agenda link: This is a simplified view of the show’s rundown mainly intended for the audience. For instance, visitors of a conference can see the day’s schedule on a screen outside the lecture hall. The agenda page follows the active timer by automatically scrolling along. Internally, it can help everyone stay in sync on current and future segments of the show.
-
The moderator link: This link is designed primarily for message interaction. For example, if you’re using messages to collect audience questions or transmit social media comments to the stage, someone can use the moderator page. It gives full control over messages but doesn’t allow timer control. For more details on this, refer to this guide.
See all the options available when sharing outputs: Sharing timer and event agenda
Per-Timer Options
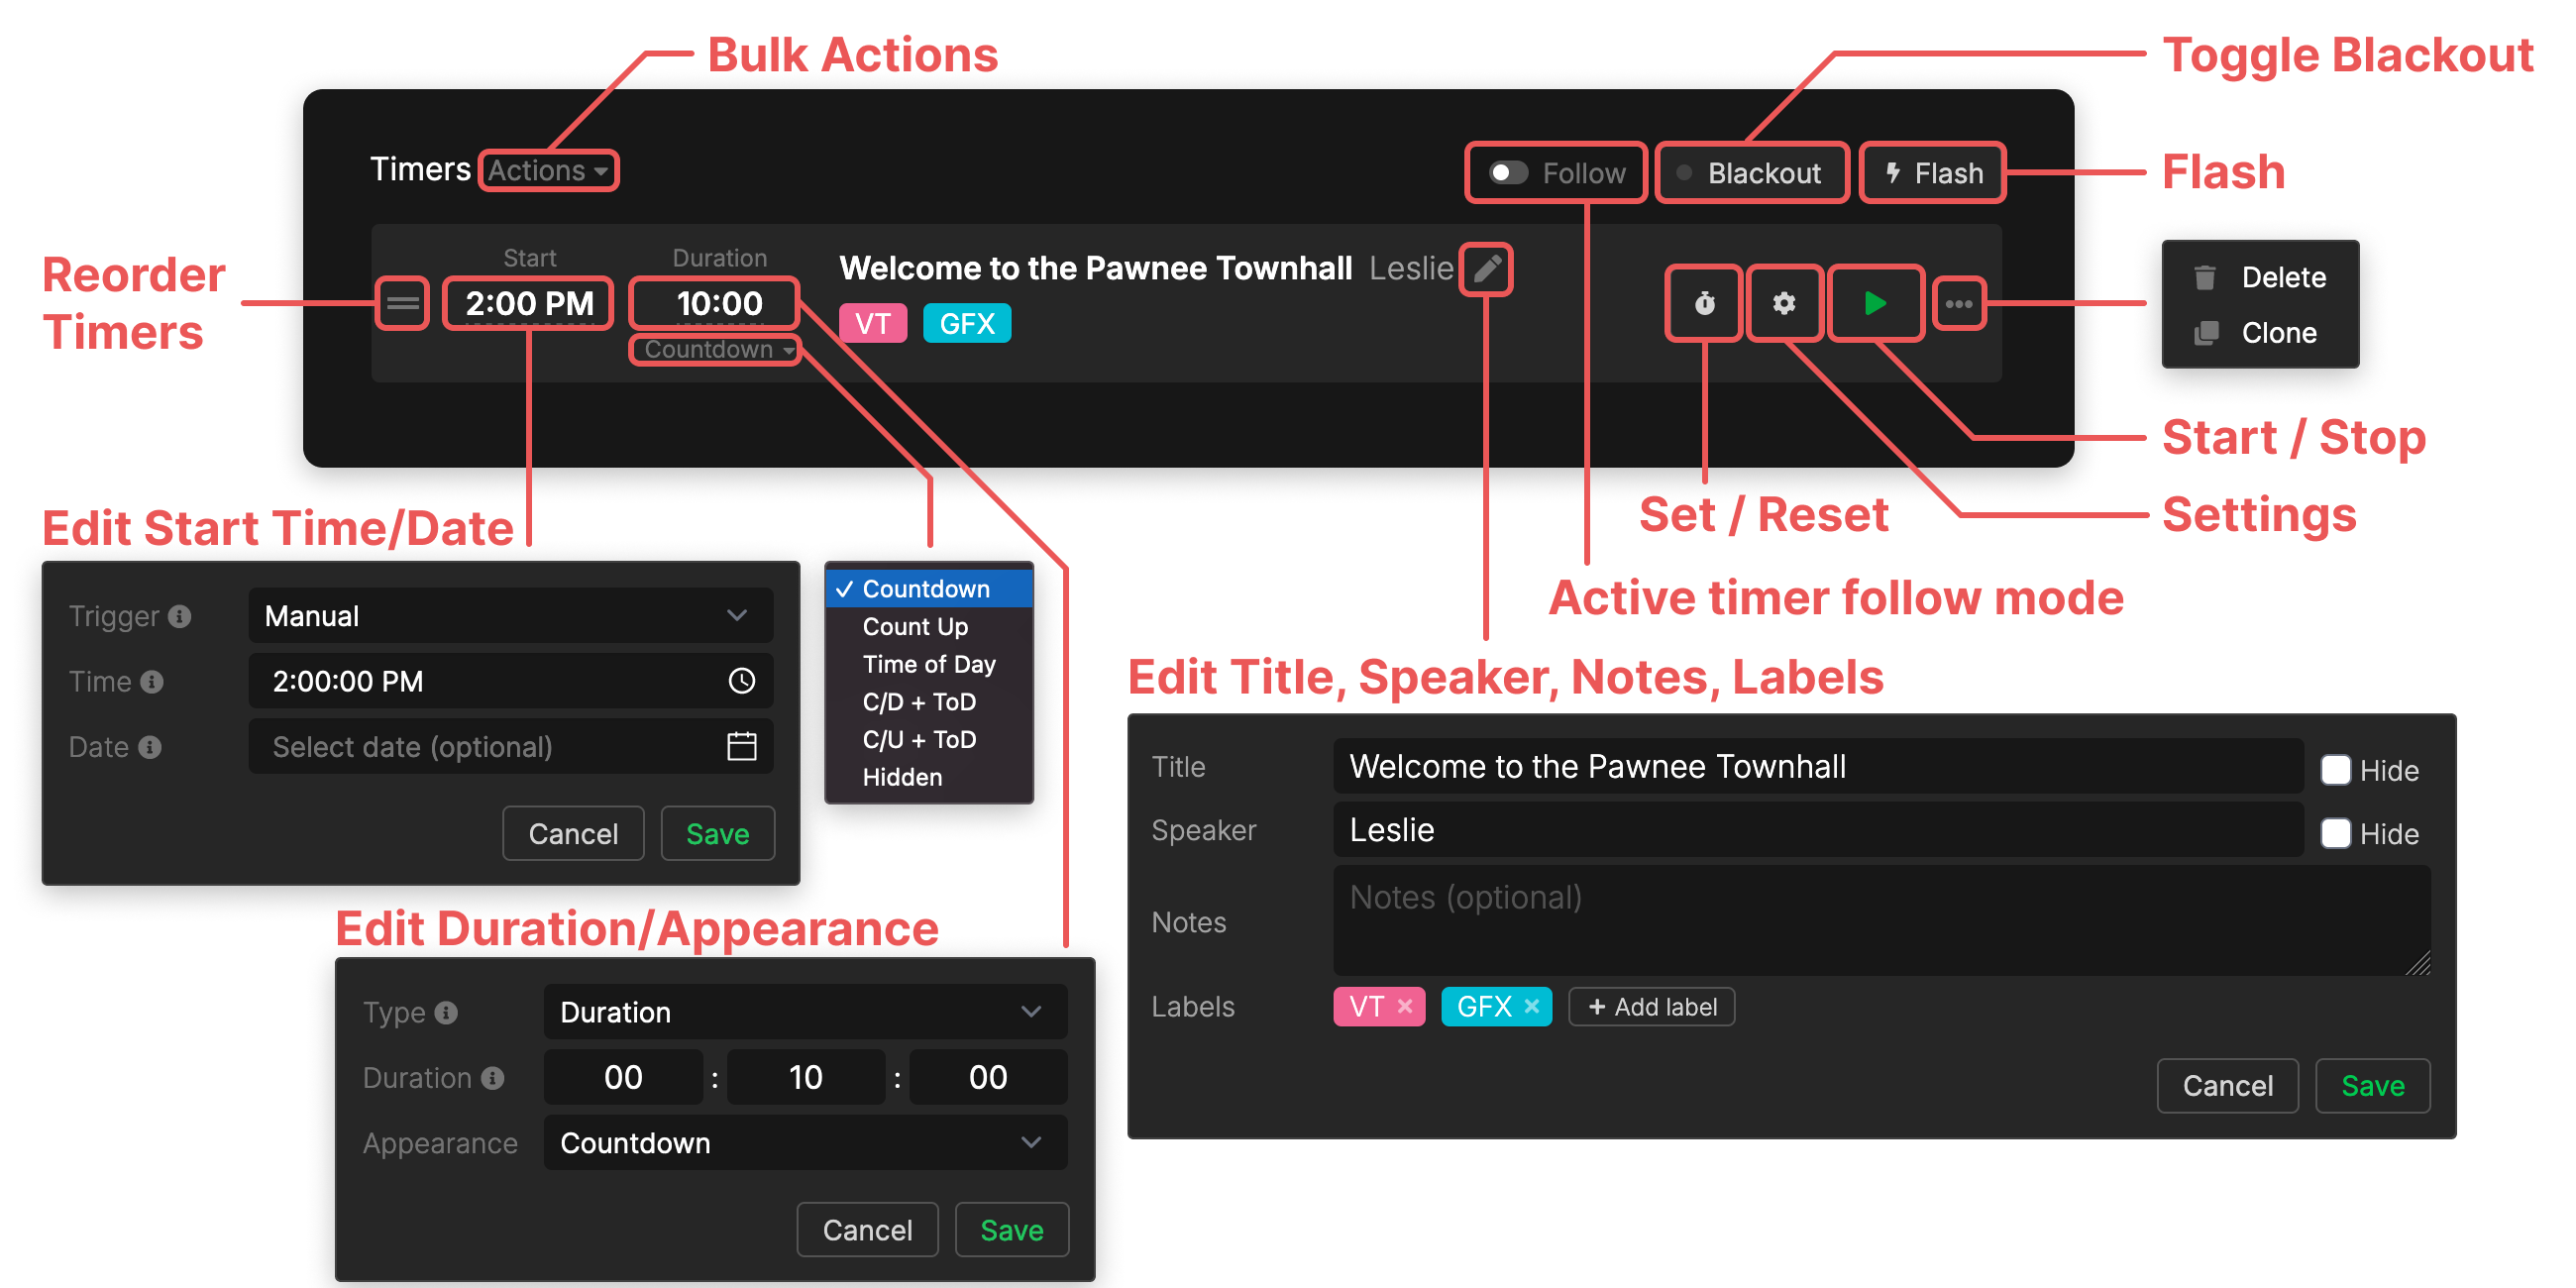
Timer Trigger
To define how your timer starts, you can choose from the following options:
Manual: The timer has to be started manually via the “Play” button either on the cue itself or the transport controls.Linked: The timer is linked to the previous timer such that it starts automatically when the previous timer reaches zero.Scheduled: The timer starts automatically at the given time. This scheduling happens server-side and will start the timer even if the controller page is closed in the browser.
Timer Duration Type
The following options let you define how the runtime length of your timer is calculated:
-
Duration: The timer has a fixed duration that you specify. This is the most straightforward option - you set a specific amount of time (e.g., 10 minutes), and the timer counts down or up from that value. -
Until Finish Time: Instead of specifying a duration, you set a specific time when the timer should end (e.g., 2:30 PM). Stagetimer automatically calculates the duration based on when the timer starts. For example, if you start the timer at 2:00 PM with a finish time of 2:30 PM, it will calculate a 30-minute duration. This is particularly useful for events with strict scheduling requirements. -
Time Warp (Modified Speed): This experimental feature allows you to set two different durations:- Duration: The actual time the timer will run (e.g., 8 minutes)
- Presenter Sees: What appears on the timer display (e.g., 10 minutes)
With this option, the timer appears to run faster or slower than real time. For example, if a presenter tends to run long, you could set an 8-minute actual duration but display 10 minutes to them. The timer will run 1.25x faster, helping them finish on time without them knowing their slot was shortened. Conversely, you could also slow down a timer if needed.
Timer Appearances
Here’s how you can choose to display your timer:
Countdown: The default, the timer counts down from the duration total to zero.Count Up: The timer counts up from zero to the duration total.Time of Day: Showing only the current time of day, or clock, and hiding the progress bar.C/D + ToD: Countdown together with Time of Day.C/U + ToD: Count Up together with Time of Day.- “Hidden”: The timer and progress bar are hidden, but all other elements like the logo and the title are still visible. This is different from the “blackout” option where all elements of the timer are hidden.
Global Settings for all Timers
Note that these options are available to paid users. See all other options available under Customization.
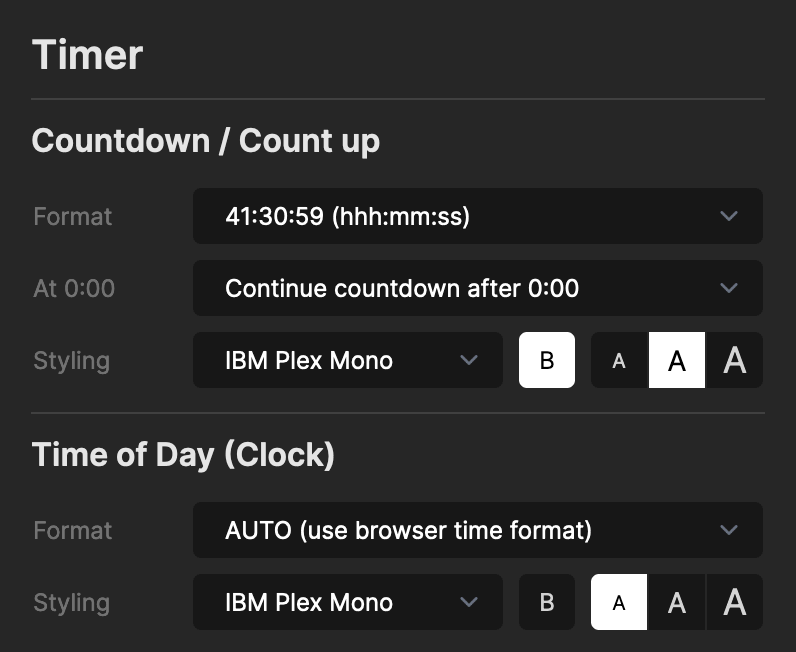
Time Formats
Stagetimer offers a variety of formats for your timer, choose the one that suits your needs the best:
1:17:30:59 (d:hh:mm:ss)1:17:30:59.5 (d:hh:mm:ss.S)41:30:59 (hhh:mm:ss)41:30:59.5 (hhh:mm:ss.S)230:59 (mmm:ss)230:59.5 (mmm:ss:S)92 (sss)92.5 (sss:S)1d 17h 30m 59s41h 30m 59s230m 59s92s
Time of Day Formats
For the time of day (clock), you can choose one of these formats:
AUTO (use browser time format)19:05:21- 24H with seconds19:05- 24H without seconds7:05:21 PM- 12H with seconds7:05 PM- 12H without seconds7:05:21 (12h w/o AM/PM)7:05 (12h w/o AM/PM)
Behavior when reaching 0:00
Also, decide what happens when your timer reaches zero:
Stop countdown at 0:00Continue countdown after 0:00
Timezones
Setting a specific timezone is crucial for syncing with your international team, consistent timing across all connected devices and correct server calculations. Every room in Stagetimer requires a specified timezone. The timezone of your current location is used when creating a room.
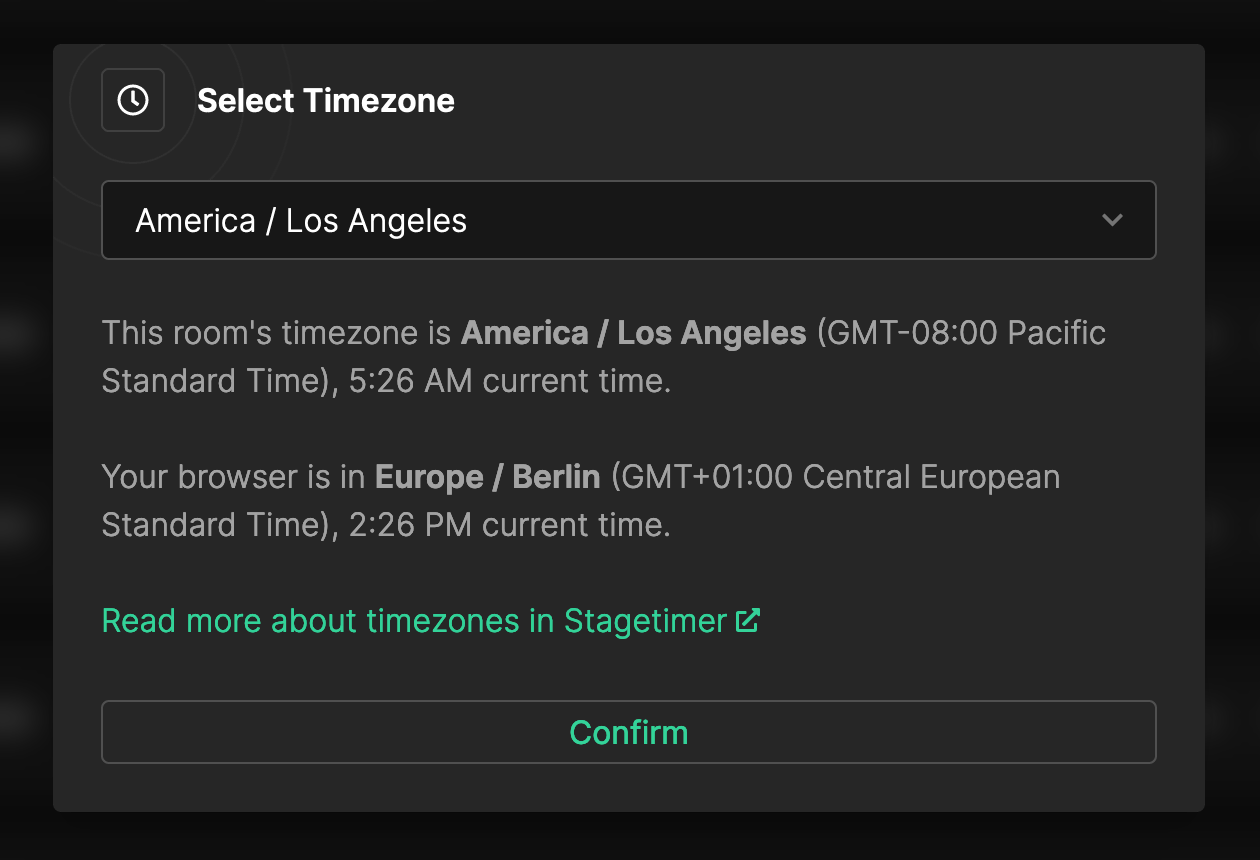
To select a timezone for your room, navigate to the Controller page. Look for the timezone indicator, typically displayed like “America / Los Angeles (PST)”, located beneath the transport controls and next to the current time display. Clicking on this will open the Timezone Chooser.
Timezones are formatted by continent and city (e.g. “America / Los Angeles”) and not by their colloquial name (e.g. “Pacific Time”). The timezone chooser provides additional details such as the colloquial name, the abbreviation, and the GMT offset.
Stagetimer handles daylight saving time changes correctly, shifting all times forwards or backwards by one hour, depending on the change.
Additional Quality of Life Settings
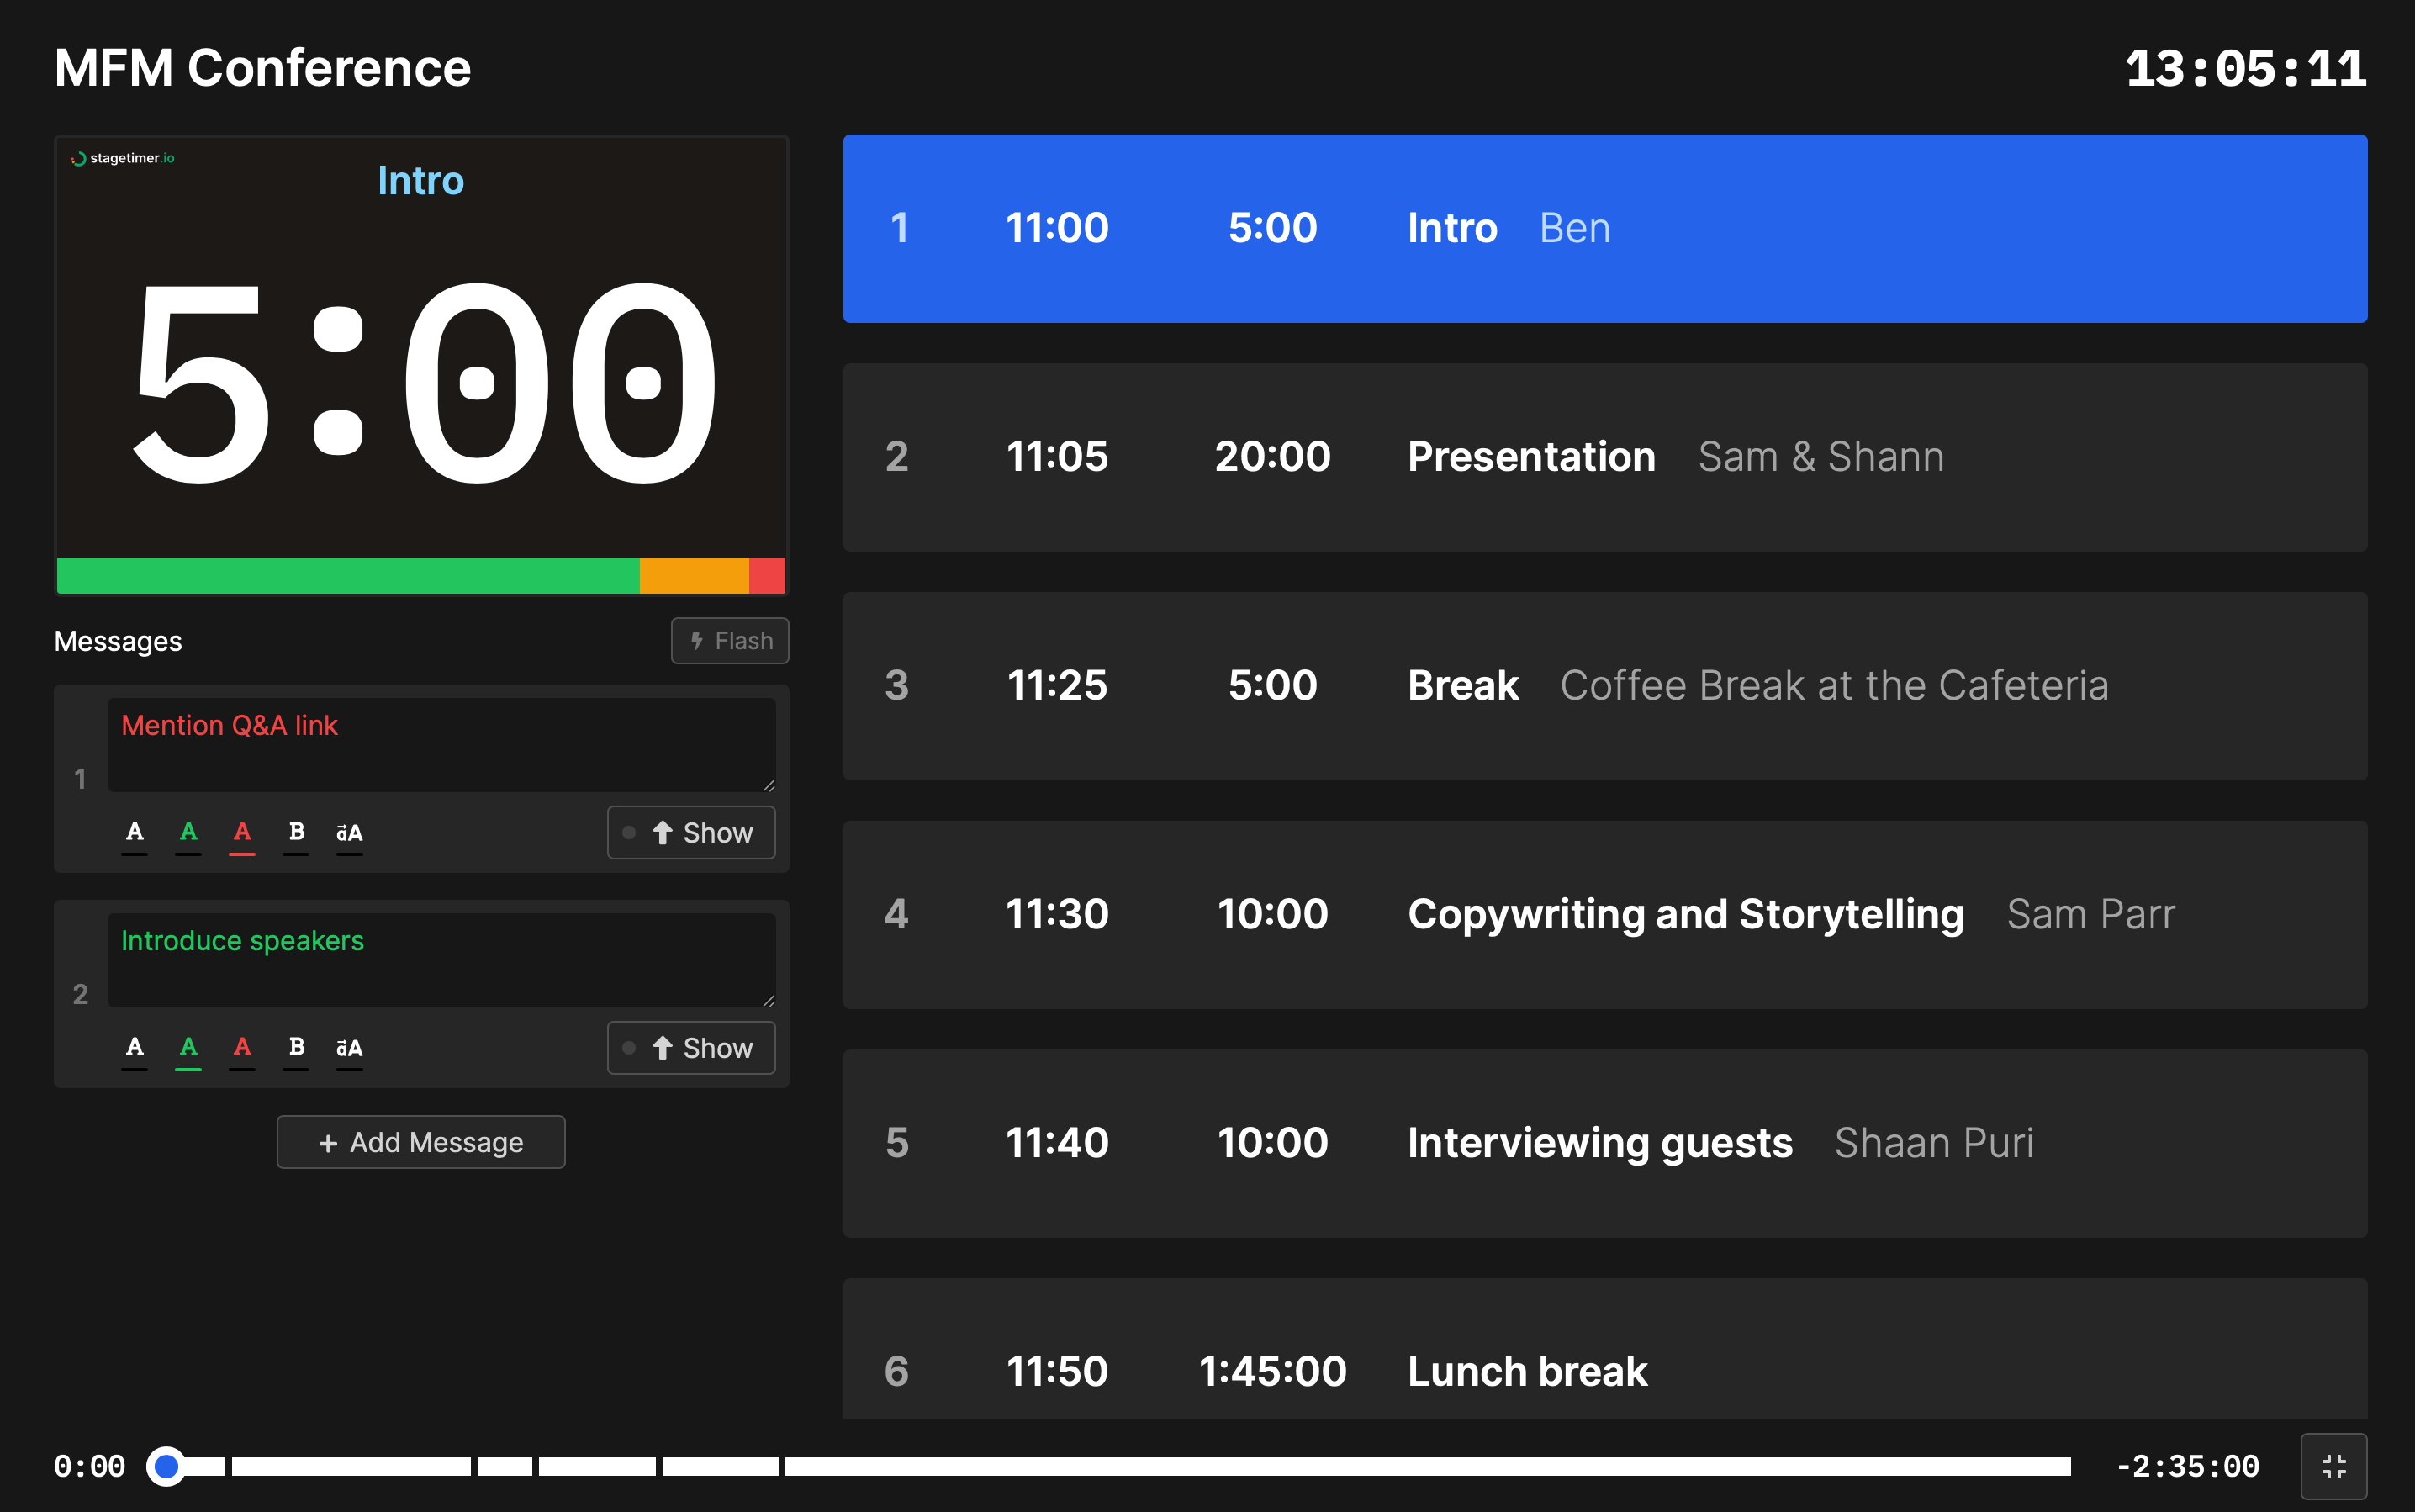
Wrap-up Times & Actions
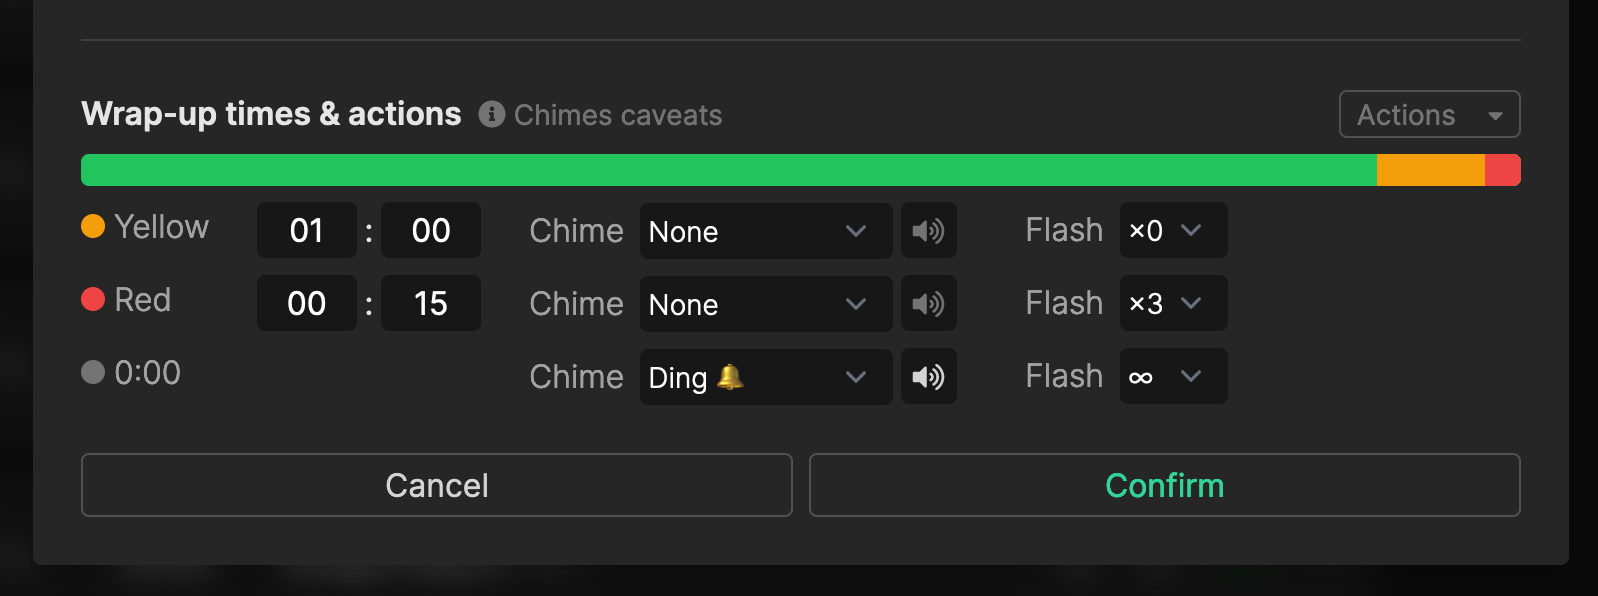
“Wrap-up times” is the term for the yellow and red sections of the progress bar, which help signal to the talent when their segment ends. You can define the duration of the yellow and red parts on a per-timer basis or apply a single setting to all timers.
Additionally, you can set a sound to play or the timer to flash when these points are reached. For example, you can set the timer to flash 3 times when it reaches the red part and then let it flash indefinitely once it goes past 0:00. These options are available to paid users.
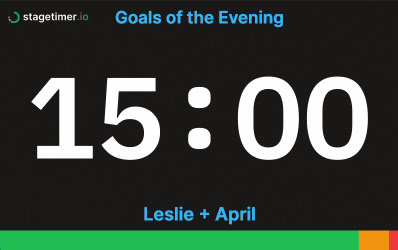
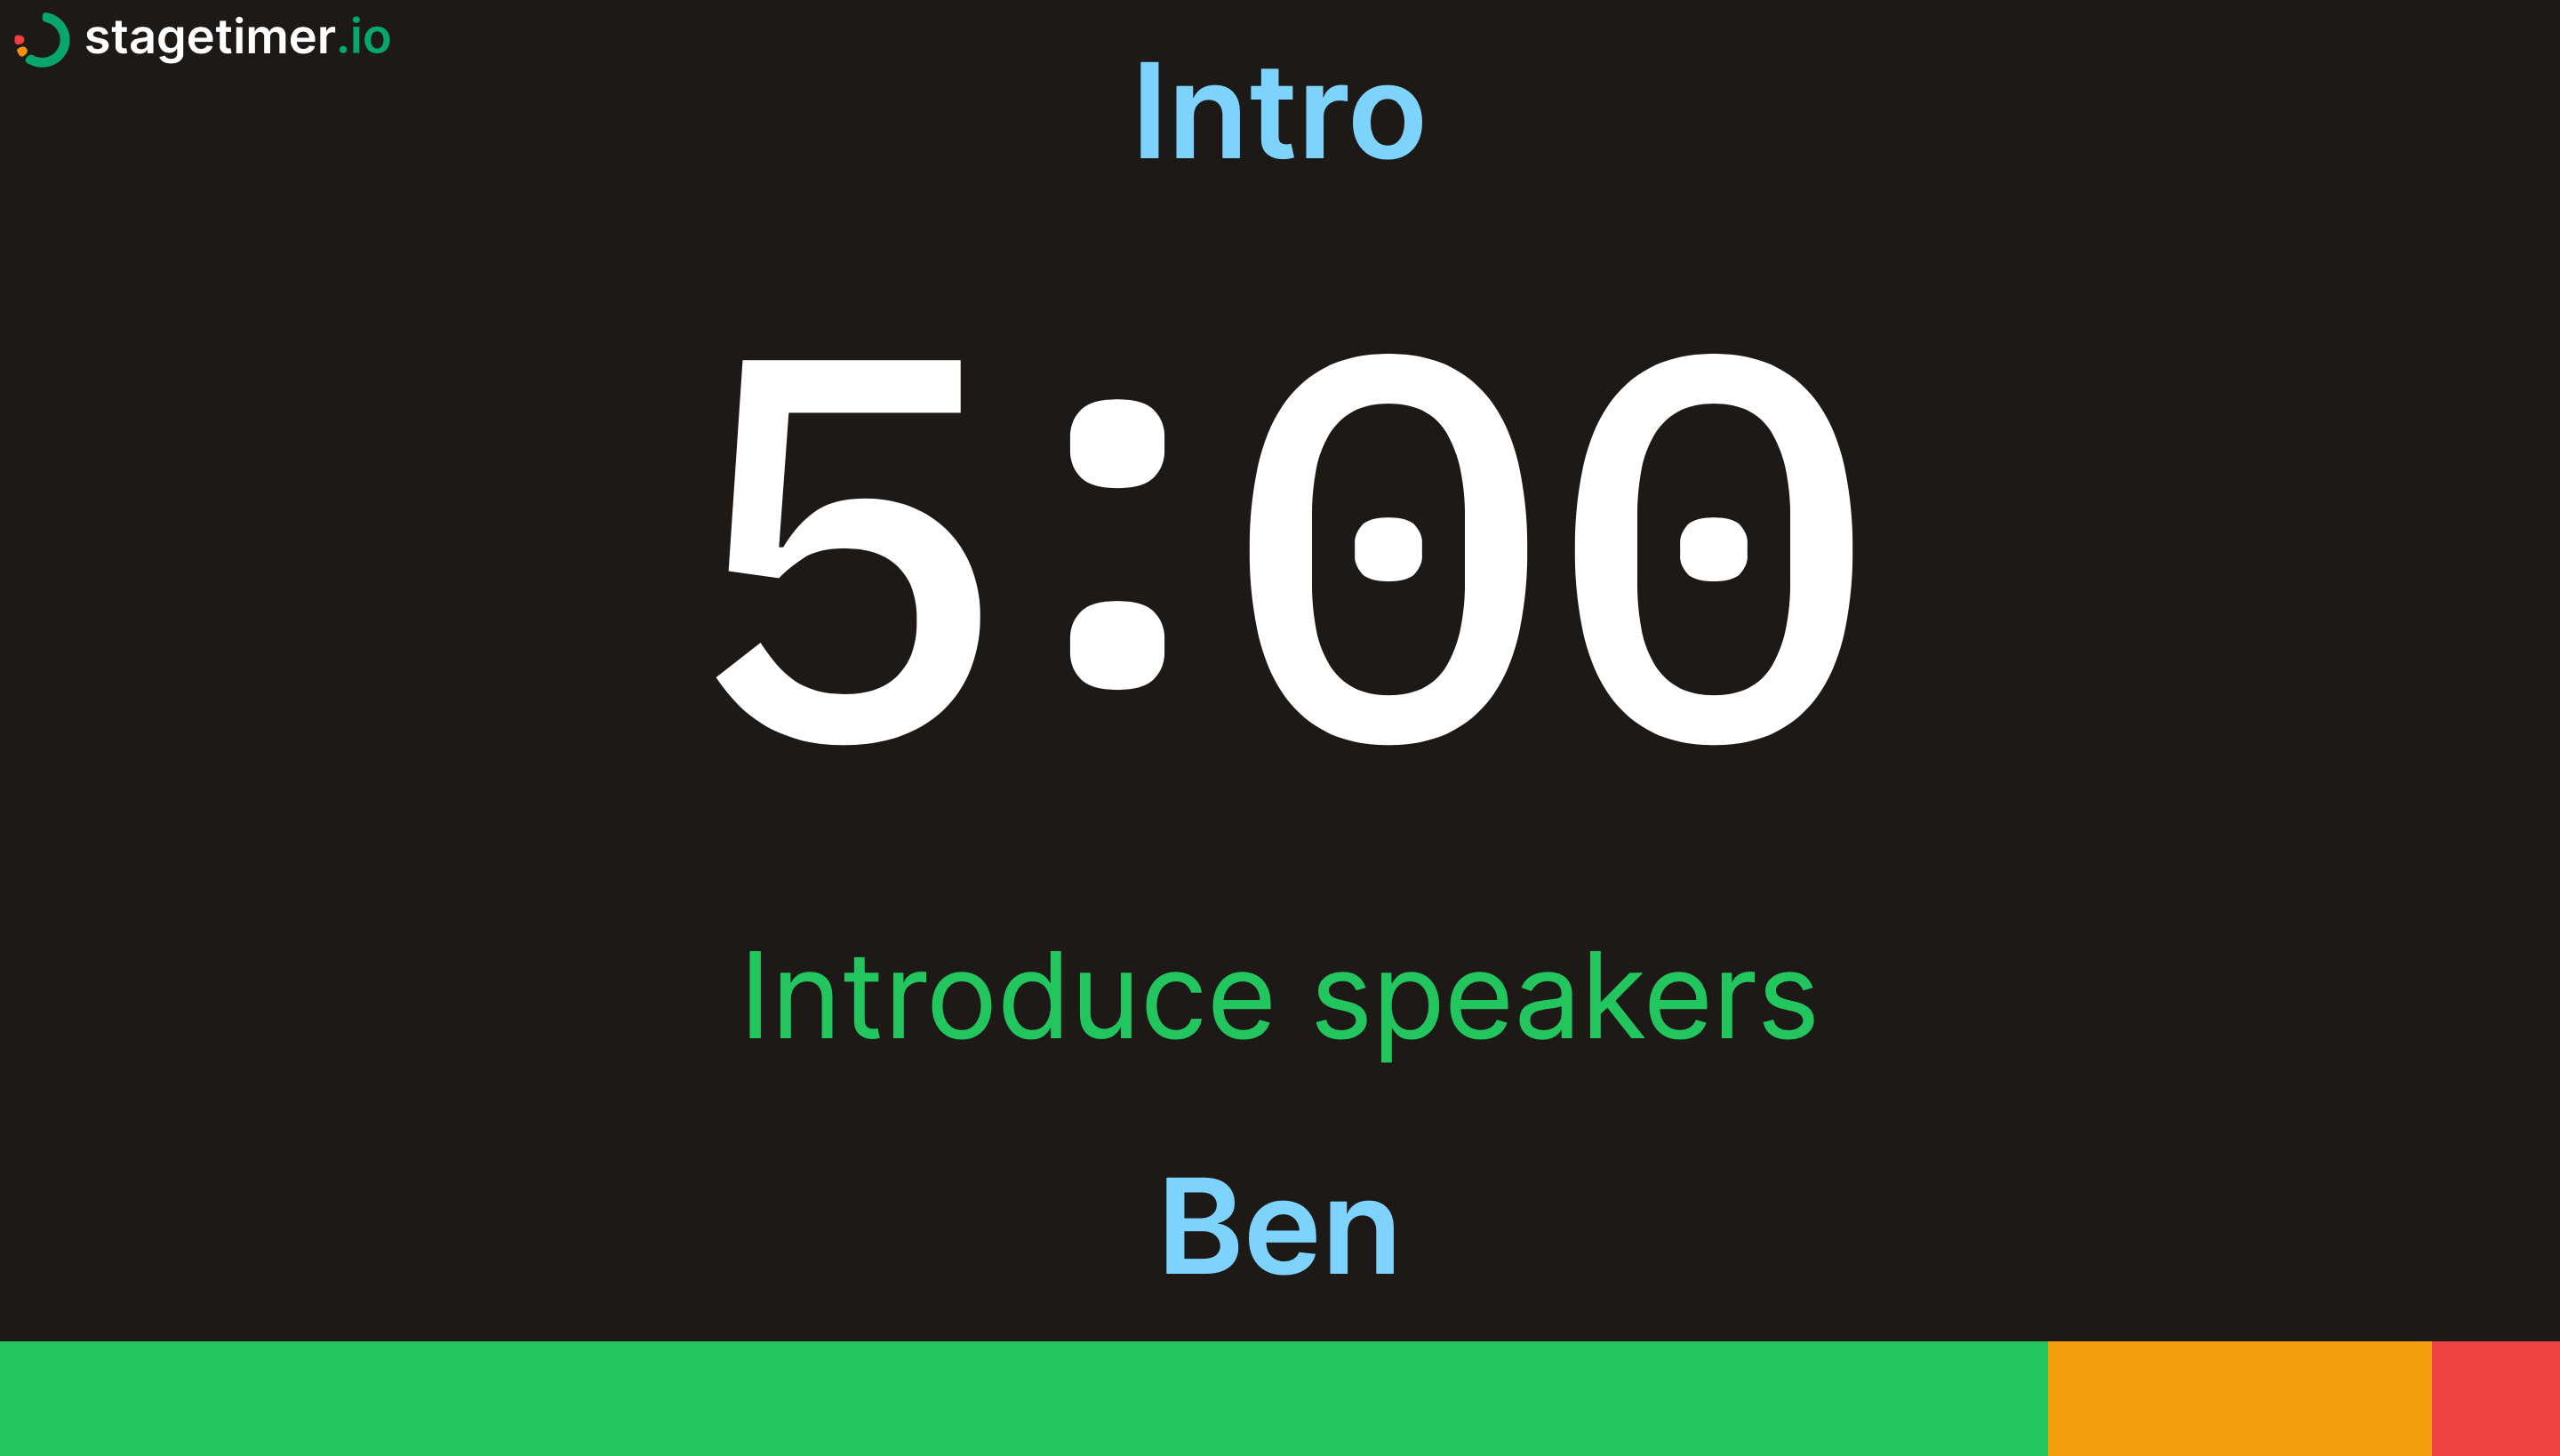
Title, Speaker & Notes
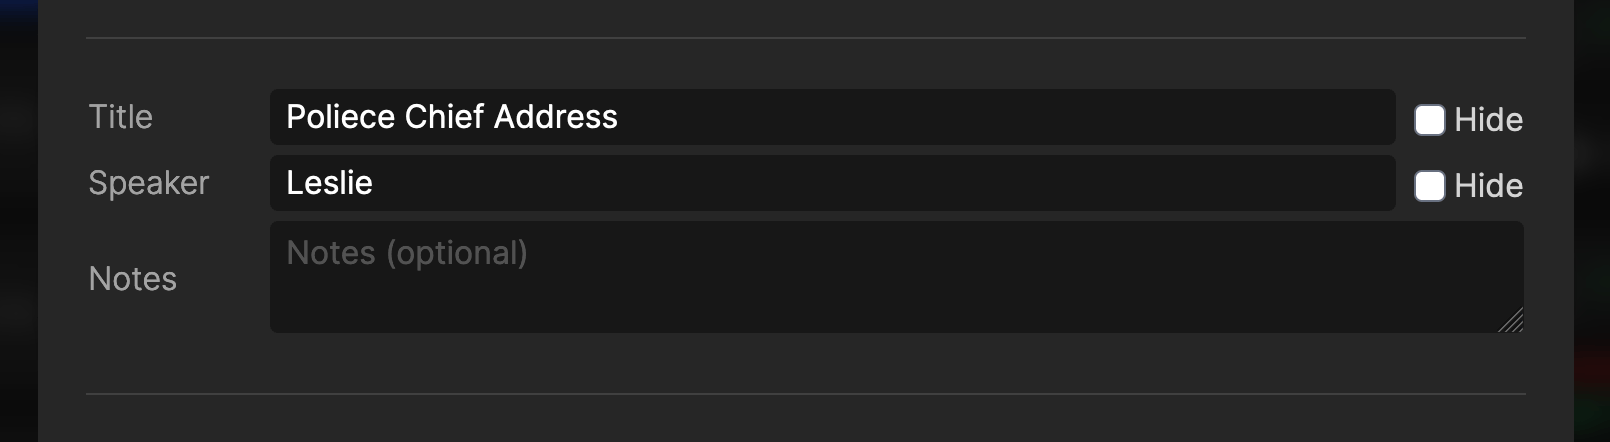
The current title appears at the top of the viewer (aka confidence monitor), and the current Speaker is shown at the bottom. For premium plan users, you can change title & speaker position.
Notes are primarily for the show caller and are never shown on the viewer. You have the option to display notes on the agenda or moderator page by adding a link parameter. This allows you to share an agenda link with notes with your team and another link without notes with the public.
You can also choose to hide individual or all titles and speakers, for instance, if you want to use the speaker field for internal purposes, invisible to the talent on stage. Remember, you have full flexibility in using the title, speaker, and notes fields.
